When to Think About Getting a New Water Heater

water heater

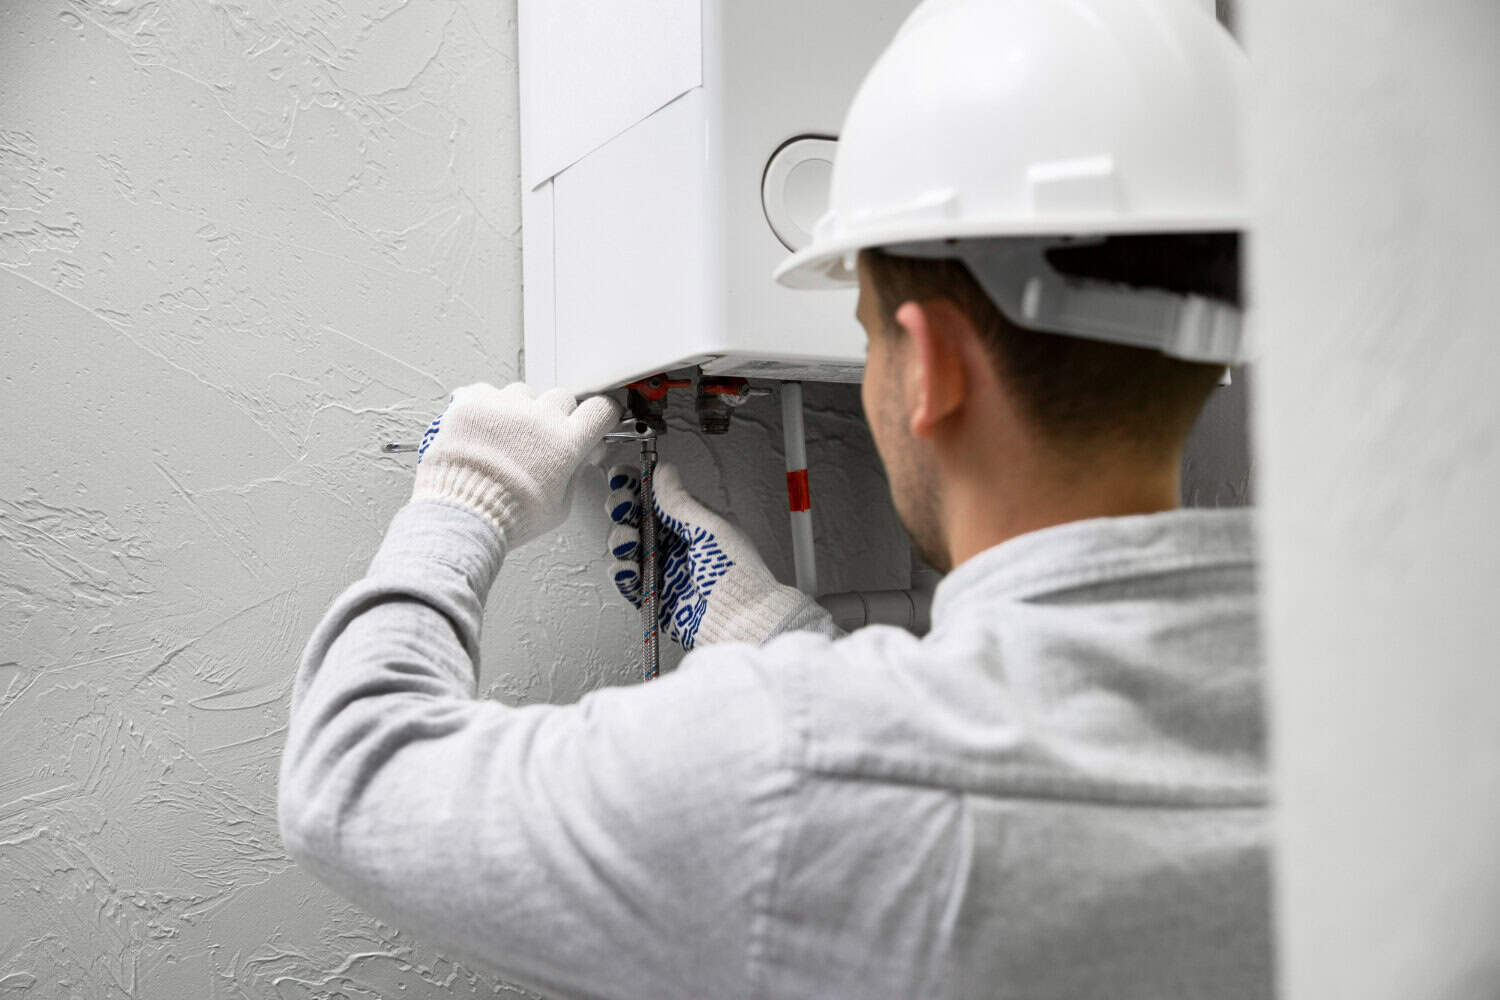
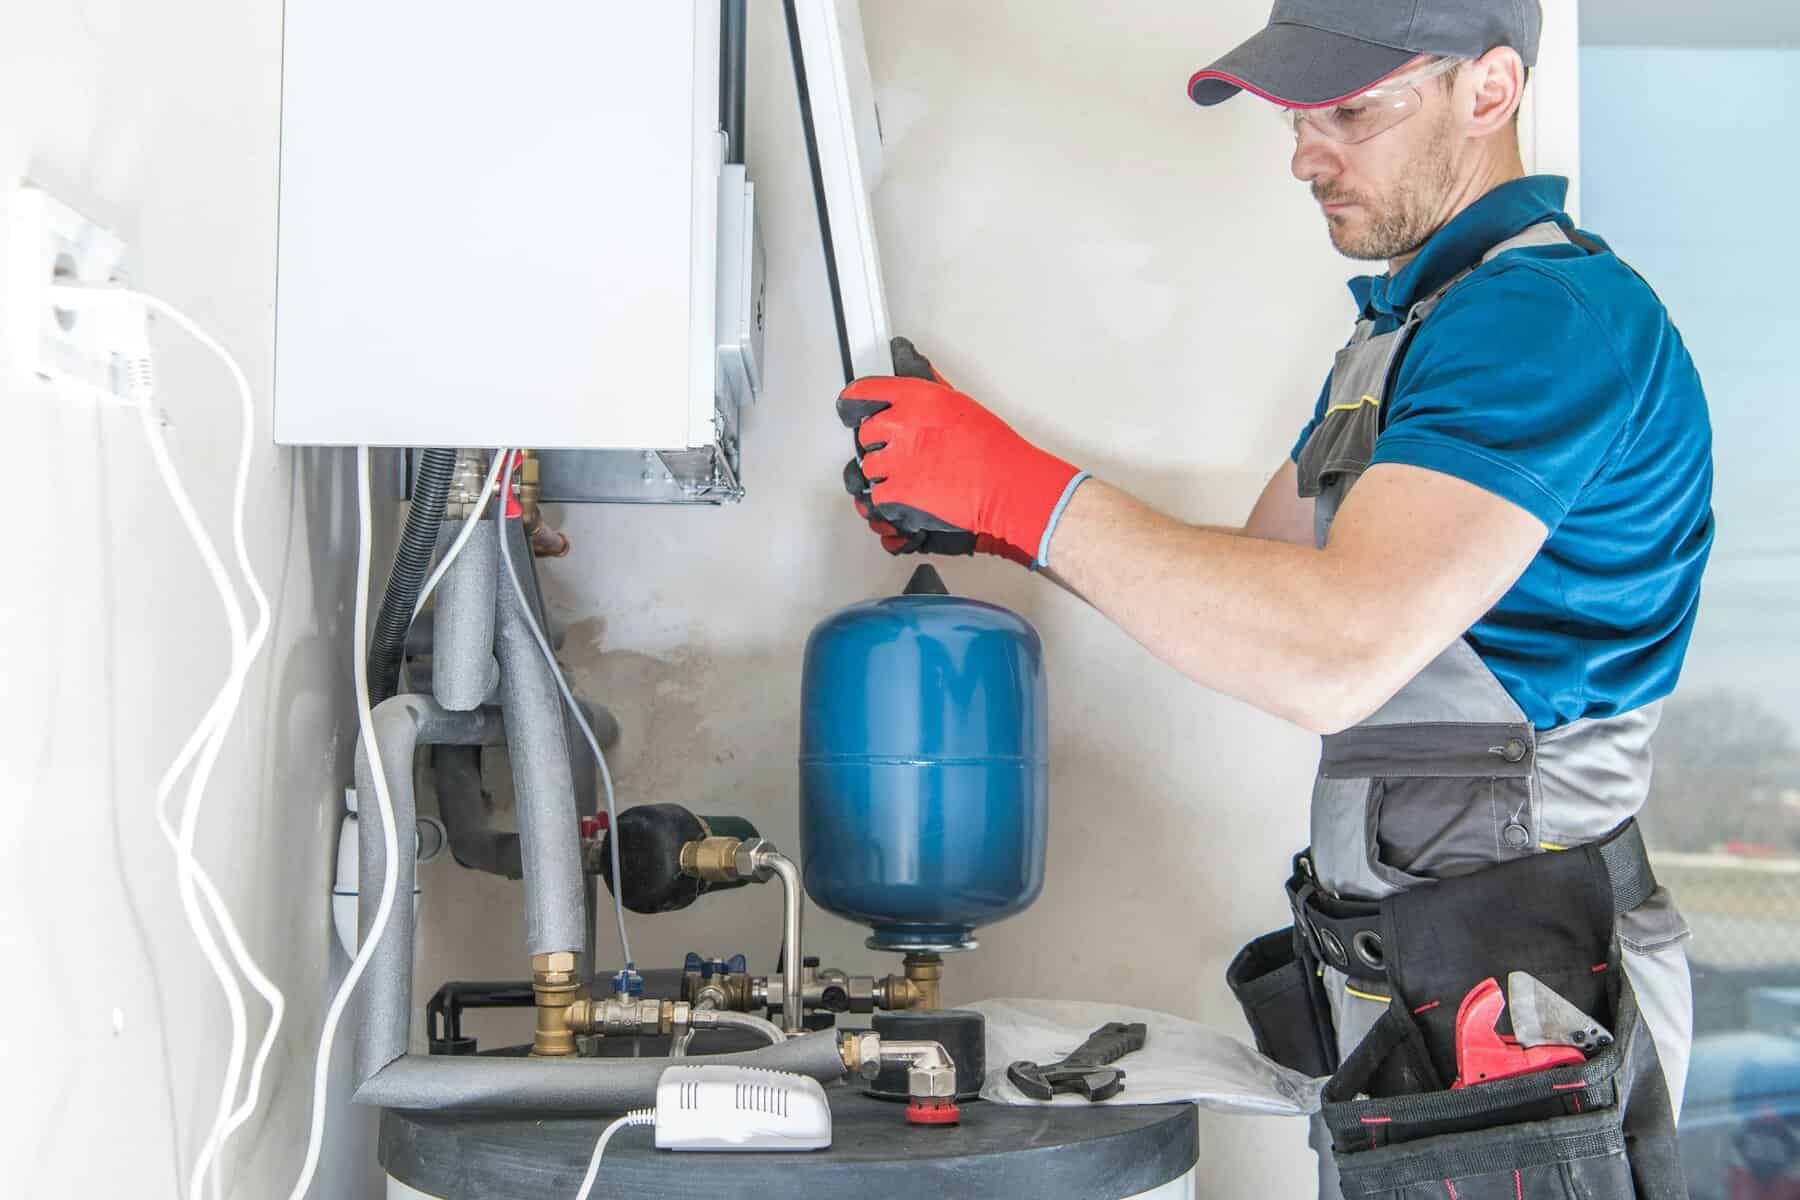
Having hot water on demand is something many of us take for granted. That is, until our water heater starts acting up. Whether you’re taking a shower, washing dishes, or doing laundry, a reliable water heater is key to a comfortable home. But how do you know when it’s time to think about getting a new one?

Water heaters, like all appliances, have a limited lifespan. Over time, they can become less efficient, leading to higher energy bills and less reliable performance. Strange noises, leaks, and sometimes even discolored water are common signs that something might be wrong. Ignoring these signs can lead to bigger issues down the road, including potential water damage.

Understanding when to repair or replace your water heater can save you money and avoid the hassle of losing hot water when you need it most. Plus, new water heaters come with benefits like better efficiency and improved performance. In this article, we’ll explore the signs of a failing water heater, weigh the costs of repair versus replacement, discuss the benefits of upgrading, and offer tips on choosing the right model for your home. By the end, you’ll be well-equipped to make an informed decision about your water heater.

Signs Your Water Heater Is Failing

Knowing the signs that your water heater is failing can help you act before you’re stuck with a cold shower. Here are some common indicators to look out for:

1. Age of the Water Heater: Most water heaters last about 8-12 years. If yours is within this range and starting to act up, it might be time to consider a replacement.

2. Inconsistent Hot Water: If you notice that the water temperature fluctuates frequently or doesn’t get as hot as it used to, this can be a sign of a failing water heater.

3. Strange Noises: Banging, popping, or rumbling sounds coming from your water heater usually indicate sediment buildup at the bottom of the tank. This sediment causes the unit to work harder, reducing its efficiency and lifespan.

4. Leaks Around the Unit: Any signs of water leaking around the heater are a red flag. Leaks often mean internal components have failed, and it’s usually more cost-effective to replace the unit than to fix it.

5. Rusty Water: Discolored water from your hot tap suggests that the water heater itself might be corroded inside. In such cases, replacing the water heater is often the best solution.

6. Frequent Repairs: If you find yourself calling for repairs more often, it’s probably time to invest in a new water heater. Frequent issues indicate that the heater is nearing the end of its useful life.

Comparing Repair vs. Replacement Costs

Deciding between repairing or replacing your water heater involves weighing the costs and benefits. Understanding when it’s more economical to replace rather than repair can save you both time and money.

1. Cost of Repairs: Minor repairs and maintenance, like replacing a thermostat or a heating element, are usually affordable. But if the repairs start to add up, it might make more sense to invest in a new water heater. For example, fixing leaks or addressing severe rust and sediment issues can be costly.

2. Efficiency and Performance: Older water heaters tend to be less efficient. Even if repairs restore them to working condition, they might consume more energy than a new, modern unit. Over time, the extra cost of running an inefficient unit can outweigh the cost of buying a new one.

3. Expected Lifespan: Consider the age of your water heater. If it’s nearing the end of its expected lifespan (8-12 years), putting more money into repairs might not be worth it. A new unit will offer better performance and come with a warranty.

4. Future Repair Costs: Think about future repair expenses. If the unit has had several issues recently, it’s likely to keep failing. In this case, replacing it provides peace of mind and long-term savings.

By carefully considering these factors, you can make a smart decision about whether to repair or replace your water heater. This will ensure you get the best value for your money and maintain reliable access to hot water in your home.

Benefits of Upgrading to a New Water Heater

Upgrading to a new water heater comes with several notable benefits that can make a big difference for your home. Here are a few key advantages:

1. Energy Efficiency: Modern water heaters are much more energy-efficient than older models. They use less electricity or gas, which can considerably reduce your energy bills. Many new units are Energy Star certified, making them a better choice for eco-conscious homeowners.

2. Improved Performance: A new water heater heats water more quickly and maintains a more consistent temperature. You won’t have to worry about running out of hot water during your morning shower or while doing laundry.

3. Advanced Features: Newer models often come with advanced features like Wi-Fi connectivity and programmable settings. These features allow you to monitor and control your water heater remotely, making it easier to manage your home’s hot water usage.

4. Long-term Savings: While the initial cost of a new water heater can be significant, the long-term savings on energy bills and reduced repair costs can make the investment worthwhile. Plus, new units often come with longer warranties, providing additional peace of mind.

5. Safety: Modern water heaters are designed with safety features not available in older models. For example, many new units include automatic shut-off valves to prevent overheating and leaks.

Choosing the Right Water Heater for Your Home

Selecting the right water heater for your home involves considering several factors to ensure you make the best choice. Here’s a quick guide to help you decide:

1. Type of Water Heater: There are several types of water heaters, including tankless, traditional tank, heat pump, and solar models. Each has its own advantages and is suitable for different needs. For instance, tankless water heaters are more energy-efficient and take up less space, but may have a higher upfront cost.

2. Capacity: Consider the size of your household and your hot water needs. A larger family will need a water heater with a bigger tank capacity or a higher flow rate in the case of tankless models.

3. Fuel Source: Water heaters can run on electricity, natural gas, propane, or even solar energy. Choose a fuel source that is readily available and affordable in your area.

4. Energy Efficiency: Look for units with high energy efficiency ratings. Energy Star certified models are a good option as they meet strict efficiency criteria set by the government.

5. Budget: Determine your budget, including installation costs. While it’s tempting to go for the cheapest option, consider the long-term savings of a more energy-efficient model.

6. Space Considerations: Ensure the unit you choose fits in the space you have available. Some models, especially tankless water heaters, take up less room and can be installed in closets or even outside.

Conclusion

Deciding when to get a new water heater can be a challenging task, but paying attention to key signs and weighing your options can make the decision easier. From identifying when your current water heater is failing to comparing repair and replacement costs, understanding the benefits of upgrading, and choosing the right model for your home, each step is important for making a smart investment.

Upgrading to a new water heater can enhance your home’s comfort, reduce energy bills, and provide peace of mind with advanced features and safety measures. Making an informed choice ensures you’ll enjoy hot water when you need it most, without unexpected problems or costly repairs.

If you’re noticing issues with your water heater or think it might be time for an upgrade, don’t wait until it’s too late. Contact My Jockey today to learn more about your options and find the perfect water heater for your home. Our experts are ready to help you make the best choice for your needs and ensure a smooth installation process.

Best Ways to Purify Air in Your Home

air purifier

Breathing clean air in your home is crucial for your health and well-being. Indoor air quality can affect everything from your respiratory health to your overall comfort. Many household items and activities can pollute the air inside your home, but there are several effective ways to keep it fresh and clean.

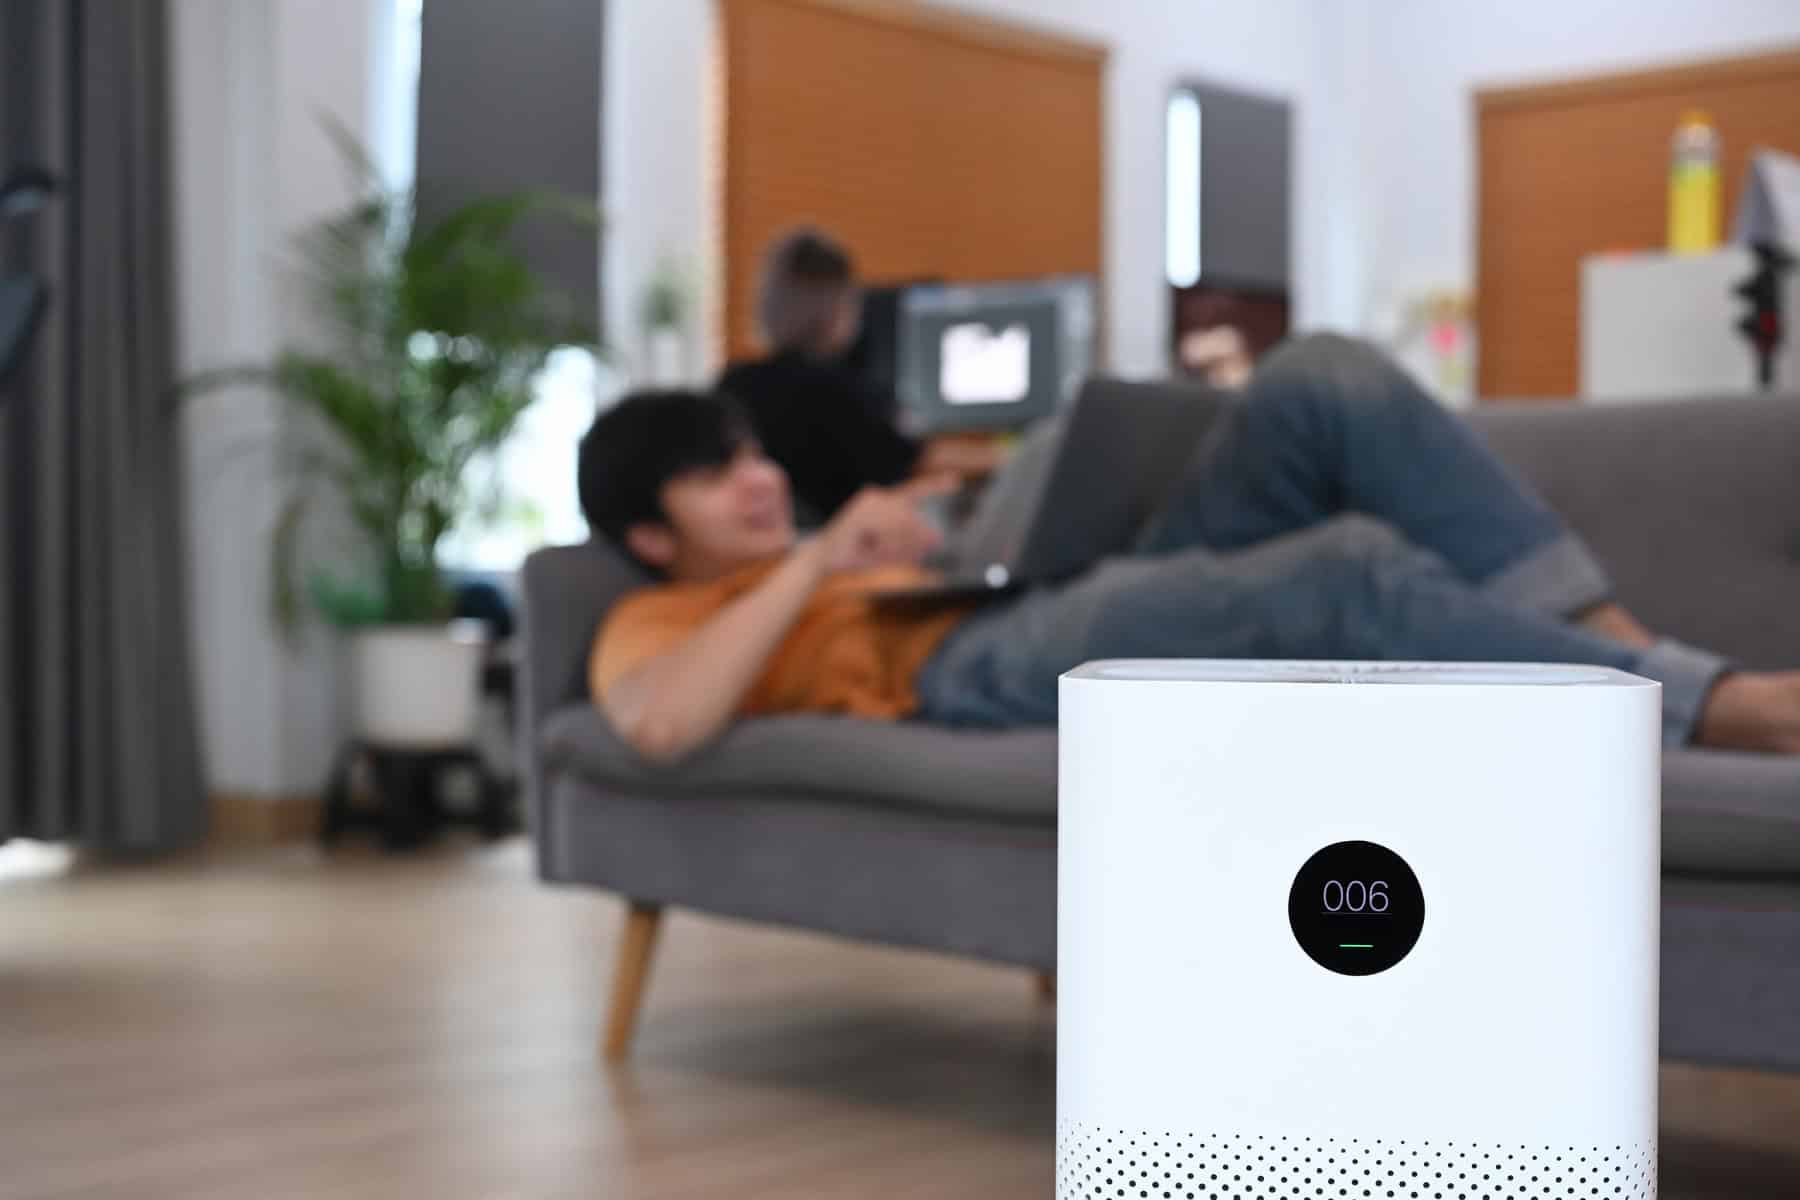
One of the best ways to purify the air in your home is by using air purifiers. Air purifiers help remove harmful particles and allergens, making the air cleaner and healthier to breathe. Choosing the right air purifier for your space and needs can have a significant impact on your indoor air quality.

Maintaining proper ventilation is also essential. Good ventilation ensures that fresh air circulates throughout your home while removing stale air and pollutants. Simple actions like opening windows or using exhaust fans can help improve air quality.

In addition to mechanical solutions, incorporating houseplants can boost indoor air quality. Many plants naturally filter toxins from the air, providing a natural and beautiful way to purify your home.

Regular cleaning and dusting play a vital role too. Dust and dirt accumulation can lead to poor air quality and trigger allergies. Keeping your living space clean helps minimize pollutants and keeps the air you breathe healthier.

By making a few changes and keeping up with regular maintenance, you can ensure that the air in your home stays fresh and clean. Ready to learn more about each method? Let’s dive into the details.

Using Air Purifiers

Air purifiers are an excellent tool for improving the air quality in your home. They help to remove pollutants, allergens, and other harmful particles from the air, making it cleaner and safer to breathe.

1. Choose the Right Air Purifier: Different air purifiers target different pollutants. Some are designed to remove dust and pollen, while others focus on mold spores and pet dander. Understand your needs and select an air purifier that addresses them. HEPA filters are effective for most households as they capture a wide range of particles.

2. Proper Placement: Place your air purifier in the rooms where you spend the most time, such as the living room or bedroom. Ensure that it’s not blocked by furniture to maximize airflow. Some purifiers are portable, allowing you to move them between rooms as needed.

3. Regular Maintenance: To keep your air purifier working efficiently, perform regular maintenance. This includes cleaning or replacing filters according to the manufacturer’s instructions. A dirty filter can reduce the purifier’s effectiveness.

By selecting the right air purifier and maintaining it properly, you can significantly improve the air quality in your home.

Maintaining Proper Ventilation

Good ventilation is essential for keeping the air in your home clean and free from pollutants. Proper ventilation helps to circulate fresh air, remove stale air, and reduce indoor pollution levels.

1. Open Windows: One of the simplest ways to improve ventilation is by opening windows. This allows fresh air to flow in and pushes stale air out. Try to open windows on opposite sides of the room to create a cross-breeze.

2. Use Exhaust Fans: Exhaust fans in kitchens and bathrooms help remove moisture and pollutants generated by cooking and bathing. Make sure these fans are working correctly and use them regularly.

3. Install Ventilation Systems: For a more advanced solution, consider installing a mechanical ventilation system. These systems can control the amount of fresh air entering your home and remove polluted air. They are especially useful in homes that are well-sealed and have limited natural ventilation.

4. Check Air Ducts: Ensure your HVAC system’s air ducts are clean and free from obstruction. Clogged ducts can restrict airflow, reducing the efficiency of your ventilation.

Maintaining proper ventilation not only helps to keep the air in your home clean but also ensures a comfortable and healthy living environment.

Incorporating Houseplants

Houseplants are a natural and beautiful way to improve your home’s air quality. Some plants are particularly good at filtering toxins and adding oxygen to the air.

1. Choose Air-Purifying Plants: Certain plants are known for their air-purifying abilities. Examples include spider plants, peace lilies, snake plants, and Boston ferns. These plants absorb harmful pollutants like formaldehyde, benzene, and trichloroethylene through their leaves.

2. Strategic Placement: Place plants in areas where you spend a lot of time, such as your living room and bedroom. Grouping several plants together enhances their ability to purify the air. You can also put plants near windows to maximize their light intake and improve their efficiency.

3. Care and Maintenance: To keep your plants healthy, make sure they get the right amount of water and light. Overwatering can lead to mold growth, which can harm indoor air quality. Follow care instructions specific to each plant to ensure they stay effective in cleaning the air.

By adding houseplants to your home, you can enhance both your indoor air quality and your living space’s aesthetics.

Regular Cleaning and Dusting

Regular cleaning and dusting are essential for maintaining good indoor air quality. Dust, allergens, and other particles can accumulate quickly, making the air in your home less healthy to breathe.

1. Vacuum Regularly: Use a vacuum cleaner with a HEPA filter to clean your floors and carpets. HEPA filters trap dust and allergens that regular vacuums may miss. Vacuum at least once a week, or more often if you have pets.

2. Dust Surfaces: Dust all surfaces, including furniture, shelves, and electronics. Use a damp cloth or a microfiber duster to trap dust particles rather than spreading them into the air. Don’t forget to clean hard-to-reach places like ceiling fans and baseboards.

3. Wash Bedding and Curtains: Wash your bedding and curtains regularly to remove dust mites and allergens. Use hot water to kill dust mites and other allergens effectively.

4. Mop Floors: After vacuuming, mop hard floors to remove any remaining dust and allergens. Use a damp mop with water or a cleaning solution suitable for your flooring type.

By staying on top of regular cleaning and dusting, you can keep the air in your home cleaner and healthier.

Conclusion

Ensuring the air in your home is clean and fresh is important for your health and comfort. By using air purifiers, maintaining proper ventilation, incorporating houseplants, and keeping up with regular cleaning and dusting, you can significantly improve your indoor air quality. Each step plays a vital role in making your home a healthier place to live.

If you need professional advice or assistance with your HVAC system or air purification methods, My Jockey is here to help. We provide comprehensive air purification services to ensure your home’s air quality remains at its best. Contact My Jockey today to enhance the comfort and health of your home!

Prevent Winter Plumbing Issues

plumbing

Winter brings with it freezing temperatures that can wreak havoc on our plumbing systems. When the temperatures drop, the water inside pipes can freeze, expand, and potentially cause the pipes to burst. This can lead to severe water damage and costly repairs. Understanding the risks and taking preventive measures can save us from winter plumbing nightmares.

Preparation is key to protecting our plumbing from the cold. Winterizing our plumbing involves specific tools and materials that help safeguard pipes against freezing. Knowing what items are necessary and how to use them properly ensures that we are well-prepared for winter’s challenges.

In this article, we’ll dive into understanding the risks associated with freezing temperatures on plumbing. We’ll discuss the essential tools and materials needed for winterizing, provide a step-by-step guide to insulating pipes, and share routine maintenance tips to prevent winter plumbing issues. These insights will help us protect our homes and enjoy a worry-free winter season.

Understanding the Risks of Freezing Temperatures on Plumbing

Freezing temperatures pose significant risks to our plumbing systems. When the water inside the pipes freezes, it expands, leading to increased pressure within the pipes. This pressure can cause the pipes to crack or even burst, resulting in severe water damage. Burst pipes can flood your home, damaging walls, floors, and personal belongings, and necessitating expensive repairs.

It’s not just the burst pipes that are a concern. Even minor leaks caused by freezing can lead to mold and mildew growth, which are hazardous to health. Cold weather can also make it harder to access and repair plumbing issues promptly. By understanding these risks, we are better equipped to take preventive measures and protect our homes from winter’s harsh conditions.

Tools and Materials You Need for Winterizing Your Plumbing

Winterizing your plumbing requires specific tools and materials to effectively protect your pipes from freezing. It’s crucial to gather these items before the cold sets in to ensure you’re fully prepared.

  • Pipe Insulation: Insulating materials like foam sleeves or fiberglass insulation help keep pipes warm. They are essential for wrapping around pipes in unheated areas to prevent freezing.
  • Heat Tape: This electrically powered tape wraps around pipes to keep them warm. It’s particularly useful for extremely cold areas and can be easily installed along the length of the pipe.
  • Shut-off Valves: Installing shut-off valves on outdoor faucets allows you to easily turn off the water supply and drain any remaining water before freezing temperatures hit.
  • Outdoor Faucet Covers: These insulated covers protect outdoor faucets from freezing. They are easy to install and provide an extra layer of protection.
  • Duct Tape and Scissors: Duct tape helps secure insulation in place, and scissors are needed to cut the insulation material to the correct size.

By gathering these tools and materials, we can efficiently winterize our plumbing systems and reduce the risk of pipe damage during the colder months.

Step-by-Step Guide to Insulating Your Pipes

Insulating your pipes is a crucial step to prevent them from freezing during the winter months. By following these steps, you can safely and effectively insulate your pipes.

  • Gather Materials: Collect all necessary materials, including pipe insulation sleeves, heat tape, duct tape, and scissors. Having everything on hand before you start will make the process smoother.
  • Measure the Pipes: Measure the length of the pipes you need to insulate. This ensures that you cut the insulation sleeves to the correct size.
  • Cut the Insulation: Using scissors, cut the insulation sleeves to fit the measured lengths of pipe. Make sure there’s enough insulation to cover the entire length of each pipe.
  • Wrap the Pipes: Open the slit in the insulation sleeves and wrap them carefully around each pipe. Ensure that the insulation is snug and covers the entire pipe’s surface.
  • Secure with Duct Tape: Use duct tape to seal the seams where the insulation meets. This holds the insulation in place and prevents it from slipping off.
  • Apply Heat Tape: For added protection, especially in extremely cold areas, wrap heat tape around the pipes before insulating. Follow the manufacturer’s instructions for proper use.

By following these steps, we can ensure our pipes are well-insulated and protected against freezing temperatures, reducing the risk of costly damage and repairs.

Routine Maintenance Tips to Prevent Winter Plumbing Issues

Routine maintenance plays a vital role in keeping our plumbing systems running smoothly through the winter. Regular checks and simple actions can prevent many common winter plumbing problems.

  • Inspect for Leaks: Regularly check all visible pipes for leaks or drips. Addressing small leaks promptly helps prevent them from becoming larger issues in freezing temperatures.
  • Seal Drafts: Seal any drafts around windows, doors, and spaces where pipes enter your home. Cold air entering through these gaps can cause pipes to freeze.
  • Disconnect Outdoor Hoses: Always disconnect and store garden hoses before winter. Leaving hoses connected can cause water to back up into the pipes and freeze.
  • Keep Cabinet Doors Open: In areas where pipes are located inside cabinets, such as under the kitchen sink, keep cabinet doors open during extremely cold weather. This allows warm air to circulate around the pipes.
  • Maintain Heating: Ensure your home’s heating system is in good working order, and keep your thermostat set to a consistent temperature. Even when you’re away, maintaining a moderate temperature prevents pipes from freezing.
  • Drain Outdoor Faucets: Turn off the water supply to outdoor faucets and drain any remaining water. Use insulated covers to protect the faucets from freezing.

By following these routine maintenance tips, we can significantly reduce the risk of winter plumbing issues and keep our homes safe and dry.

Conclusion

Protecting your plumbing during winter is essential for avoiding expensive repairs and maintaining a comfortable living environment. By understanding the risks of freezing temperatures, gathering the right tools and materials for winterizing, and effectively insulating your pipes, you can safeguard your home from potential damage. Regular maintenance further ensures that your plumbing system remains in top shape throughout the cold months.

For expert HVAC and plumbing services in Saratoga Springs and The Capital Region, trust My Jockey. Our professional plumbing services are ready to help you winterize your home and prevent any plumbing issues. Contact My Jockey today to schedule your service and enjoy a worry-free winter.

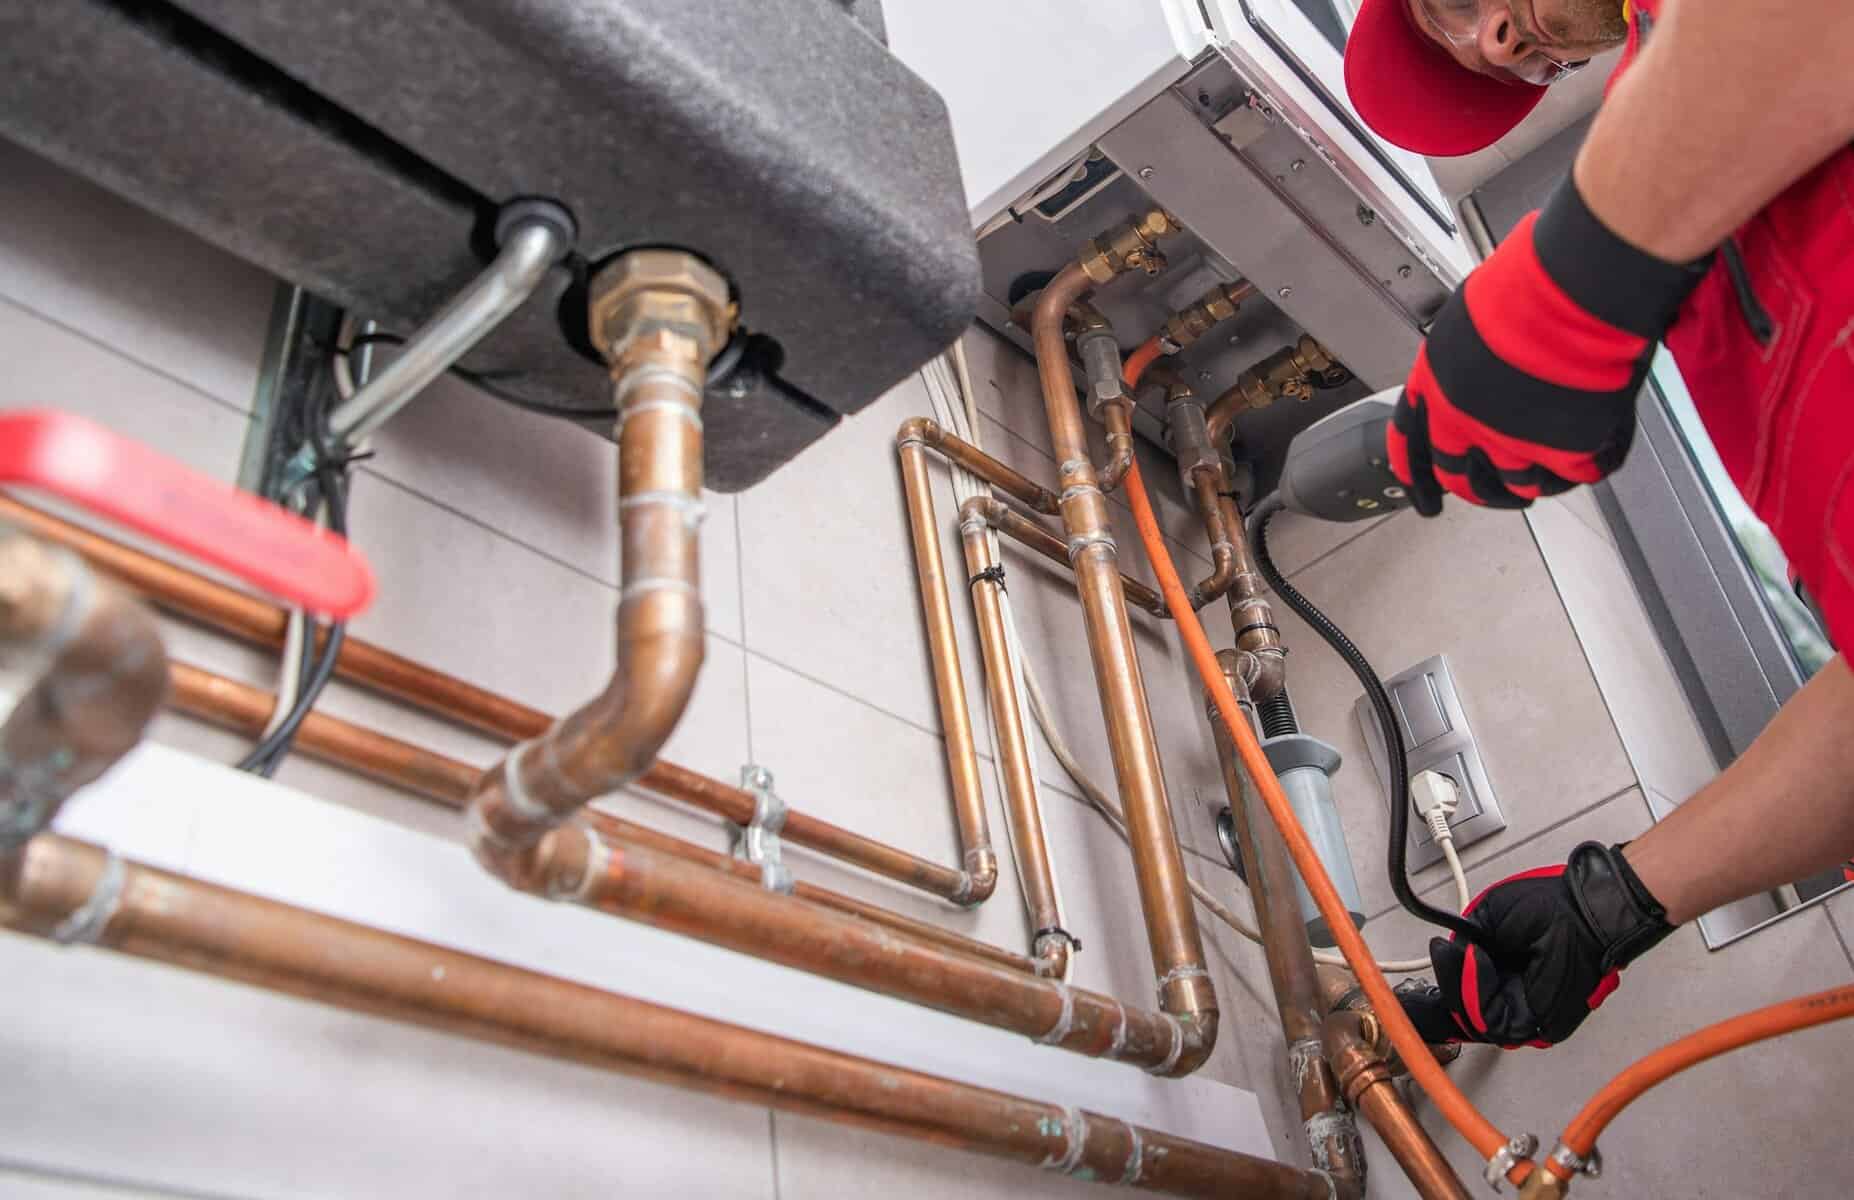
Improve Indoor Air Quality with Simple Changes

Air purifier

Indoor air quality significantly impacts your health and well-being. Poor air quality can lead to respiratory issues, allergies, and a general sense of discomfort in your home. Fortunately, improving the air you breathe indoors doesn’t require complex or expensive solutions. Simple changes can make a big difference in enhancing the quality of your indoor environment.

One of the easiest ways to improve indoor air quality is by keeping your home clean and dust-free. Regular cleaning can reduce the number of pollutants and allergens in the air, such as dust mites, pet dander, and mold spores. A clean home not only looks better but also feels fresher and healthier.

In addition to a clean home, using air purifiers and adding indoor plants can further enhance air quality. Air purifiers can effectively remove contaminants, while plants can naturally filter the air and add a touch of greenery to your home. These additions are simple yet effective tools in maintaining a healthy indoor atmosphere.

Furthermore, improving ventilation and ensuring proper airflow is crucial. Good ventilation helps to remove stale indoor air and bring in fresh outdoor air, diluting pollutants and reducing humidity levels. Proper airflow prevents the buildup of harmful substances and keeps your home feeling fresh.

Lastly, regular maintenance of your HVAC system can play a significant role in keeping indoor air quality high. A well-maintained system filters and circulates air efficiently, ensuring that the air you breathe is clean. Routine checks and timely filter changes can make all the difference in maintaining a healthy living environment.

By implementing these straightforward and accessible steps, you can greatly improve the quality of the air in your home, making it a safer and more enjoyable place to live.

Keep Your Home Clean and Dust-Free

Keeping your home clean is crucial in maintaining good indoor air quality. Dust and dirt particles accumulate quickly and can become air pollutants if not managed properly. Regularly vacuuming carpets, rugs, and upholstery helps to remove dust mites and other allergens. Use a vacuum cleaner with a HEPA filter to ensure that fine particles are trapped and not released back into the air.

Dusting surfaces with a damp cloth is also effective in capturing dust particles. Dry dusting can often spread dust into the air, but using a damp cloth helps to trap and remove it. Pay special attention to areas that tend to collect more dust, like shelves, blinds, and baseboards. Regular mopping of hard floors also helps in reducing the amount of dust and allergens in your home.

Don’t forget about hidden or less obvious areas such as behind and under furniture, as these places can also accumulate significant amounts of dust and dirt. Washing bedding and curtains frequently can help eliminate dust mites and other allergens. Consistently practicing these cleaning habits keeps your home free from dust and ensures that the air you breathe is cleaner and healthier.

Use Air Purifiers and Plants

Air purifiers can significantly enhance the air quality in your home. These devices work by removing contaminants like dust, pollen, pet dander, and even some bacteria and viruses from the air. Select an air purifier with a HEPA filter, as it is highly effective at capturing small particles. Position the air purifier in rooms where you spend the most time, such as the bedroom or living room, to maximize its benefits.

Adding indoor plants is another simple way to improve air quality. Plants act as natural air filters, absorbing carbon dioxide and releasing oxygen. Certain plants like spider plants, snake plants, and peace lilies are particularly good at removing toxins like formaldehyde and benzene from the air. Plus, they add a touch of greenery, making your home more aesthetically pleasing.

By combining the use of air purifiers with indoor plants, you create a more comprehensive approach to filtering and refreshing the air in your home. This duo helps maintain a continuous circulation of clean air, promoting a healthier and more pleasant living environment.

Improve Ventilation and Airflow

Good ventilation is essential for maintaining quality indoor air. Proper ventilation helps to remove stale air, excess moisture, and pollutants, replacing them with fresh air. An easy way to improve ventilation is by opening windows and doors when the weather permits. This allows outdoor air to circulate and freshen up your indoor spaces.

Using exhaust fans in areas like the kitchen and bathroom can also help. These fans remove humidity and odors, preventing moisture build-up that can lead to mold growth. Ensure that the fans are vented to the outside and not just recirculated within the home. Ceiling fans are another great way to improve air circulation and keep the air moving.

If you live in an area where opening windows is not feasible due to external pollution or extreme weather, using a mechanical ventilation system might be the best option. Systems such as energy recovery ventilators (ERVs) can bring in fresh air and expel stale air while minimizing energy loss. By taking these steps, you ensure that your home has a continuous flow of fresh, clean air, making it a healthier environment for everyone.

Maintain Your HVAC System Regularly

Your HVAC system plays a crucial role in keeping your indoor air clean and comfortable. Regular maintenance is key to ensuring it runs efficiently and effectively. Schedule professional HVAC inspections at least twice a year—once before the cooling season and once before the heating season. Technicians can check for issues like leaks, dirty coils, and worn-out parts, helping to keep your system in top shape.

Between professional visits, change the HVAC filters regularly. Dirty filters can restrict airflow and reduce the system’s efficiency, leading to poor air quality and higher energy bills. Most filters should be changed every 1 to 3 months, but check the manufacturer’s recommendations for your specific system.

Additionally, keep the area around your HVAC unit clean and free from obstructions. Clear away dust and debris to prevent them from entering the system and causing damage. By combining regular professional maintenance with these simple steps, you can improve your HVAC system’s performance and ensure cleaner, healthier air in your home.

Conclusion

Improving indoor air quality doesn’t have to be complicated or costly. Simple changes like keeping your home clean, using air purifiers and plants, enhancing ventilation, and maintaining your HVAC system can make a significant difference. These steps create a safer, healthier living environment by reducing pollutants and increasing fresh air circulation.

By staying proactive about indoor air quality, you protect yourself and your family from potential health issues associated with poor air conditions. These changes not only improve the way your home feels but also ensure that everyone breathes easier.

If you want professional help maintaining your HVAC system or have any questions about improving your indoor air quality, contact My Jockey today. We provide expert HVAC, plumbing, and air quality management to ensure your home is comfortable and safe year-round. Give us a call to schedule your service and breathe easier knowing your home is in good hands.

Best Water Heater for Your Home: How to Choose

water heater

Choosing the right water heater for your home is an important decision that affects your daily comfort and your energy bills. With so many options available, it can be challenging to decide which type and model will best meet your needs. Factors such as energy efficiency, capacity, and key features should all be considered to ensure you select a water heater that fits your lifestyle and budget.

Water heaters come in various types, each with its own advantages and disadvantages. Understanding the differences between traditional tank units, tankless systems, and hybrid models can help you make an informed decision. Additionally, considering the long-term operating costs and energy efficiency of each option can save you money and reduce your environmental impact.

Making the right choice involves more than just picking a model off the shelf. You need to assess your household’s hot water usage, space availability, and specific needs. By taking the time to evaluate these factors, you can choose a water heater that provides reliable performance and meets your family’s needs for years to come. Let’s dive into the essential tips for selecting the best water heater for your home.

Understanding Different Types of Water Heaters

Selecting the best water heater starts with understanding the different types available. Each type serves specific needs and has its own advantages. Traditional tank water heaters are the most common and store a large amount of hot water in a tank. They provide a steady supply of hot water but can run out if demand is high. Tank water heaters are less expensive upfront but can be less energy-efficient due to standby heat loss.

Tankless water heaters, also known as on-demand water heaters, heat water directly without storing it in a tank. They are more energy-efficient and provide a continuous supply of hot water, which is perfect for larger households or homes with significant hot water needs. However, tankless models typically have a higher initial cost and may require additional installation work.

Hybrid water heaters combine the features of both tank and tankless systems. They use a heat pump to make them more energy-efficient and can store a moderate amount of hot water to meet peak demands. Hybrids often offer the best of both worlds: energy savings and consistent hot water availability. Understanding these options will help you decide which type best suits your household needs.

Considering Energy Efficiency and Operating Costs

Energy efficiency should be a top consideration when choosing a water heater. Efficient models reduce energy consumption and can significantly lower your utility bills. Traditional tank water heaters tend to be less energy-efficient because they continuously heat a large volume of water. Look for models with higher energy factor (EF) ratings, which indicate better efficiency.

Tankless water heaters are known for their energy savings because they only heat water when needed. This reduces energy usage and costs. Despite their higher initial cost, tankless units often pay for themselves over time through energy savings. When comparing tankless models, examine their EF ratings and opt for those with high efficiency.

Hybrid water heaters are another energy-efficient option. They use heat pump technology to transfer heat from the air to the water, using less energy than traditional methods. While hybrids can be more expensive initially, their lower operating costs make them a cost-effective choice in the long run. Evaluating these factors will help you choose a water heater that balances efficiency and economy, providing hot water while saving energy and money.

Evaluating Capacity and Size Requirements

Choosing the right capacity and size for your water heater is crucial to ensuring you have enough hot water for your household. The capacity you need largely depends on the number of people in your home and your hot water usage patterns. A water heater that is too small will leave you wanting more hot water, while one that is too large will waste energy heating water you don’t use.

For tank water heaters, size is typically measured in gallons. A 40 to 50-gallon tank is sufficient for a family of four, while larger households may require 75 gallons or more. Consider your peak hour demand, which is the highest amount of hot water you’ll need during the busiest time of the day, to determine the right size.

Tankless water heaters are sized differently. They are rated by the maximum temperature rise possible at a given flow rate. Assess the flow rates of various fixtures in your home and add them up to understand your needs. For example, a shower typically uses 2.5 gallons per minute (GPM), so if you have two people showering simultaneously, you’ll need a unit that can handle at least 5 GPM. Evaluating your household’s specific requirements ensures you select a water heater that will keep up with your demands without overconsumption of energy.

Key Features and Technologies to Look For

When choosing a water heater, modern features and technologies can enhance performance, efficiency, and convenience. Look for models with digital displays, which provide information on water temperature and maintenance alerts. These features make it easier to monitor your system’s performance and schedule necessary maintenance.

Some water heaters come equipped with Wi-Fi capabilities, allowing you to control and monitor the unit through a smartphone app. This added convenience enables remote temperature adjustment and maintenance scheduling, improving your overall experience. Additionally, features like vacation mode can save energy when the unit is not in use for extended periods.

Safety features are another important consideration. Look for water heaters with automatic shutoff valves that cut off gas or electricity in case of a malfunction. Anti-scale devices can extend the lifespan of your water heater by reducing mineral buildup, maintaining efficiency over time. By focusing on these key features and technologies, you can choose a water heater that meets your needs and offers the latest advancements for ease of use and reliability.

Conclusion

Selecting the best water heater for your home involves careful consideration of various factors such as types, energy efficiency, capacity, and modern features. Each type of water heater, whether it’s a traditional tank, tankless, or hybrid, has its own unique benefits and potential drawbacks. By understanding these differences and assessing your household’s specific needs, you can make an informed decision that enhances your comfort and saves you money.

Remember to evaluate the energy efficiency and operating costs associated with each option, as this will impact your long-term savings and environmental footprint. Ensure the water heater you choose can handle your household’s hot water demand and look for key features that add convenience and safety to your system.

For expert advice and premium HVAC and plumbing services in Saratoga Springs and The Capital Region, trust My Jockey. We are committed to helping you find the perfect water heater for your home. Contact My Jockey today to schedule a water heater service and make sure your home stays warm and comfortable with the best water heater solution.

Boost Energy Efficiency in Your Home’s HVAC

Furnace Installation

Keeping your home comfortable year-round can be costly, especially if your HVAC system isn’t running as efficiently as it could be. Finding ways to boost the energy efficiency of your heating, ventilation, and air conditioning (HVAC) system can help you save money on utility bills and reduce your environmental footprint. Implementing simple yet effective strategies can lead to a noticeable difference in your home’s energy consumption.

Regular maintenance and inspections are essential for ensuring your HVAC system operates at peak performance. By routinely checking and servicing your system, you can identify and fix small issues before they become larger, more expensive problems. Additionally, upgrading to a programmable thermostat allows better control over your home’s temperature, reducing wasted energy when heating or cooling isn’t necessary.

Proper insulation and sealing are also crucial components in improving energy efficiency. Insulation helps keep the conditioned air inside your home, reducing the workload on your HVAC system. Likewise, making use of energy-efficient HVAC systems can make a significant impact. These systems are designed to use less energy while providing the same level of comfort, ultimately lowering your energy costs.

In the sections that follow, we will delve deeper into these strategies to help you optimize your home’s HVAC system for maximum energy efficiency. Implementing these tips can enhance your comfort while also benefiting your wallet and the environment.

Regular Maintenance and Inspections

Scheduling regular maintenance and inspections for your HVAC system is crucial for keeping it running efficiently. Just like a car, your HVAC system needs routine check-ups to ensure all parts are functioning properly. Neglecting these check-ups can lead to wear and tear, resulting in reduced efficiency and higher energy bills.

During regular maintenance, a professional technician will inspect your system for any potential issues. They will clean and lubricate moving parts, check refrigerant levels, and ensure there are no leaks. These actions help your system run more smoothly and prevent small problems from turning into major repairs. Routine maintenance can extend the lifespan of your system, saving you money in the long run.

In addition to professional check-ups, you can also perform some basic maintenance tasks at home. Changing your air filters regularly is one of the simplest yet most effective ways to keep your system running efficiently. Dirty filters can restrict airflow, causing your HVAC system to work harder and use more energy. Make it a habit to check and replace filters every one to three months, depending on usage and the type of filter.

Upgrade to a Programmable Thermostat

Upgrading to a programmable thermostat is a smart move for boosting your home’s energy efficiency. Programmable thermostats allow you to set a schedule for your heating and cooling needs, so you’re not wasting energy when no one is home. For example, you can set the temperature lower during the day when everyone is at work or school and have it cozy and warm by the time you return.

Some programmable thermostats come with advanced features like remote access through your smartphone or smart home integration. This means you can adjust the settings even when you’re not at home, providing more flexibility and control. These thermostats can learn your schedule and preferences, automatically making adjustments to optimize efficiency.

Using a programmable thermostat also helps maintain more consistent temperatures, which reduces the workload on your HVAC system. Instead of experiencing spikes and dips in temperature, your home stays more comfortable with less effort from your heating and cooling units. This not only enhances comfort but also translates to significant energy savings over time.

By investing in a programmable thermostat, you take a significant step towards making your home more energy-efficient. It’s a small change that can result in substantial savings on your monthly utility bills, all while reducing the environmental impact.

Proper Insulation and Sealing

Ensuring your home is properly insulated and sealed is vital for maximizing HVAC efficiency. Insulation helps keep the desired temperature inside your home by slowing down the transfer of heat. When your home is well-insulated, your HVAC system doesn’t have to work as hard to maintain a comfortable temperature, which saves energy.

Start by checking your attic, walls, and floors for adequate insulation. The attic is a common place where heat can escape, so make sure there is a thick layer of insulation covering the attic floor. Upgrading to high-efficiency insulation materials can further enhance your home’s energy savings. Walls and floors also need proper insulation, particularly if you live in an area with extreme temperatures.

Sealing gaps and cracks around your home is equally important. Weatherstripping around doors and windows can prevent drafts that lead to temperature inconsistencies. Using caulk to seal gaps around plumbing, ducts, and electrical wiring can also make your home more airtight. By taking these steps, you prevent the loss of heated or cooled air, ensuring your HVAC system runs more efficiently.

Use Energy-Efficient HVAC Systems

Switching to energy-efficient HVAC systems is one of the best ways to boost your home’s overall energy efficiency. Modern HVAC units are designed to use less energy while delivering the same, if not better, performance. Look for systems with high SEER (Seasonal Energy Efficiency Ratio) ratings, as these are generally more energy-efficient.

There are several options to consider when upgrading your HVAC system:

  • High-Efficiency Furnaces: These furnaces convert more electricity and gas into heat compared to older models.
  • Heat Pumps: These systems provide both heating and cooling and often use less energy by transferring heat instead of generating it.
  • Geothermal Systems: Using the constant temperature of the earth, these systems are highly energy-efficient and can reduce your heating and cooling costs significantly.

Investing in an energy-efficient HVAC system can lead to substantial savings on your utility bills and reduce your home’s carbon footprint. Though the initial cost may be higher, the long-term benefits make it a worthwhile investment.

Conclusion

Optimizing your HVAC system for energy efficiency doesn’t have to be a daunting task. Regular maintenance and inspections ensure your system runs smoothly, and upgrading to a programmable thermostat gives you more control over your home’s temperature. Proper insulation and sealing keep the conditioned air inside, reducing the workload on your HVAC system. Finally, investing in energy-efficient HVAC systems can provide significant cost and energy savings in the long term.

Taking these steps creates a more comfortable and energy-efficient home, contributing to a lower environmental impact and better financial savings. Keeping your HVAC system in top shape is an investment in your home’s overall health and efficiency.

If you’re ready to enhance your home’s energy efficiency, contact My Jockey today for expert advice and HVAC services. Our team is here to help you achieve a more comfortable and cost-effective home environment.

Do Smart Thermostats Really Cut Energy Costs?

smart thermostat

Are you thinking about installing a smart thermostat to save on energy costs? Smart thermostats have become popular in recent years, promising to make heating and cooling more efficient. But do they really help cut down on energy bills? It’s important to understand how these devices work and what benefits they offer.

Smart thermostats are designed to learn your schedule and preferences, adjusting the temperature automatically. This means your heating and cooling systems run more efficiently, potentially saving you money. They can be controlled remotely via a smartphone app, which allows you to make changes even when you’re not at home. With features like these, it’s easy to see why many people are considering the switch.

However, no technology is perfect. It’s essential to weigh the potential drawbacks and limitations of smart thermostats. Some people might find them challenging to use, and the initial cost can be a concern. Understanding both the pros and cons can help you make an informed decision.

In this article, we’ll delve into how smart thermostats work, their benefits, and the possible downsides. We’ll also share tips on how to maximize your energy savings. Whether you’re just curious or seriously considering an upgrade, this guide will give you the information you need.

How Smart Thermostats Work

Smart thermostats are more advanced than regular ones. They use sensors, Wi-Fi, and algorithms to manage your home’s heating and cooling. Here’s how they work:

1. Learning Your Schedule: Smart thermostats learn your daily routines. They know when you’re home and when you’re not. This helps them adjust the temperature automatically to save energy.

2. Remote Control: You can control a smart thermostat from your phone or tablet. This means you can change the temperature from anywhere, even if you’re not home. This is handy if you forget to adjust it before leaving.

3. Geofencing: Some smart thermostats use geofencing. This means they use your phone’s location to figure out if you’re near home. If you’re close, they can start warming or cooling your house so it’s comfortable when you arrive.

4. Weather Awareness: These thermostats can check the weather and make changes based on outside conditions. If it’s going to be very hot or cold, the thermostat adjusts to keep your energy use efficient.

5. Energy Reports: Smart thermostats often give you reports on your energy use. They show you patterns and suggest ways to save more energy. This can help you understand where you can cut down on energy costs.

Benefits of Using Smart Thermostats

Smart thermostats offer many benefits. Here are some key reasons to consider getting one:

1. Energy Savings: One of the biggest benefits is saving energy. By learning your schedule and adjusting the temperature automatically, smart thermostats can reduce wasted energy. This can lead to lower utility bills.

2. Convenience: Controlling your thermostat from a smartphone is very convenient. Whether you’re in bed or away from home, you can easily adjust the temperature. This convenience can make your life a lot easier.

3. Comfort: Smart thermostats help keep your home at a comfortable temperature all the time. They make automatic adjustments to ensure you’re never too hot or too cold. This can improve your comfort without extra effort.

4. Detailed Energy Reports: Getting detailed reports on your energy use is very helpful. It allows you to see where you are using the most energy and make changes to improve efficiency. This can lead to even more savings over time.

5. Compatibility with Other Devices: Many smart thermostats work well with other smart home devices. For example, they can connect to your smart speaker so you can change the temperature with your voice. This integration makes managing your home even easier.

Smart thermostats are a great way to improve energy efficiency and comfort in your home. With many benefits and easy-to-use features, they are a valuable addition to any home.

Potential Drawbacks and Limitations

While smart thermostats offer many benefits, there are some potential drawbacks and limitations to consider. Knowing these can help you make a well-informed decision.

1. Initial Cost: Smart thermostats can be expensive to buy and install. The upfront cost might be a barrier for some people. Though they can save you money on energy bills, it may take some time to see a return on your investment.

2. Complexity: Some people find smart thermostats complicated to set up and use. While they are designed to be user-friendly, the initial setup can be confusing. Reading the manual and following instructions carefully can help, but it’s still a challenge for some users.

3. Wi-Fi Dependency: Smart thermostats rely on a stable Wi-Fi connection to function correctly. If your internet goes down, you might lose some of the smart features. Although most smart thermostats still work manually without Wi-Fi, you won’t be able to control them remotely.

4. Compatibility Issues: Not all smart thermostats are compatible with every heating and cooling system. Before buying one, it is important to check if it will work with your current HVAC setup. Incompatibility can lead to additional costs for upgrades or adapters.

5. Privacy Concerns: Smart thermostats collect data about your home’s temperature and your schedule. Some people feel uneasy about this level of data collection. Ensure you understand the privacy policies and data security measures of the thermostat you choose.

Tips for Maximizing Energy Savings with Smart Thermostats

To get the most out of your smart thermostat and maximize energy savings, follow these tips:

1. Utilize Scheduling Features: Use the scheduling features to set specific times for your heating and cooling systems to turn on and off. Having a set schedule helps the thermostat adjust temperatures automatically, saving energy when you’re not home.

2. Enable Geofencing: Activate geofencing if your thermostat supports it. This feature tracks your location and adjusts the temperature when you’re leaving or coming home. It ensures your home is always comfortable without wasting energy.

3. Take Advantage of Energy Reports: Regularly review the energy reports provided by your smart thermostat. These reports can show you where you’re using the most energy and suggest ways to save. Making small adjustments based on this data can lead to significant savings.

4. Set Temperature Limits: Set reasonable temperature limits for heating and cooling. Avoid setting your thermostat too high in the winter or too low in the summer. Small adjustments can lead to big savings on your energy bills.

5. Keep Your HVAC System Maintained: A well-maintained HVAC system runs more efficiently. Regularly change filters, schedule annual check-ups, and keep your system clean. A smart thermostat can only do so much if your HVAC system isn’t running at its best.

6. Use Smart Home Integrations: If you have other smart home devices, integrate them with your thermostat. For example, smart blinds can help control the amount of sunlight entering your home, reducing the need for heating or cooling. This teamwork can enhance energy efficiency.

Conclusion

Smart thermostats can play a significant role in cutting energy costs and improving home comfort. They offer advanced features like learning your schedule, remote control, and detailed energy reports. While there are some potential drawbacks such as initial costs and complexity, the benefits often outweigh these issues. By following tips to maximize energy savings, you can make the most out of your smart thermostat investment.

If you’re considering a smart thermostat or need help with your HVAC system, My Jockey can assist you. Our team of experts in Saratoga Springs and The Capital Region, NY, is ready to help you achieve better energy efficiency in your home. Contact our AC maintenance company at My Jockey today and start saving on your energy bills!

When It’s Time to Replace Your Water Heater

water heater

A reliable water heater is essential for every home. It provides hot water for showers, washing dishes, and laundry. But like all appliances, water heaters don’t last forever. Understanding when it’s time to replace your water heater can save you from sudden cold showers and potentially costly repairs.

Sometimes, it can be tough to know when your water heater is on its last legs. There are several signs to look out for that signal your water heater might be failing. Recognizing these signs early can help you plan for a replacement instead of dealing with an emergency.

Beyond spotting signs of failure, evaluating the age and efficiency of your water heater is also crucial. Older models might not only be less efficient, but could also be costing you more in energy bills. By assessing these factors, you can make an informed decision about whether to repair or replace your unit.

Cost is another important consideration. Comparing the costs of repair versus replacement can help you decide which option makes the most sense for your situation. Finally, choosing the right replacement model can ensure you have a reliable source of hot water for years to come. Let’s dive into the details and help you make the best choice for your home.

Signs Your Water Heater Is Failing

Knowing the signs of a failing water heater can help you avoid sudden breakdowns and cold showers. Here are some key indicators:

1. Inconsistent Water Temperature: If your hot water runs out quickly or fluctuates between hot and cold, it might be a sign that your water heater is struggling to keep up with demand.

2. Strange Noises: Rumbling, banging, or popping sounds coming from your water heater are not normal. These noises often indicate sediment buildup at the bottom of the tank, affecting its efficiency and leading to wear and tear.

3. Rusty Water: If the hot water from your taps has a rusty tint, this could mean corrosion inside your water heater tank. Rusty water is a clear sign you may need to replace the unit soon.

4. Leaks: Puddles of water around your water heater indicate a leak. Leaks can occur from the tank or the pipes and should be addressed promptly to prevent water damage.

5. Age: If your water heater is more than 10 years old, it’s likely nearing the end of its lifespan. Older water heaters are more prone to problems and less energy-efficient.

Evaluating the Age and Efficiency

Knowing how old your water heater is and understanding its efficiency helps determine when it’s time for a replacement. Here’s what to consider:

1. Check the Age: Water heaters typically last between 10 to 15 years. You can find the age of your water heater by looking at the serial number on the manufacturer’s sticker. If it’s over a decade old, it might be time to start thinking about a replacement.

2. Energy Efficiency: Newer models are generally more energy-efficient. Older water heaters may consume more electricity or gas, leading to higher energy bills. Compare the energy usage of your current water heater to that of newer models. Look for the Energy Star label, which indicates higher efficiency.

3. Performance Issues: Frequent repairs and declining performance are signs of an aging water heater. If you notice a rise in repair costs or continuous issues with hot water production, your system might be losing its efficiency.

4. Recovery Rate: The recovery rate is the time it takes for the water heater to heat a full tank of water. A slower recovery rate can indicate inefficiency. If it takes longer to get a hot shower, check if a newer model would be more effective.

By evaluating these factors, you can make an informed decision about replacing your water heater. Upgrading to a more efficient model can save you money on energy bills and provide more reliable hot water.

Cost Comparison: Repair vs. Replacement

Deciding between repairing or replacing your water heater can hinge on a few factors, including cost and efficiency. Here’s how to weigh your options:

1. Repair Costs: Minor issues like a faulty thermostat or a broken heating element can often be repaired at a reasonable cost. If the repair is inexpensive and the unit is relatively new, fixing it might be the best choice. Get quotes from service providers to understand the cost involved.

2. Replacement Costs: If your water heater is older or requires frequent repairs, replacing it could be more cost-effective in the long run. A new water heater can range from $500 to $2,000, depending on the type and size. Compare this with repeated repair costs and the potential savings from a more energy-efficient model.

3. Energy Savings: Newer water heaters are more energy-efficient. While there’s an upfront cost to purchase and install a new unit, it can lead to lower utility bills. Calculate the potential savings over a few years to see if replacement makes financial sense.

4. Long-Term Value: Consider the lifespan of the repair. A repaired old water heater might last a few more years, but a new unit could give you peace of mind for 10 to 15 years. Weigh the benefits of long-term reliability against short-term costs.

Choosing the Right Replacement Model

When it’s time to replace your water heater, selecting the right model is key. Here are important factors to consider:

1. Type of Water Heater: There are several types of water heaters, including tankless, storage tank, heat pump, and solar. Tankless water heaters provide hot water on demand and are generally more energy-efficient but have a higher upfront cost. Storage tank water heaters are the most common and usually less expensive to install.

2. Fuel Source: Water heaters can run on electricity, natural gas, propane, or even solar energy. Consider the availability and cost of the fuel source in your area. Gas water heaters typically have lower operational costs but require proper venting.

3. Size and Capacity: The size of your water heater should match your household’s hot water needs. A family of four typically needs a 50-gallon tank, whereas smaller households can manage with a 30-gallon tank. For tankless models, look at the flow rate to ensure it can handle your usage.

4. Energy Efficiency: Check the Energy Factor (EF) rating of the water heater. Models with higher EF ratings are more efficient and can save money on energy bills. Look for units with the Energy Star label for guaranteed efficiency.

Conclusion

Deciding when to replace your water heater involves looking at signs of failure, evaluating its age and efficiency, comparing costs, and choosing the right replacement model. Each of these steps helps ensure you have a reliable and efficient hot water supply for your home. Keeping an eye on your water heater’s performance and being proactive can save you from unexpected cold showers and high repair costs.

If you need expert advice on your water heater, My Jockey is here to help. Our team can guide you through the process, from identifying problems to choosing and installing the best replacement model. Reach out to My Jockey today for all your HVAC and plumbing needs!

Top Tips for a Long-Lasting HVAC System

HVAC system

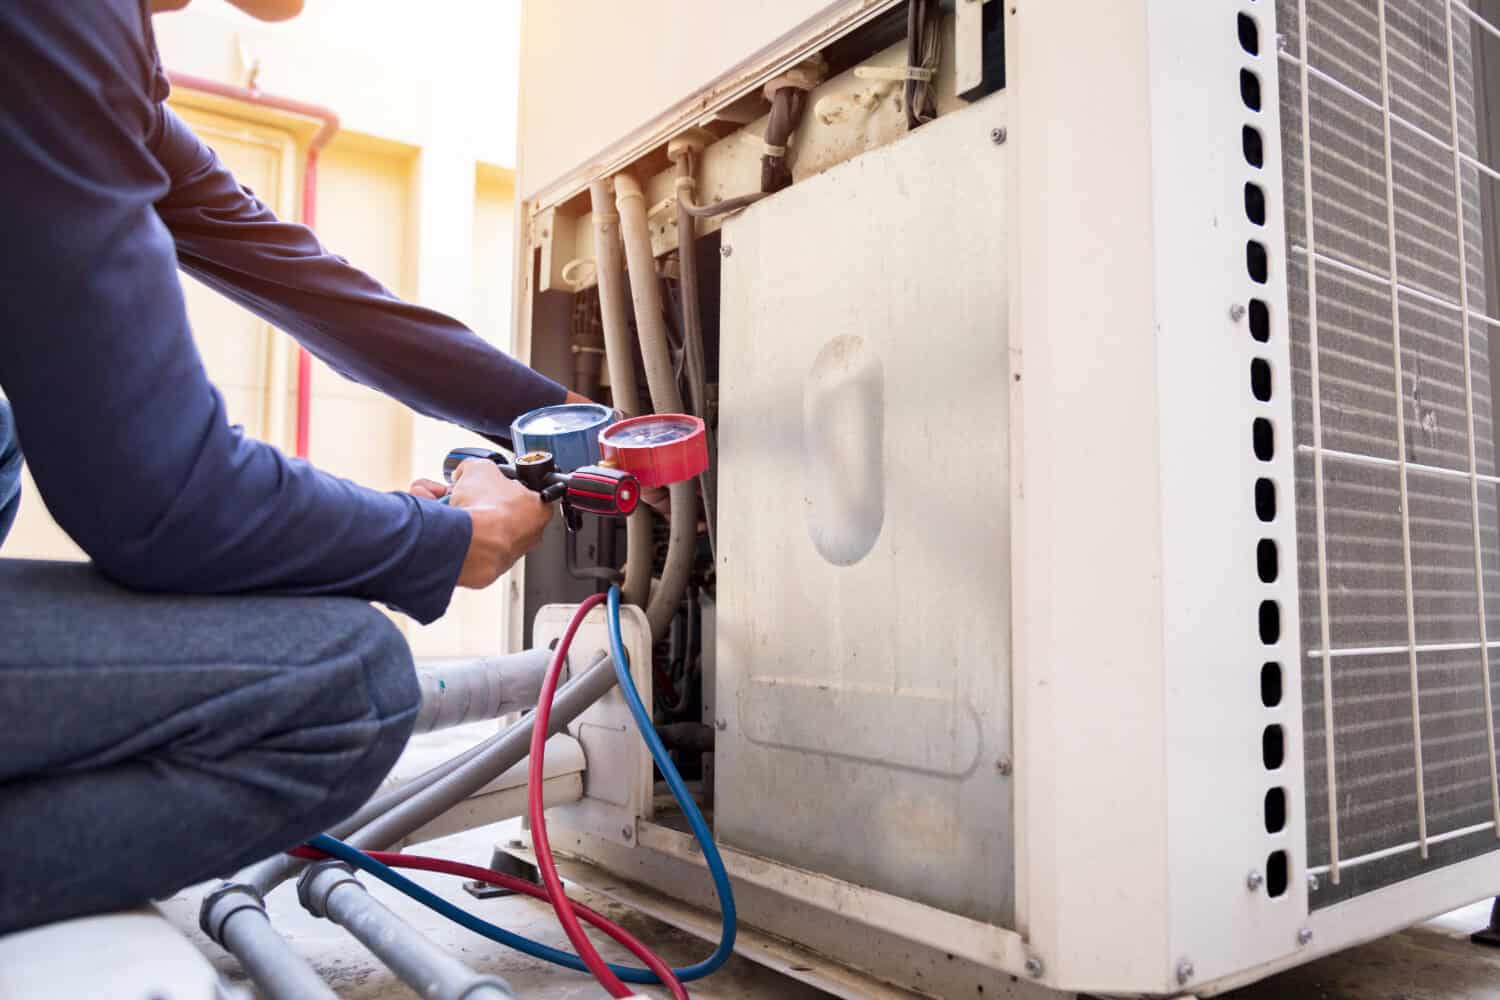
An HVAC system is a crucial part of any home, providing comfort and maintaining indoor air quality. However, keeping it running efficiently and extending its lifespan requires some attention and care. Knowing how to maintain your HVAC system can prevent costly repairs and keep your home comfortable year-round.

Regular maintenance and inspections are key to a long-lasting HVAC system. A well-maintained unit not only performs better but also lasts longer. Basic maintenance tasks can be done by homeowners, while more detailed inspections may need a professional. Ensuring everything is clean and functioning helps to identify small problems before they turn into major issues.

Optimizing your thermostat settings can also make a big difference. Setting your thermostat to the right temperature reduces the workload on your system, saving energy and prolonging its life. Advances in smart thermostats provide even greater control and efficiency, making it easier to maintain optimal settings.

Keeping air filters clean and replacing them when necessary is another simple yet impactful way to maintain your HVAC system. Dirty filters restrict airflow, forcing the system to work harder and reducing its efficiency. Regular filter care improves air quality and system performance.

Finally, addressing minor issues as soon as they arise can prevent them from becoming bigger problems. Paying attention to unusual noises, poor airflow, and other signs of trouble can help you catch and fix issues early. By following these tips, you can ensure your HVAC system stays in top shape for many years.

Ready to dive into the specifics? Let’s explore these essential tips to help you maintain a long-lasting HVAC system.

Regular Maintenance and Inspections

Keeping your HVAC system in good shape starts with regular maintenance and inspections. These steps help to ensure everything is working correctly and can spot potential issues before they become major problems.

1. Schedule Regular Check-Ups: Aim to have your HVAC system checked by a professional at least once a year. Spring is a good time to service your air conditioner, while fall is ideal for your heater. These check-ups can catch small issues early and keep your system running smoothly.

2. Clean and Clear Outdoor Units: Make sure the area around your outdoor HVAC unit is clear of debris like leaves, grass, and dirt. Trim any bushes or plants at least two feet away from the unit to ensure proper airflow. Clean the unit’s fins gently with a soft brush to avoid damaging them.

3. Inspect Ductwork: Leaky ducts can cause your system to lose efficiency. Walk around and inspect your ductwork for any obvious signs of leaks or damage. If you notice any issues, you might need a professional to take a closer look and seal any leaks.

4. Check Electrical Components: Look at the connections and wiring for any signs of wear or damage. Loose or frayed wires should be tightened or replaced to prevent electrical issues.

Regular maintenance and inspections keep your HVAC system in peak condition, reducing the chances of unexpected breakdowns and extending the lifespan of your unit.

Optimizing Thermostat Settings for Efficiency

Your thermostat settings have a big impact on your HVAC system’s performance and efficiency. Making small adjustments can save energy and reduce wear and tear on the system.

1. Set Temperature Wisely: During the summer, set your thermostat to 78°F when you’re home and raise it a bit when you’re away. In the winter, around 68°F is comfortable when you are home, and you can lower it some when you’re sleeping or out.

2. Use Programmable Thermostats: These thermostats allow you to set schedules that automatically adjust the temperature, so you don’t have to remember to do it yourself. You can program it to lower or raise the temperature based on your daily routine.

3. Consider Smart Thermostats: Smart thermostats learn your habits and adjust settings to save energy without sacrificing comfort. They can be controlled remotely via your smartphone, making it easy to adjust the temperature on the go.

4. Avoid Extreme Settings: Rapid temperature changes force your system to work harder. Gradually adjust the thermostat to minimize strain on the HVAC system and improve its efficiency.

By optimizing your thermostat settings, you can maintain a comfortable home and help your HVAC system run more efficiently, saving you money on energy bills and prolonging the life of your unit.

Cleaning and Replacing Air Filters

Keeping your HVAC system’s air filters clean is one of the easiest and most effective ways to ensure it runs smoothly. Dirty filters can block airflow, making your system work harder and less efficiently.

1. Check Filters Monthly: Even if the manufacturer suggests replacing filters every three months, it’s a good idea to check them monthly. If you have pets or live in a dusty area, your filters may get dirty faster.

2. Replace When Needed: Different types of filters have different lifespans. Basic fiberglass filters need replacement every month, while higher-quality pleated filters may last up to three months. Be sure to replace them as needed to keep your system running efficiently.

3. Cleaning Permanent Filters: Some HVAC systems have reusable air filters. Remove the filter and rinse it with water until clean. Let it dry completely before putting it back to avoid mold growth. Always follow the manufacturer’s guidelines for cleaning.

4. Improved Air Quality: Clean filters don’t just help your system work better; they also improve the air quality in your home. Regular maintenance of air filters ensures that dust, allergens, and other particles are effectively filtered out, making the air healthier to breathe.

By staying on top of air filter maintenance, you can enhance your HVAC system’s performance and ensure your home remains a comfortable, healthy environment.

Identifying and Addressing Minor Issues Early

Addressing small problems with your HVAC system as soon as they arise can prevent major issues down the line. This proactive approach can save you from costly repairs and system failures.

1. Listen for Unusual Noises: Any strange sounds like grinding, banging, or screeching could indicate a problem. These noises might be signs of loose parts or mechanical issues that need immediate attention.

2. Monitor Airflow: If you notice weak airflow from your vents, it could be a sign of a blockage or issue with the blower. Ensuring that air is flowing properly prevents the system from working too hard and helps with efficiency.

3. Check for Leaks: Any moisture or leakage around your HVAC unit is a red flag. Condensation is normal, but puddles of water or unusual moisture could point to problems with the drain system or refrigerant leaks.

4. Monitor Energy Bills: A sudden spike in energy bills without an obvious cause could indicate your system is not operating efficiently. Investigate any anomalies to determine if your HVAC system needs servicing.

Catching and fixing these minor problems early will keep your HVAC system running smoothly and help you avoid more serious issues.

Conclusion

Maintaining a long-lasting HVAC system doesn’t have to be difficult. By following these tips on regular maintenance, optimizing thermostat settings, cleaning filters, and addressing minor issues early, you can ensure your system runs efficiently for years to come. A well-maintained HVAC system not only keeps your home comfortable but also saves energy and reduces costs.

If you need assistance with any aspect of HVAC maintenance or repairs, our team at My Jockey is here to help. Ensuring your HVAC system remains in top condition will provide comfort and peace of mind for your family all year round.

Contact My Jockey today to schedule a service or learn more about how we can help with your HVAC needs. Your comfort is our priority!