The Benefits of Regular HVAC Check-Ups

HVAC check-up

Taking care of your HVAC system is essential for a comfortable and efficient home. Regular check-ups can help your system work better and last longer. An HVAC system that’s well-maintained can save you money and keep your home comfortable year-round.

Regular HVAC check-ups are a smart investment that can provide many benefits. From saving money on energy bills to improving indoor air quality, these check-ups are an essential part of home maintenance. Read on to find out more.

Improved Energy Efficiency

Regular HVAC check-ups are essential for improving your system’s energy efficiency. When your HVAC system runs efficiently, it uses less energy to maintain a comfortable temperature in your home. This not only helps to lower your utility bills but also reduces strain on the environment.

1. Optimizing Performance: During a check-up, technicians will inspect and clean various components of your HVAC system. By ensuring that everything is in good working order, your system can operate more smoothly. Clean filters, lubricated parts, and correctly set thermostats all contribute to better energy efficiency.

2. Adjusting Settings: Often, HVAC systems need minor adjustments to settings like airflow and refrigerant levels. These adjustments can make a big difference in how efficiently your system operates. Technicians will fine-tune these settings during a check-up to ensure optimal performance and energy use.

3. Identifying Issues Early: Small problems can lead to big energy losses if left unaddressed. Regular check-ups allow technicians to identify and fix these issues early on. This helps to prevent your HVAC system from working harder than it needs to, saving energy in the process.

By taking simple steps to maintain your HVAC system, you can improve its energy efficiency significantly. This benefits both your wallet and the environment.

Extended Equipment Lifespan

Regular HVAC check-ups play a crucial role in extending the lifespan of your equipment. Just like a car, your HVAC system needs routine maintenance to stay in good shape. Regular check-ups can prevent the wear and tear that leads to breakdowns and costly repairs.

1. Routine Cleaning: Cleaning is essential to the longevity of your HVAC system. Dust, dirt, and debris can build up in the system, causing parts to wear out faster. By keeping everything clean, you can help your HVAC system run more smoothly and last longer.

2. Component Inspection: During a check-up, technicians will inspect all components of your HVAC system. This includes belts, fans, coils, and other parts that can wear out over time. Regular inspections help catch issues before they become serious problems, preventing damage and extending the life of your system.

3. Timely Repairs: Making timely repairs can also extend the life of your HVAC system. When small issues are identified early, they can be fixed before they cause more significant damage. This helps avoid the need for major repairs or even replacement.

4. Lubrication and Adjustments: Parts that move need to be lubricated regularly to prevent friction and wear. Technicians will also make necessary adjustments to ensure all parts are working correctly. These minor actions can have a big impact on how long your HVAC system lasts.

Enhanced Indoor Air Quality

Regular HVAC check-ups are crucial for enhancing the air quality inside your home. The air you breathe can significantly impact your health, and your HVAC system plays a big role in filtering out pollutants. A well-maintained system ensures that the air circulating in your home is clean and healthy.

1. Filter Maintenance: One of the key components of your HVAC system is its air filter. Over time, these filters can become clogged with dust, dirt, and allergens. During a check-up, technicians will clean or replace your filters, ensuring they effectively capture airborne contaminants.

2. Duct Cleaning: The ducts in your HVAC system can collect dust and other debris. This can lead to poor air quality and trigger allergies or respiratory issues. Regular duct cleaning is part of a comprehensive HVAC check-up, ensuring that the air circulating through your home is free of pollutants.

3. Humidity Control: Proper humidity levels are essential for good indoor air quality. A well-maintained HVAC system helps control humidity levels, preventing conditions that favor mold and mildew growth. Technicians will check and calibrate your system to maintain optimal humidity levels.

4. Ventilation: Proper ventilation is also an important factor. HVAC check-ups ensure that vents are not blocked and that air can flow freely throughout your home. This reduces the concentration of pollutants and helps maintain a healthy environment.

Preventing Costly Repairs

Regular HVAC check-ups are essential for preventing costly repairs. By catching small issues early, you can avoid bigger problems down the line. Regular maintenance keeps your system running smoothly and can save you money.

1. Early Problem Detection: During a check-up, technicians can identify minor issues like worn-out belts, refrigerant leaks, or electrical problems. Addressing these problems early prevents them from escalating into more serious and expensive repairs.

2. Routine Maintenance: Performing routine maintenance tasks like cleaning coils, lubricating moving parts, and adjusting settings can prevent wear and tear. This helps avoid unexpected breakdowns and extends the life of your system.

3. Avoiding Emergency Services: Emergency repairs can be costly and inconvenient. Regular check-ups minimize the risk of sudden malfunctions, ensuring your system runs reliably year-round and reducing the need for emergency service calls.

4. Cost-Effective Solutions: Regular check-ups provide a cost-effective way to manage your HVAC system. Preventive maintenance is typically much cheaper than major repairs or replacement. Staying on top of regular check-ups pays off in the long run.

Conclusion

Regular HVAC check-ups offer numerous benefits that contribute to a comfortable and healthy home. From improved energy efficiency and extended equipment lifespan to enhanced indoor air quality and preventing costly repairs, maintaining your HVAC system is essential. These check-ups ensure your system operates efficiently and reliably, saving you money and enhancing your quality of life.

Don’t wait until a small issue turns into a big problem. Take proactive steps to keep your HVAC system running smoothly. For professional and reliable HVAC services in Saratoga Springs and the Capital Region, NY, contact us at My Jockey today. Let our experts help you maintain a comfortable and efficient home.

Top Tips to Prevent Plumbing Issues During Winter

plumber

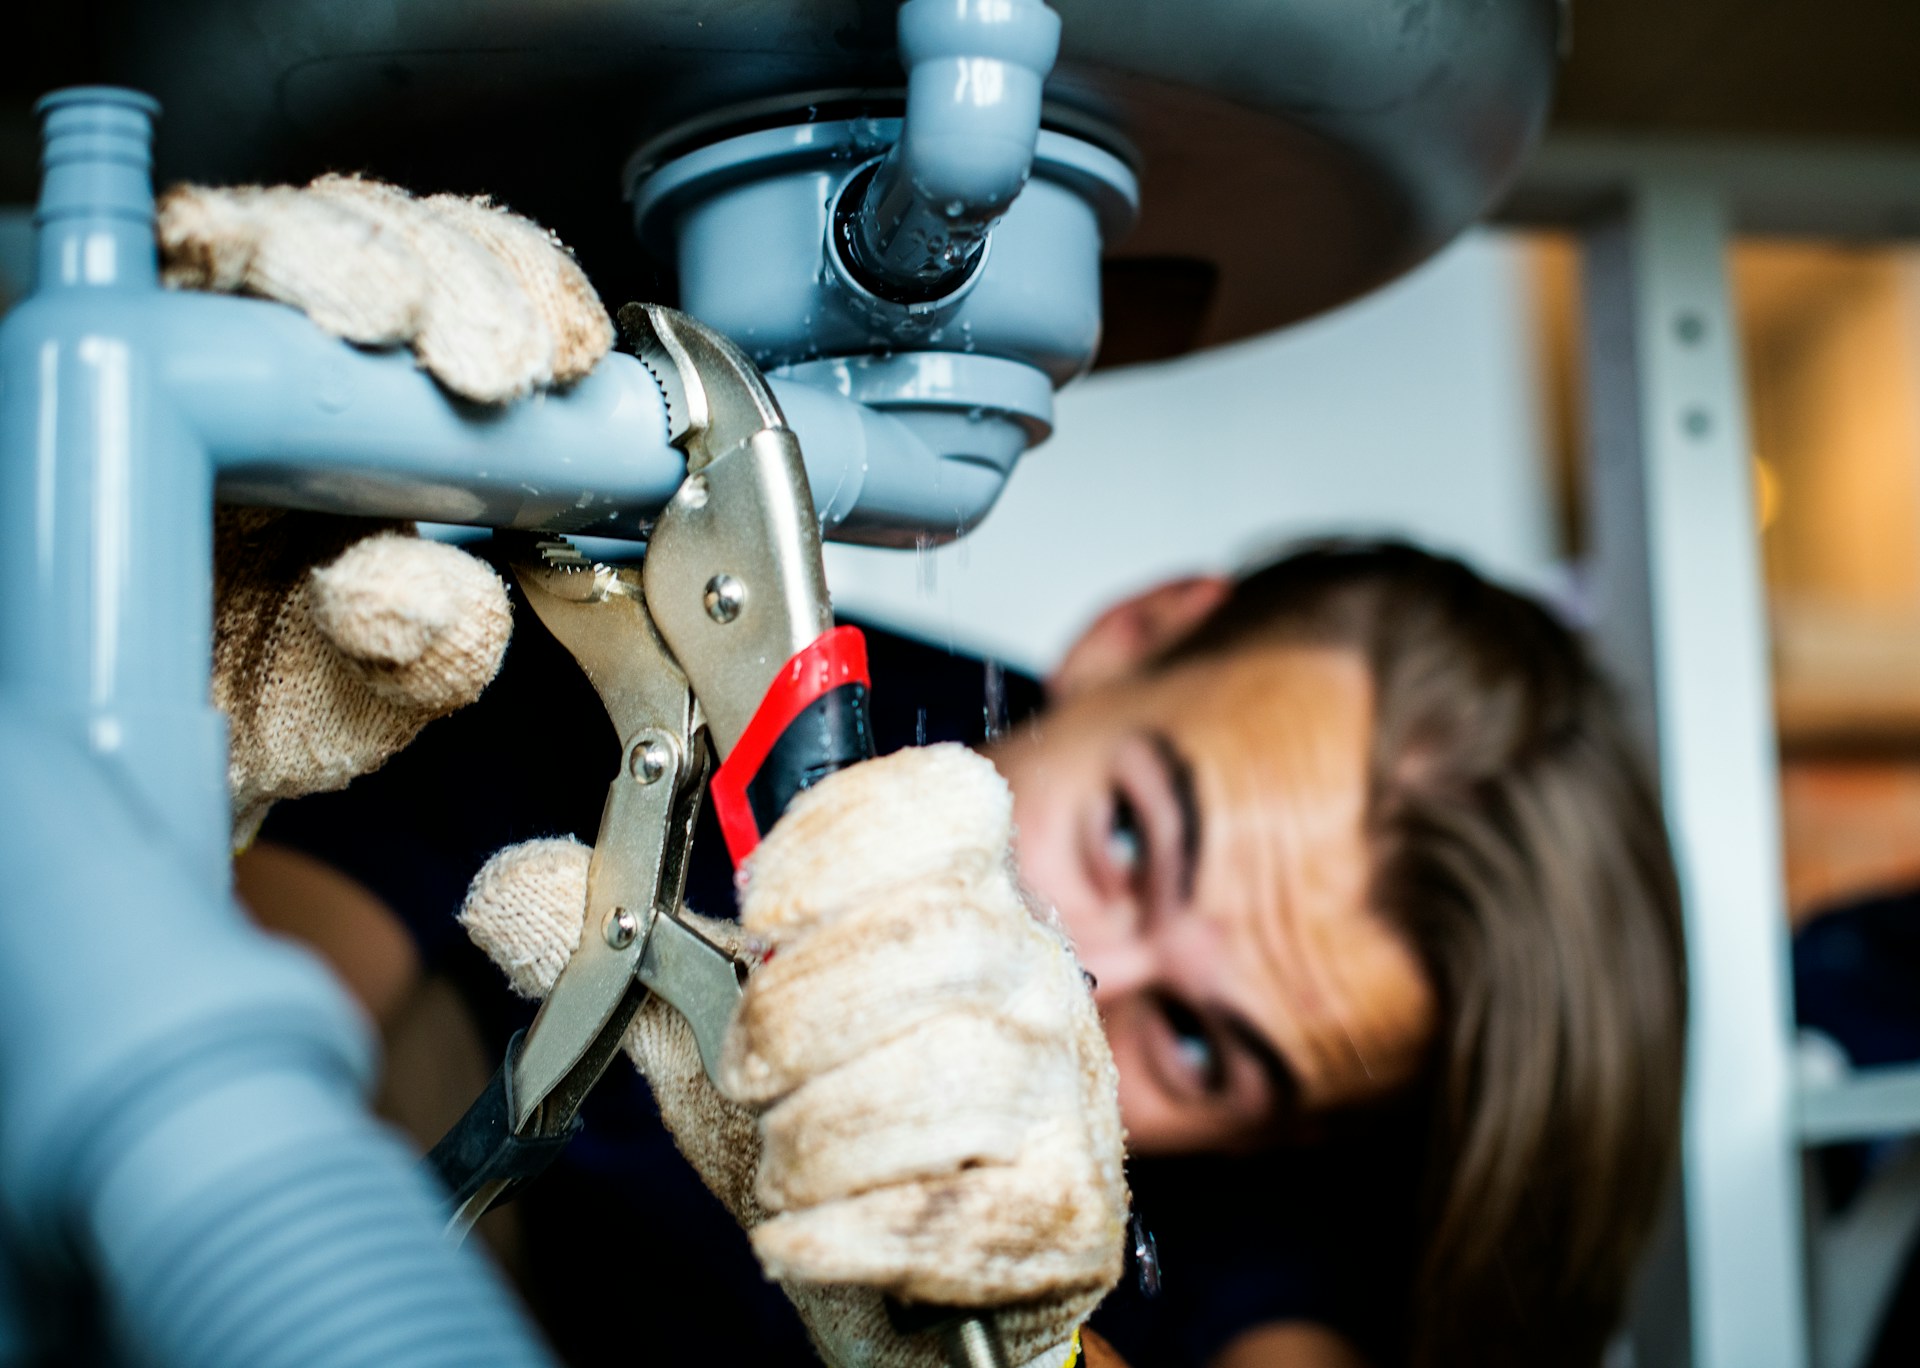
Winter can be a challenging time for homeowners, especially when it comes to plumbing. The cold temperatures can cause a lot of problems if you’re not prepared. Frozen pipes, failing water heaters, and other issues can lead to costly repairs and a lot of stress. This is why it’s so important to take steps before the cold hits to ensure your plumbing system is ready for winter.

In this article, we will share tips to help you prevent common winter plumbing issues. By following these steps, you can protect your home and enjoy a worry-free winter.

Understanding Common Winter Plumbing Issues

During winters in Saratoga Springs, homeowners often face several common plumbing problems that can turn into expensive repairs if not addressed promptly. One primary issue is frozen pipes. Water expands when it freezes, which can cause pipes to burst. Burst pipes not only result in water damage but also require significant repair work that can be both time-consuming and costly.

Another common winter plumbing issue involves water heaters. Cold weather can put added stress on water heaters as they work harder to supply hot water. This increased usage can lead to failures, and a malfunctioning heater can leave you without hot water when you need it most. 

Additionally, clogged drains are frequent in winter due to holiday cooking and the use of disposals for food waste. Grease and fat can solidify in the pipes, causing blockages that need professional cleaning.

Effective Insulation Techniques to Protect Your Pipes

Protecting your pipes from freezing requires proper insulation, which is one of the most effective prevention measures. Here are some simple and effective techniques you can do:

1. Pipe Insulation: Use foam pipe insulation to cover your pipes. This material is readily available at most hardware stores and is easy to install. Measure the length of your pipes and cut the insulation to fit. Wrap it around the pipes, especially those in unheated areas like basements, attics, or garages.

2. Heat Tape: For added protection, consider using heat tape. This is an electrical tape that can be wrapped around pipes and plugged into a power source to provide continuous heat. Follow the manufacturer’s instructions carefully to avoid potential hazards.

3. Seal Gaps and Cracks: Inspect areas where pipes enter your home and use caulk or spray foam to seal any gaps or cracks. This helps keep cold air out and warm air in, reducing the risk of pipes freezing.

4. Cabinet Doors: On particularly cold nights, leave cabinet doors open under sinks to allow warm air to circulate around the pipes. This simple step can prevent freezing in exposed areas.

5. Outdoor Faucets: Don’t forget to winterize your outdoor faucets. Disconnect garden hoses and drain any remaining water. Install insulated covers over the faucets to keep them protected from freezing temperatures.

Essential Tips for Maintaining Your Water Heater in Cold Weather

Maintaining your water heater during the colder months ensures that you have a steady supply of hot water and prevents potential breakdowns. First, we recommend adjusting the thermostat to a temperature of around 120 degrees Fahrenheit. This setting provides enough hot water for household needs while ensuring the water heater’s efficiency and safety.

Next, drain the tank to remove sediment buildup. Over time, sediment can accumulate at the bottom of the tank, causing the heater to work harder and be less efficient. To do this, turn off the power or gas supply, attach a garden hose to the drain valve, and let the water and sediment flow out. After draining, refill the tank and turn the supply back on.

Additionally, insulating the water heater and its pipes can help maintain heat and reduce energy costs. Use an insulating blanket around the tank and wrap the pipes with foam insulation. These steps help to prevent heat loss, especially if your water heater is located in an unheated area like a garage or basement.

Proactive Measures to Prevent Frozen Pipes

Frozen pipes are a common issue in Saratoga Springs during the winter, but there are ways to prevent this from happening. Start by insulating all exposed pipes, especially those in unheated areas such as attics, basements, and garages. Use foam pipe insulation or heat tape to keep the pipes warm.

Another proactive measure is to keep a slow trickle of water running through the faucets connected to vulnerable pipes. This flow can prevent water from freezing in the pipes. Additionally, opening cabinet doors under sinks allows warm air to circulate around the pipes, reducing the chances of freezing.

If you plan to be away from home for an extended period during the winter, set your thermostat to at least 55 degrees Fahrenheit to ensure the house stays warm enough to prevent freezing. You might also consider shutting off the water supply and draining the pipes while you’re away.

Conclusion

Preparing your plumbing for a Saratoga Springs winter is essential to avoid costly repairs and ensure uninterrupted service during the cold months. From understanding common plumbing issues to insulating pipes and maintaining your water heater, our tips can help you safeguard your home’s plumbing system.

Regular maintenance and proactive measures make a significant difference in preventing winter plumbing problems. At My Jockey, we are committed to helping homeowners protect their plumbing systems through every season. For professional plumbing services and expert advice, reach out to us today. 

Is a Smart Thermostat Right for You?

smart thermostat

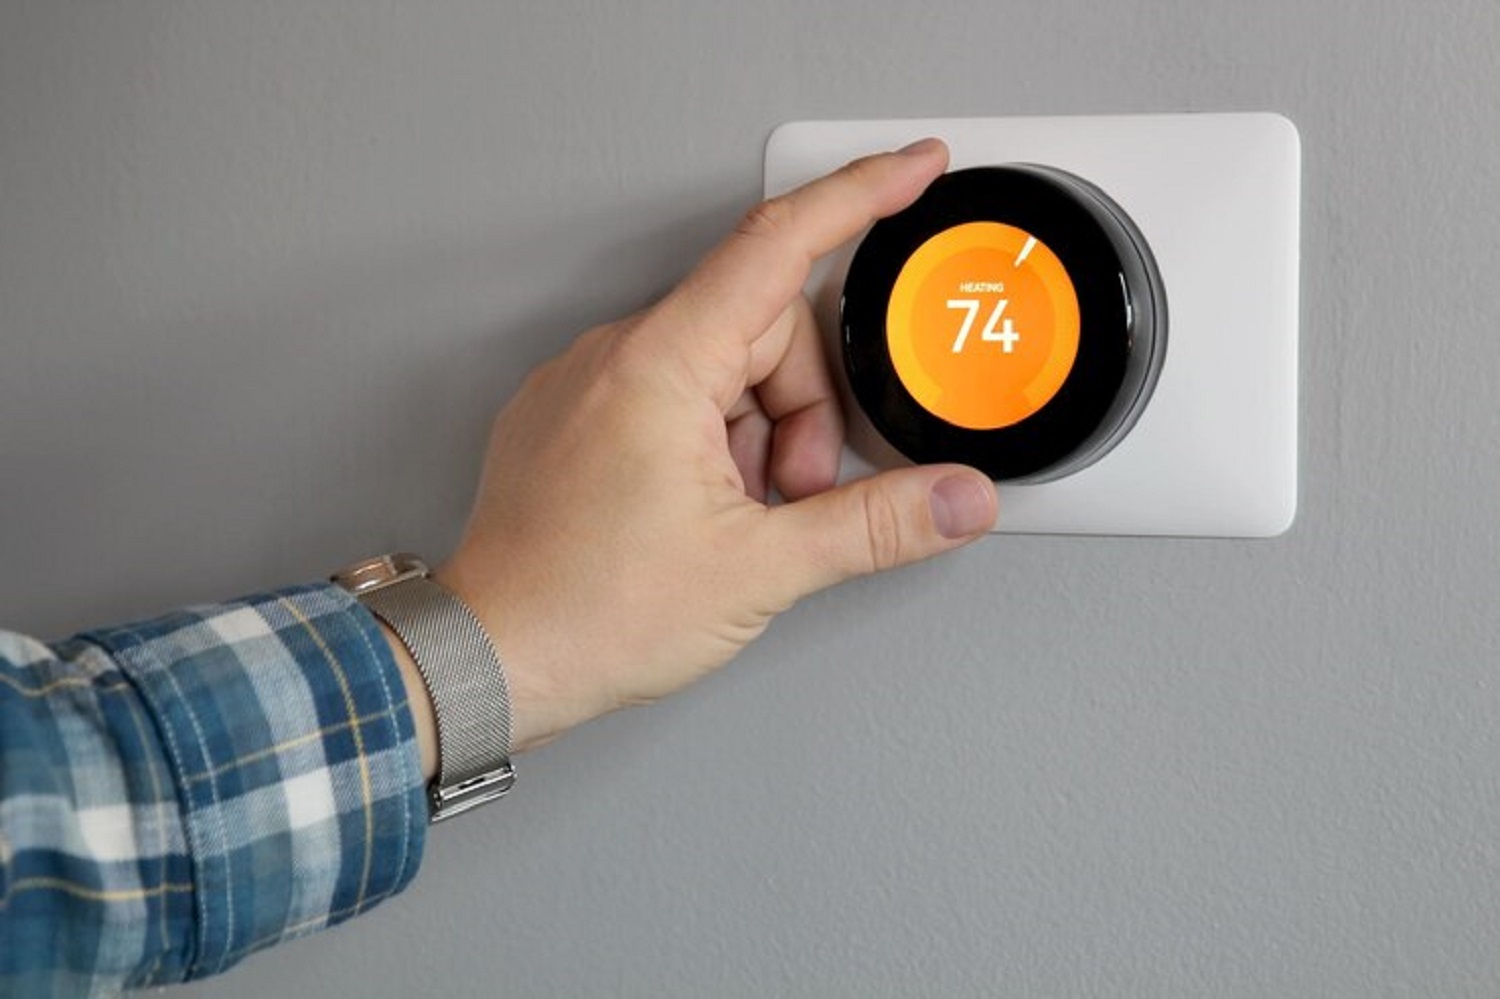
Managing your home’s temperature can be challenging, especially with traditional thermostats that require constant manual adjustments. Smart thermostats offer a modern solution. They bring advanced features that can make heating and cooling your home easier and more efficient.

Let’s explore the key benefits and considerations before installing one and how to choose the best smart thermostat for your needs. This way, you can enjoy a more comfortable and energy-efficient home.

What Is a Smart Thermostat?

A smart thermostat is a modern device that helps you control the temperature in your home more efficiently. Unlike traditional thermostats, smart thermostats can learn your preferences and adjust the heating and cooling automatically. This makes it easier to keep your home comfortable without having to constantly adjust the settings.

Smart thermostats connect to your Wi-Fi network, allowing you to control them using a smartphone app or voice commands through devices like Amazon Alexa or Google Assistant. This means you can change the temperature from anywhere, even if you are not at home. Some smart thermostats can also track your energy usage, helping you understand how much energy you are consuming and identify ways to save.

One of the smartest features of these devices is their ability to learn your routine. For example, they can detect when you leave the house and automatically lower the temperature to save energy. When you are about to return, the thermostat can start heating or cooling your home so it is comfortable when you arrive. This learning capability not only provides convenience but also helps you save on energy bills.

Key Benefits of Smart Thermostats

Smart thermostats offer several benefits that make them a worthwhile investment for your home. Here are some key advantages:

1. Energy Savings: One of the biggest benefits of smart thermostats is their ability to save energy. Automatically adjusting the temperature based on your habits and preferences helps reduce energy consumption. This can lead to lower utility bills and lessen your environmental impact.

2. Convenience: With a smart thermostat, you no longer need to manually adjust the temperature every time you leave or return home. The device learns your schedule and makes adjustments on its own. You can also control it remotely using your smartphone, which is handy if you forgot to turn down the heat before leaving the house.

3. Enhanced Comfort: Smart thermostats provide more precise temperature control, ensuring your home stays at a comfortable temperature. Some models offer room sensors that can detect temperature variations in different areas of your home, adjusting the heating or cooling to keep every room comfortable.

4. Insights and Alerts: Many smart thermostats provide insights into your energy usage and suggest ways to improve efficiency. They can also send you alerts if there are issues with your HVAC system, such as if the system is running longer than usual, which might indicate a problem.

5. Compatibility with Smart Home Systems: Smart thermostats can be integrated with other smart home devices. This allows you to create an interconnected system where your lights, security cameras, and thermostats can all be controlled through a single app or voice command. This unified control can make managing your home much easier.

Smart thermostats significantly improve home climate control by offering energy savings, convenience, enhanced comfort, useful insights, and compatibility with other smart devices. These benefits make them a smart choice for any modern home.

Considerations Before Installing a Smart Thermostat

Before you install a smart thermostat, there are a few important things to consider. Making sure you’re prepared can help you get the most out of your new device.

1. Compatibility: Not all smart thermostats work with every HVAC system. Check if the smart thermostat you want is compatible with your current system. Most manufacturers provide a compatibility checker on their website. It’s also a good idea to consult with an HVAC professional to make sure everything will work smoothly.

2. Wi-Fi Connection: Smart thermostats need a stable Wi-Fi connection to function properly. Ensure your home’s Wi-Fi signal is strong where you plan to install the device. A weak connection can lead to delays or even prevent you from controlling the thermostat remotely.

3. Power Requirements: Some smart thermostats require a C-wire (common wire) for power. If your current thermostat setup doesn’t have a C-wire, you may need to have one installed. Without the proper wiring, the smart thermostat may not work as intended.

4. Installation: While some smart thermostats are easy to install yourself, others may require professional installation. Consider your comfort level with handling electrical wiring and your familiarity with HVAC systems. Hiring a professional can ensure the job is done correctly and safely.

5. Privacy and Security: Smart thermostats collect data about your home’s temperature and occupancy patterns. Check the privacy policy of the thermostat manufacturer to understand how your data will be used. Also, make sure you have good security practices for your Wi-Fi network to protect your smart home devices from hacking.

Taking these considerations into account can help you choose and install a smart thermostat that meets your needs and works seamlessly with your home.

How to Choose the Right Smart Thermostat for Your Home

Choosing the right smart thermostat can greatly enhance your home’s comfort and efficiency. Here are some tips to help you make the best choice:

1. Features: Look for features that match your lifestyle. Some smart thermostats offer geofencing, which adjusts the temperature based on your location. Others have learning capabilities that adapt to your schedule. Consider what features will be most useful for your daily routine.

2. Ease of Use: The thermostat should be easy to program and control. Check reviews to see if other users find the interface simple to navigate. A user-friendly app can also make controlling your thermostat more convenient.

3. Energy Reports: Some smart thermostats offer detailed energy reports. These can help you track your energy usage and find ways to save. If you’re interested in monitoring your energy consumption, look for a model that provides this feature.

4. Price: Smart thermostats come in a range of prices. While more expensive models offer advanced features, there are also budget-friendly options that work well. Decide what features are essential for you and find a model that fits your budget.

5. Integration: If you have other smart home devices, choose a thermostat that integrates well with them. Check if the thermostat works with your smart home system or assistants like Amazon Alexa or Google Assistant.

By considering these factors, you can select a smart thermostat that will improve your home’s comfort and help you save energy.

Conclusion

A smart thermostat can be a great addition to your home, making it more comfortable and energy-efficient. Understanding the features and benefits, as well as what to consider before installing one, ensures you make the right choice. Whether it’s saving energy, enjoying enhanced comfort, or simply having the convenience of remote control, a smart thermostat can offer many advantages.

If you’re thinking about upgrading to a smart thermostat, we can help. At My Jockey, our HVAC contractors in New York can provide expert advice and installation services for all your HVAC needs. Contact us today to learn more about how we can improve your home’s comfort and efficiency with a smart thermostat.

Easy Ways to Improve Your Home’s Air Quality

air purifier

Having clean air in your home is very important for your health and well-being. Good air quality helps you breathe easier, sleep better, and can even improve your overall mood. Many things can affect the air quality in your home, like dust, pet dander, and humidity. Continue reading to know how you can easily improve the air quality in your home, creating a healthier and more comfortable living environment.

Keep Your Home Clean

Keeping your home clean is a straightforward way to improve air quality. Dust, pet dander, and other particles can build up and circulate through the air, causing respiratory issues and allergies. Regular cleaning helps remove these pollutants and keeps your home’s air fresh.

Vacuuming is one of the most effective ways to reduce dust and dirt. Use a vacuum with a HEPA filter to trap tiny particles that other vacuums might miss. Vacuum all carpets, rugs, and upholstered furniture at least once a week. Don’t forget to vacuum under beds and other furniture where dust likes to hide.

Dusting is another important step. Use a damp cloth or microfiber duster to clean surfaces like shelves, countertops, and tables. Avoid using feather dusters, as they can spread dust around instead of capturing it. Clean your home’s air vents and ceiling fans regularly to prevent dust from circulating.

Wash your bedding and curtains frequently. These items can collect dust, pet hair, and other allergens. Washing them in hot water helps kill dust mites and remove allergens. If you have pets, groom them regularly to minimize the amount of dander they release into the air.

Keeping a clean home goes a long way in ensuring the air you breathe is healthy and free from harmful particles. Regular cleaning tasks like vacuuming, dusting, and washing linens make a noticeable difference in air quality.

Use Air Purifiers

Air purifiers are a great tool for improving the air quality in your home. They work by removing pollutants like dust, pollen, and pet dander, making the air cleaner and easier to breathe. This is especially helpful for people with allergies or asthma.

1. Choosing the Right Air Purifier: There are many types of air purifiers available. Look for one with a HEPA filter, as it can capture very small particles. Some air purifiers also come with activated carbon filters that help remove odors and chemicals from the air. Select an air purifier that matches the size of the room you’ll be using it in.

2. Proper Placement: Place the air purifier in the room where you spend the most time, such as the bedroom or living room. Ensure it’s not blocked by furniture or walls, as this can limit its effectiveness. It’s a good idea to keep doors and windows closed while the purifier is running to prevent new pollutants from entering.

3. Regular Maintenance: To keep your air purifier working well, change the filters regularly—usually every 6 to 12 months, depending on the manufacturer’s recommendations. Some air purifiers have indicator lights that tell you when it’s time to replace the filter.

Improve Ventilation

Improving ventilation in your home is an effective way to enhance air quality. Proper ventilation helps remove stale air and brings in fresh air, reducing the accumulation of pollutants.

1. Open Windows and Doors: One of the simplest ways to improve ventilation is to open your windows and doors regularly. Even just a few minutes a day can make a big difference. This allows fresh air to enter and pushes out old, stale air. Make sure to do this when outdoor air quality is good to avoid bringing in pollutants.

2. Use Exhaust Fans: Exhaust fans in the kitchen and bathroom help remove moisture, odors, and pollutants at the source. Turn on the exhaust fan while cooking to get rid of smoke and cooking smells. Use the bathroom fan during and after showers to get rid of humidity and prevent mold growth.

3. Maintain Your HVAC System: Your HVAC system plays a key role in ventilating your home. Make sure to change the air filters regularly and have the system inspected by a professional. Clean air filters help the system run efficiently and keep the air in your home clean.

Control Humidity Levels

Controlling humidity levels in your home is essential for maintaining good air quality. Too much humidity can lead to mold and mildew, while too little can cause dryness and irritation.

1. Use Dehumidifiers: Dehumidifiers are handy for removing excess moisture from the air. Place them in damp areas like basements or bathrooms to keep humidity levels in check. Aim for a humidity level between 30% and 50% for the best air quality.

2. Fix Leaks and Seal Gaps: Water leaks can add unwanted moisture to your home. Check for leaks in plumbing, roofs, and windows, and repair them promptly. Sealing gaps and cracks can also help prevent humidity from creeping in.

3. Monitor Humidity with Hygrometers: Hygrometers are small devices that measure humidity in the air. Place them in different rooms to monitor humidity levels. This helps you take action before humidity levels become too high or too low.

Conclusion

Improving your home’s air quality doesn’t have to be complicated. Simple steps like keeping your home clean, using air purifiers, improving ventilation, and controlling humidity levels can make a significant impact. Good air quality is essential for your health and well-being, and taking these measures ensures you and your family breathe cleaner, fresher air.

If you need professional help with improving your home’s air quality, look no further than My Jockey. We offer expert HVAC and air purification services that can keep your home comfortable and healthy. Get in touch with us today to learn more about our services and how we can help you maintain great air quality in your home.

Why Regular HVAC Maintenance Matters

HVAC maintenance

Regular HVAC maintenance is crucial for keeping your heating and cooling system running smoothly and efficiently. Just like a car, your HVAC system needs routine check-ups to perform at its best. When you neglect maintenance, small issues can turn into big problems, leading to costly repairs and uncomfortable indoor conditions.

Improved Energy Efficiency

Regular HVAC maintenance plays a significant role in improving your system’s energy efficiency. When your HVAC system is well-maintained, it doesn’t have to work as hard to heat or cool your home. This means it uses less energy, which translates to lower utility bills.

One of the main factors that affect efficiency is dirty or clogged filters. When filters are clean, air can flow freely through the system, allowing it to operate more effectively. Regularly checking and replacing filters can make a noticeable difference in energy consumption.

Another key aspect of maintenance is ensuring that all components are clean and in good condition. Dust and debris can accumulate in various parts of the system, such as the coils and ductwork. This buildup can hinder the system’s performance and force it to use more energy. Cleaning these components during routine maintenance can keep your system running smoothly and efficiently.

Finally, maintenance includes checking the thermostat settings and making sure they are optimized for your comfort and efficiency. Proper calibration can prevent the system from cycling too frequently, which also saves energy. By keeping everything in check, regular maintenance helps your HVAC system operate at its peak efficiency.

Extended Equipment Lifespan

A well-maintained HVAC system lasts longer. Regular maintenance can significantly extend the lifespan of your equipment, saving you from the expense of early replacement. Just like a car that gets regular oil changes and tune-ups, an HVAC system that receives proper care will serve you well for years.

Routine maintenance tasks, such as lubricating moving parts and tightening electrical connections, help prevent wear and tear. When parts can move freely and connections are secure, the system doesn’t have to strain to work. This reduces the overall stress on the equipment, allowing it to function smoothly.

Additionally, identifying and fixing small issues before they become major problems is key to preserving your HVAC system. During maintenance check-ups, a technician can spot signs of trouble, such as worn belts or refrigerant leaks. Addressing these issues early can prevent them from causing more significant damage, which could shorten the life of your system.

Lastly, regular maintenance helps ensure that your HVAC system is running at its optimal performance level. When the system doesn’t have to work harder than necessary, it experiences less wear and tear. This translates to fewer breakdowns and a longer service life. Keeping up with maintenance is an investment in the longevity of your HVAC equipment.

Better Indoor Air Quality

Regular HVAC maintenance has a significant impact on the quality of the air inside your home. Clean air filters and ducts play a crucial role in keeping indoor air free from dust, allergens, and pollutants. When these components are well-maintained, they trap contaminants more effectively, improving the overall air you breathe.

One important aspect of maintenance is inspecting and replacing air filters. Dirty filters can’t capture particles as efficiently, allowing dust and allergens to circulate throughout your home. Replacing filters regularly ensures that your system continues to operate effectively, promoting cleaner air.

Another critical part of maintaining good indoor air quality is cleaning the ductwork. Dust, mold, and other contaminants can build up in ducts over time. These pollutants can then be distributed throughout your home when the HVAC system is running. By having the ducts cleaned during routine maintenance, you reduce the risk of these harmful particles entering the air you breathe.

Lastly, a well-maintained HVAC system helps to control humidity levels in your home. Excess moisture can lead to mold growth, which can be harmful to your health. Regular maintenance ensures that your system is effectively dehumidifying the air, preventing mold and improving overall indoor air quality.

Prevent Costly Repairs

Regular HVAC maintenance can save you from the hassle and expense of unexpected repairs. Addressing small issues before they become major problems is key to avoiding costly breakdowns. This proactive approach helps keep your system running smoothly and prevents inconvenient and expensive emergency repairs.

During routine maintenance, a qualified technician can identify potential problems early on. They can check for worn parts, leaks, or other signs of trouble that, if left unattended, could lead to significant damage. By fixing these issues promptly, you can avoid the high costs associated with major repairs or system replacements.

Another way maintenance prevents costly repairs is by keeping your system running efficiently. An inefficient system has to work harder to achieve the desired temperature, which puts extra strain on its components. This increased wear and tear can lead to more frequent breakdowns and the need for expensive fixes. Regular maintenance ensures that your HVAC system is operating at peak efficiency, reducing the likelihood of these problems.

Furthermore, regular maintenance helps maintain the warranty on your HVAC equipment. Many manufacturers require proof of routine maintenance to honor warranty claims. By keeping up with maintenance, you protect yourself from the full cost of repairs that would otherwise be covered.

Conclusion

Regular HVAC maintenance is essential for the comfort and safety of your home. It improves energy efficiency, extending the lifespan of your equipment, and enhances indoor air quality. More importantly, it helps prevent costly repairs by catching problems early.

Taking the time to schedule regular maintenance can provide peace of mind, knowing that your HVAC system is in good working order. It’s an investment that pays off in the long run by saving you money on energy bills and avoiding unexpected breakdowns.

For residents in Saratoga Springs and The Capital Region, NY, My Jockey is here to help with all your HVAC maintenance needs. Don’t wait for problems to arise. Take proactive steps to ensure your system’s longevity and efficiency. Schedule your HVAC maintenance with My Jockey today and keep your home comfortable year-round.

Tips to Make Your Water Heater Last Longer

water heater

Keeping your water heater in good condition is essential for ensuring you always have hot water when you need it. A well-maintained water heater can last many years, saving you money on repairs and replacements. Simple steps, like regular maintenance and proper settings, can make a big difference.

Regular Maintenance Checks

Regular maintenance checks are crucial for extending the life of your water heater. By checking your water heater regularly, you can spot and fix small problems before they turn into big issues.

1. Inspect the Tank and Pipes: Look at the outside of the tank and the pipes. Check for rust, leaks, or any other signs of wear and tear. Small leaks can grow into big ones, so it’s important to catch them early.

2. Check the Anode Rod: The anode rod protects your water heater from rust. It attracts corrosive elements in the water, keeping them away from the tank. Over time, the rod wears out and needs to be replaced. Checking the anode rod every couple of years can make your water heater last much longer.

3. Test the Pressure Relief Valve: The pressure relief valve keeps the water heater from building up too much pressure. Lift the lever on the valve to make sure it works correctly. If water comes out when you lift the lever, it’s working fine. If not, it might need to be replaced.

Regular maintenance checks help keep your water heater running smoothly. Taking a little time to inspect different parts of the system can save you from costly repairs in the future.

Flushing the Tank Annually

Flushing the tank is an essential step in maintaining your water heater. Over time, sediment builds up at the bottom of the tank. This sediment can cause problems, like making your water heater less efficient or even causing damage to the tank.

1. Turn Off the Heater: Before you start, make sure the water heater is turned off. If you have an electric water heater, turn off the power at the circuit breaker. If you have a gas water heater, turn the thermostat to the “pilot” setting.

2. Connect a Hose: Attach a garden hose to the drain valve at the bottom of the tank. Run the other end of the hose to a safe place where the hot water can drain, like a floor drain or outside.

3. Drain the Tank: Open the valve to let the hot water and sediment drain out. Be careful, as the water will be hot. You can also open the pressure relief valve at the top of the tank to help the water drain faster.

4. Flush with Fresh Water: Once the tank is empty, close the valve and turn the cold water supply back on for a few minutes. This will rinse out any remaining sediment. Then close the drain valve, remove the hose, and turn the water heater back on.

Flushing the tank each year helps keep your water heater efficient and in good condition. Removing sediment buildup prevents damage and makes your water heater last longer. It’s a simple task that can make a big difference in the performance of your water heater.

Adjusting the Temperature Settings

Adjusting the temperature settings on your water heater can greatly impact its efficiency and lifespan. The ideal temperature setting is around 120°F. This temperature is hot enough to meet your needs while preventing the heating element from working harder than it should.

1. Locate the Thermostat: The thermostat is usually found on the front of the water heater. For electric heaters, there may be two thermostats—one for the top and one for the bottom heating element. Gas water heaters typically have a clearly labeled temperature dial.

2. Adjust the Temperature: Use a flathead screwdriver to turn the dial to the recommended 120°F. If you have a gas heater, simply turn the dial by hand. Setting the temperature too high can cause scalding and energy waste, while setting it too low might not provide enough hot water.

3. Check the Water Temperature: After adjusting the thermostat, check the temperature of the water at the tap. Allow it to run for a few minutes, then use a thermometer to test the temperature. Make sure it’s around 120°F, and adjust the settings if necessary.

Lowering the temperature setting reduces the strain on your water heater, helping it last longer. It also saves on energy costs and keeps your family safe from potential burns.

Insulating the Water Heater

Insulating your water heater is a simple way to improve efficiency and extend its lifespan. Insulation helps keep the heat inside the tank, so the water heater doesn’t have to work as hard to keep the water hot.

1. Get an Insulation Blanket: You can find insulation blankets at most hardware stores. Make sure to get one that fits the size of your water heater. These blankets are made from fiberglass and other heat-resistant materials.

2. Turn Off the Heater: Before you add insulation, turn off the water heater. For electric heaters, switch off the power at the circuit breaker. For gas heaters, turn the thermostat to the “pilot” setting.

3. Wrap the Tank: Wrap the insulation blanket around the tank, making sure not to block the controls, vents, or access panels. Use tape to secure the blanket in place. If you have an electric water heater, cut out spaces for the upper and lower thermostats.

4. Insulate the Pipes: While you’re at it, consider insulating the first few feet of the hot and cold water pipes. Pipe insulation is easy to install and can further improve efficiency.

Insulating your water heater and pipes helps maintain the water temperature, reducing the frequency of heating cycles. This not only saves energy but also lessens the wear and tear on the system, extending its lifespan.

Conclusion

Taking care of your water heater doesn’t have to be complicated. By following these simple tips, you can make sure your water heater runs efficiently and lasts longer. Regular maintenance checks, flushing the tank, adjusting the temperature settings, and insulating the tank are all easy tasks you can do to keep your water heater in the best condition possible.

When your water heater is well-maintained, you can enjoy reliable hot water without worrying about unexpected breakdowns or high energy bills. These small actions can add up to big savings and peace of mind over time.

If you need help with maintaining your water heater or have questions about your HVAC and plumbing systems, contact My Jockey today. Our expert team is here to provide heating and air conditioning services so you can keep your home comfortable and efficient all year round.

When to Know It’s Time for a New Furnace

furnace

Keeping your home warm and cozy is important, especially during the cold months. Your furnace plays a big role in making sure your home stays comfortable. But just like any other appliance, furnaces don’t last forever. Knowing when it’s time to replace your furnace can save you a lot of trouble and money.

Your furnace doesn’t usually fail all at once. Instead, it gives off signs that it’s nearing the end of its life. Spotting these signs early can help you avoid sudden breakdowns and the discomfort of a cold home. Plus, upgrading to a new, energy-efficient model can also save you money on your energy bills.

In this article, we’ll explore the signs that indicate it’s time for a new furnace. From frequent and costly repairs to inconsistent heating, we’ll cover everything you need to know. We’ll also look at how rising energy costs and unusual sounds can be warning signs. Understanding these indicators will help you make an informed decision about when to replace your furnace.

Signs Your Furnace Is Nearing the End of Its Lifespan

One of the first signs that your furnace is nearing the end of its lifespan is its age. Most furnaces last around 15 to 20 years. If your furnace is getting close to this age range, it might be time to start thinking about a replacement. Older models tend to be less efficient and more prone to breakdowns.

Another sign to look out for is an increase in odd noises. If your furnace starts making banging, rattling, or squealing sounds, it could be a sign that internal components are wearing out. These noises often indicate that parts are struggling to work together, which can lead to failures down the road.

You should also keep an eye on the color of the burner flame. A healthy furnace will have a steady blue flame. If the flame is yellow, it means the fuel isn’t burning completely, which can be a sign of a carbon monoxide leak. This is a serious issue and often signals that your furnace needs immediate attention or even replacement.

Lastly, look out for more dust, soot, or rust around the furnace or in the air. A failing furnace might not be burning fuel completely, leading to these deposits. This not only affects your indoor air quality but also indicates that your furnace may not be working efficiently anymore.

Frequent and Costly Repairs

Frequent and costly repairs are another clear sign that it might be time for a new furnace. If you find yourself calling the repair technician more often, these repair costs can add up quickly. Spending hundreds of dollars on repeated fixes is a good indicator that your current furnace is on its last legs.

When evaluating repair costs, consider the “50% rule.” If the cost of repairs is more than 50% of the cost of a new furnace, then it’s more economical to replace it. Continuously sinking money into an old furnace doesn’t make sense in the long run.

Take note of the frequency of service calls too. Needing repairs once a year is one thing, but multiple repairs in a single season are a red flag. This not only drains your finances but also suggests that your furnace is becoming less reliable and could fail when you need it most.

Also, pay attention to the type of problems you’re encountering. Some issues might be more severe and costly than others, such as problems with the heat exchanger or blower motor. These key components are expensive to replace, and if they fail, it might be better to put your money towards a new system instead.

By keeping track of how often and how much you spend on repairs, you can make a more informed decision about when it’s time to invest in a new furnace.

Inconsistent Heating and Rising Energy Bills

One of the most noticeable signs that your furnace is failing is inconsistent heating. If some rooms in your house are warm while others are cold, your furnace may be struggling to distribute heat evenly. This inconsistency often means that the furnace is losing its efficiency, requiring more energy to provide less warmth.

Rising energy bills are another indicator. An old or malfunctioning furnace has to work harder to maintain the desired temperature, which uses more energy and drives up your utility costs. If you notice a steady increase in your bills without a significant change in your usage, your furnace could be the culprit.

Pay attention to how long your furnace runs as well. If it seems like it’s running all the time or cycling on and off frequently, it may be on its last legs. A failing furnace can’t regulate home temperatures properly, which could lead to overworking and overheating. This not only increases your energy bills but also puts extra wear and tear on the system.

By monitoring these issues, you can identify when your furnace is no longer efficient and take steps to replace it, saving you both money and discomfort.

Safety Concerns and Unusual Noises

Safety should always be a top priority when evaluating your furnace. One major issue to watch out for is the presence of carbon monoxide, a colorless and odorless gas that can be fatal. Symptoms of a carbon monoxide leak may include dizziness, headaches, and flu-like symptoms. Detectors can alert you to the presence of this dangerous gas, but any signs of a leak should prompt immediate action and possibly a furnace replacement.

Other safety concerns include gas and burner issues. If you smell gas coming from your furnace, this could indicate a serious problem such as a gas leak. Turn off the furnace right away and call a professional to inspect the unit. Ignoring gas leaks can lead to dangerous situations like fires or explosions.

Unusual noises from your furnace are another red flag. Sounds like banging, rattling, or screeching often mean that internal parts are wearing out or have become loose. These noises can indicate various issues, such as motor or blower problems, which require immediate attention. Constant noise not only affects your comfort but could also put your safety at risk.

By paying attention to these safety concerns and unusual noises, you can ensure a safer home environment and decide when it’s time for a furnace replacement.

Conclusion

Knowing when to replace your furnace can save you a lot of time, money, and discomfort. From recognizing the signs that your furnace is nearing its end, to understanding the implications of frequent and costly repairs, inconsistency in heating, and safety concerns, these indicators are clear signals that it might be time for a new furnace. Keeping an eye on unusual noises and rising energy bills can provide additional clues that your furnace is no longer efficient or safe.

Don’t wait until your furnace fails completely. Addressing these issues early allows you to plan for a replacement without the stress of an emergency. A new, efficient furnace can keep your home warm and comfortable, reduce your energy bills, and provide peace of mind.

At My Jockey, we offer comprehensive HVAC and plumbing services to ensure your home stays safe and comfortable. If you’re experiencing any of these signs, it might be time to consider a new furnace. Schedule a consultation with My Jockey today and let us help you find the perfect solution for your home.

Easy Tips for Improving Air Quality at Home

exhaust fan

Breathing clean air is important for our health. The air inside our homes can sometimes be more polluted than outside air. Understanding what affects indoor air quality can help us make our homes healthier.

Many things can pollute indoor air, like dust, mold, pet dander, and chemicals from cleaning products. Poor air quality can cause allergies, asthma, and other health problems. Knowing what causes indoor air pollution is the first step in improving it.

In this article, we’ll explore different ways to improve the air inside your home. We’ll look at common indoor pollutants, how to ventilate your home properly, and the best air purifiers to use. You’ll also learn simple daily habits that can make a big difference. Let’s get started on making your home a healthier place to live!

Understanding Indoor Air Pollutants

Indoor air pollutants come from various sources around your home and can affect your health and comfort. Recognizing these pollutants is essential for creating a healthier living environment.

1. Dust and Pet Dander: Dust accumulates on surfaces and can be stirred up into the air. Pet dander, tiny flakes of skin from animals, also contributes to indoor air pollution. Both can trigger allergies and asthma.

2. Mold and Mildew: These thrive in damp places like bathrooms, basements, and around leaks. Mold spores can cause respiratory issues and other health problems when inhaled.

3. Volatile Organic Compounds (VOCs): VOCs are chemicals found in many household products, including paints, cleaners, and furniture. They can release harmful gases that cause headaches, dizziness, and long-term health effects.

4. Tobacco Smoke: Cigarette smoke contains numerous toxic chemicals that can linger in the air and on surfaces, posing significant health risks to both smokers and nonsmokers.

5. Pollen: Pollen from outdoor plants can enter your home through windows, doors, and on clothing. It can cause seasonal allergies and worsen indoor air quality.

Understanding these common pollutants helps us take steps to reduce their presence in our homes. By tackling the sources of these pollutants, you can create a cleaner, healthier indoor environment.

Effective Ways to Ventilate Your Home

Proper ventilation is key to maintaining good air quality. It helps remove stale air, reduce indoor pollutants, and bring in fresh air from outside. Here are some effective ways to ventilate your home:

1. Open Windows and Doors: One of the simplest ways to improve ventilation is by opening windows and doors. This allows fresh air to flow through your home and push out stale air. Try to do this regularly, especially when using cleaning products or cooking.

2. Use Exhaust Fans: Install exhaust fans in bathrooms and kitchens to remove moisture, odors, and pollutants. These fans help prevent mold growth by reducing humidity levels.

3. Install a Whole-House Ventilation System: For better control over indoor air quality, consider installing a whole-house ventilation system. These systems use fans and ducts to exchange indoor air with fresh outdoor air throughout the entire home.

4. Maintain Your HVAC System: Regular maintenance of your HVAC system ensures it runs efficiently and effectively. Change filters regularly and schedule annual check-ups to keep the system clean and functional.

5. Use an Air Exchanger: Air exchangers bring in fresh outdoor air while exhausting stale indoor air. They are especially useful in tightly sealed homes where natural ventilation may not be sufficient.

Proper ventilation not only improves air quality but also makes your home more comfortable. By following these tips, you can ensure a steady supply of fresh air and reduce the levels of indoor pollutants.

Choosing the Right Air Purifier

Selecting the right air purifier for your home can significantly improve indoor air quality. Here are some factors to consider when choosing an air purifier:

1. Type of Filter: The most common types of filters used in air purifiers are HEPA (High-Efficiency Particulate Air) filters and activated carbon filters. HEPA filters are excellent for removing dust, pollen, and pet dander, while activated carbon filters are effective at eliminating odors and chemical pollutants.

2. Room Size: Make sure to choose an air purifier that is suitable for the size of the room you want to clean. Check the Clean Air Delivery Rate (CADR) rating, which indicates the purifier’s capacity to filter airborne particles in a specific room size.

3. Noise Level: Consider the noise level of the air purifier, especially if it will be used in a bedroom or living room. Some models have a “quiet mode” which can be useful at night.

4. Energy Efficiency: Look for energy-efficient models to save on electricity costs. Air purifiers with the ENERGY STAR label meet strict energy efficiency guidelines.

5. Maintenance Requirements: Check how often filters need to be replaced and the cost of replacement filters. Some models have washable filters that can be reused, making them more cost-effective in the long run.

Choosing the right air purifier involves balancing these factors to meet your specific needs. A good air purifier can make a substantial difference in improving the air quality in your home.

Simple Daily Habits to Improve Air Quality

Improving air quality in your home can be as simple as adopting a few daily habits. Here are some easy steps you can take:

1. Keep Windows Closed During High Pollen Seasons: If you suffer from seasonal allergies, keep windows closed during high pollen seasons to prevent pollen from entering your home.

2. Vacuum and Dust Regularly: Dusting surfaces and vacuuming carpets and rugs can help reduce dust and pet dander. Use a vacuum cleaner with a HEPA filter for better results.

3. Avoid Using Scented Products: Scented candles, air fresheners, and cleaning products can release VOCs into the air. Opt for natural or unscented alternatives to reduce indoor pollutants.

4. Wash Bedding and Curtains Frequently: Bedding and curtains can collect dust and allergens. Wash them regularly to keep these pollutants at bay.

5. Use Exhaust Fans: Use exhaust fans in bathrooms and kitchens to remove moisture, odors, and pollutants. This helps reduce humidity and prevents mold growth.

6. Place Doormats at Entrances: Placing doormats at entrances can help trap dirt and prevent it from being tracked inside. Encourage family members and guests to wipe their feet before entering.

By incorporating these simple habits into your daily routine, you can significantly improve the air quality in your home. These small changes can have a big impact on your health and comfort.

Conclusion

Improving indoor air quality is a crucial step in making your home healthier and more comfortable. By understanding common indoor air pollutants and taking effective measures to ventilate your home, you can breathe cleaner air. Choosing the right air purifier and adopting simple daily habits can further enhance the air quality in your living space.

Taking these steps not only benefits your health but also contributes to the overall well-being of your family. Cleaner air means fewer allergens, reduced risk of respiratory issues, and a more pleasant home environment.

Ready to make your home a haven of clean air? Contact My Jockey for professional HVAC services that can help you achieve the best indoor air quality. Through air purification system installation, we can ensure your home remains comfortable and healthy all year round. Don’t wait—start breathing cleaner air today!

When Should You Replace Your Furnace?

Keeping your home warm during the cold months is essential for comfort and safety. Your furnace works hard to maintain a cozy environment, but like all appliances, it doesn’t last forever. Knowing when to replace your furnace is important to avoid unexpected breakdowns and high energy bills.

Many homeowners wonder if their furnace is still up to the job. You might notice your furnace isn’t heating as well, or maybe your energy bills are higher than usual. These can be signs that it’s time to start thinking about a replacement. A new furnace can save you money and provide better heating for your home.

Understanding the key signs that it might be time to replace your furnace can help you make an informed decision. Whether it’s age, efficiency, or repair costs, knowing what to look for can keep your home comfortable and warm. In this guide, we’ll explore the signs your furnace might need replacing, the benefits of a new unit, and what to consider when making this important choice.

Signs Your Furnace Needs Replacement

Knowing the signs that your furnace needs replacement can save you from a lot of stress and discomfort. Here are some clear indicators to watch for:

1. Inconsistent Heating: If different rooms in your home have varying temperatures, it might be due to your furnace not distributing heat evenly anymore. This inconsistency can make your home uncomfortable and is a sign that your furnace is struggling to do its job.

2. Frequent Repairs: If you find yourself calling for repairs more often, it might be more cost-effective to replace the furnace. Frequent breakdowns not only waste your money but also signal that your furnace is nearing the end of its lifespan.

3. Strange Noises: Unusual sounds like banging, rattling, or squealing indicate that something is wrong with your furnace. These noises often mean that internal components are wearing out and the furnace might soon fail altogether.

4. High Energy Bills: A sudden spike in your energy bills without a change in usage is a sign that your furnace is losing efficiency. As furnaces age, they need to work harder to heat your home, which uses more energy and increases your bills.

5. Yellow Burner Flame: The burner flame in your furnace should be blue. A yellow flame can indicate that the furnace isn’t burning fuel completely, which could mean carbon monoxide is present. This is a serious safety concern and a good reason to consider getting a new furnace.

Recognizing these signs early can help you avoid an unexpected furnace breakdown in the middle of winter.

Age and Efficiency of Your Furnace

The age and efficiency of your furnace play crucial roles in deciding when it’s time for a replacement:

Age of Your Furnace: A typical furnace lasts about 15 to 20 years. If your furnace is in this age range, it’s wise to start planning for a replacement. Older furnaces are less efficient and more prone to breakdowns. Even if your old furnace seems to be working fine, it may not be operating efficiently, which costs you more in the long run.

Efficiency Standards: Modern furnaces are designed to meet higher energy efficiency standards. The efficiency of a furnace is measured by its Annual Fuel Utilization Efficiency (AFUE) rating. Older furnaces may have an AFUE rating as low as 60-70%, meaning they convert only 60-70% of the fuel into heat, while the rest is wasted. Newer models have ratings of 90% or higher, providing more heat for each dollar spent on fuel.

Technological Advances: Newer furnaces come with advanced features that offer better performance and energy savings. Features like variable-speed blowers and two-stage heating provide more even heating and reduce energy consumption. Upgrading to a modern furnace can significantly lower your energy bills and improve your home’s comfort.

Considering the age and efficiency of your furnace is an essential step in determining whether it’s time for a replacement. Upgrading to a newer, more efficient model can offer cost savings and better performance, making it a wise investment for your home.

The Cost of Repairs vs. Replacement

Deciding between repairing or replacing your furnace involves weighing the costs. Here are some points to consider:

1. Frequent Repairs: If you find yourself repairing your furnace more than once or twice a year, it’s a sign that replacement might be a better option. Constant repairs add up quickly and can sometimes cost as much as a new furnace.

2. Repair Costs: Compare the cost of a single repair to the cost of a new furnace. A general rule of thumb is the $5000 rule: multiply the age of your furnace by the repair cost. If this number exceeds $5000, it’s probably time to replace the unit. For example, a 10-year-old furnace needing a $600 repair would give you a value of $6000, suggesting replacement is a better financial decision.

3. Energy Savings: New furnaces are more energy-efficient, which can lead to savings on your monthly utility bills. While the upfront cost of a new furnace is higher, the long-term savings on energy and repair costs often make it a smart investment.

Choosing to replace rather than repair can save you money and stress in the long run. Always consider the age of your furnace, the cost of repairs, and potential energy savings before making your decision.

Benefits of Upgrading Your Furnace

Upgrading your furnace offers numerous benefits that go beyond just keeping your home warm. Here are some compelling reasons to consider a new furnace:

1. Improved Energy Efficiency: New furnaces are designed to be highly efficient, with many models boasting AFUE ratings of 90% or higher. This means you’ll use less fuel to heat your home, resulting in lower energy bills and a smaller carbon footprint.

2. Enhanced Comfort: Modern furnaces feature advanced technologies like variable-speed blowers and two-stage heating, which provide more consistent and even heating throughout your home. No more cold spots or uneven temperatures!

3. Reliability and Peace of Mind: A new furnace is less likely to break down, giving you peace of mind during the coldest months. Many new units come with extended warranties, offering additional protection and reducing the cost of potential future repairs.

4. Smart Thermostat Compatibility: Upgrading your furnace means you can take advantage of the latest thermostat technology. Smart thermostats allow for greater control over your home’s temperature, even when you’re not at home, optimizing energy use and comfort.

5. Increased Home Value: A new, efficient furnace can increase the value of your home. Potential buyers will appreciate a modern, reliable heating system and may be more likely to choose your home over another.

By upgrading your furnace, you can enjoy a more comfortable home, lower energy bills, and the peace of mind that comes with a reliable heating system.

Conclusion

Deciding when to replace your furnace is crucial for maintaining a comfortable and efficient home. Watching for signs like frequent repairs, inconsistent heating, and high energy bills can help you make this important decision. Consider the age and efficiency of your furnace, and weigh the costs of repairs against the benefits of a new, modern unit.

A new furnace offers improved energy efficiency, enhanced comfort, and greater reliability. These benefits not only make your home more comfortable but also increase its value and reduce your energy bills. By taking the time to evaluate your current furnace and considering an upgrade, you can ensure a warm, comfortable home for years to come.

If you need help deciding whether it’s time to replace your furnace, reach out to My Jockey. Our team of experts is ready to assist you with all your HVAC needs, including heating and furnace installation. Contact My Jockey today for a consultation and ensure your home stays warm and efficient this winter.

Reduce Your Heating Bill This Winter

heating inspection

Winter can bring high heating bills, but there are simple ways to keep those costs down. Many homes lose heat through drafts and poor insulation, making your heater work harder than it needs to. By sealing cracks and adding insulation, you can keep the warm air inside and reduce your energy use. This not only saves money but also makes your home more comfortable.

The thermostat is another key player in managing heating costs. Many people don’t realize how powerful a tool it can be. By adjusting your thermostat settings and using a programmable model, you can maintain comfort without overspending. Small changes in how you set and use your thermostat can lead to big savings over time.

Keeping your HVAC system in top shape is also essential for reducing heating costs. Regular maintenance ensures that your system runs efficiently all winter long. This means fewer breakdowns and less energy wasted. Lastly, exploring alternative heating methods can provide additional savings and efficiency. By combining these strategies, you can lower your heating bills and enjoy a warm, cozy winter.

Seal Drafts and Insulate Properly

One of the easiest ways to reduce your heating bill is to seal drafts and insulate your home properly. Drafts can come from windows, doors, or even electrical outlets. To find drafts, walk around your home on a windy day and feel for any cool air coming in. You can use caulk or weatherstripping to seal these gaps. This simple step can make a big difference in keeping warm air inside your home.

Insulating your home is another crucial step. Insulation helps to keep the heat in during the winter and the cool air in during the summer. Check the insulation in your attic, walls, and floors. If it’s old or thin, consider adding more. There are different types of insulation, such as fiberglass batts, foam board, and blown-in insulation. Choose the type that best fits your needs and budget. By sealing drafts and insulating properly, you ensure your home stays warm without overworking your heating system.

Optimize Your Thermostat Settings

Your thermostat settings play a big role in how much you spend on heating. If you have a programmable thermostat, you can set it to lower the temperature when you’re asleep or not at home. This small change can lead to significant savings. A good rule of thumb is to lower the temperature by 10 to 15 degrees for eight hours a day to save about 10% on your heating bill.

Here are some tips to optimize your thermostat settings:

– Daytime: Keep the thermostat at a comfortable temperature when you’re home, around 68 degrees Fahrenheit.

– Nighttime: Lower the thermostat to about 60-65 degrees Fahrenheit while you sleep.

– Away From Home: Set the thermostat to a lower temperature when the house is empty.

Using these settings, you’ll save energy without sacrificing comfort. For even better results, consider a smart thermostat that learns your schedule and adjusts the temperature automatically. This way, you maximize efficiency and convenience, making it easier to keep your heating costs low.

Regular HVAC Maintenance

Keeping your HVAC system in peak condition is crucial for reducing your heating bill. A well-maintained system runs more efficiently, using less energy to heat your home. Schedule regular check-ups with a professional to make sure everything is working as it should. During these check-ups, technicians can clean and inspect parts like the furnace, heat exchanger, and filters.

Changing your HVAC filters regularly is also important. Dirty filters make your system work harder than necessary, wasting energy and money. Most filters should be changed every one to three months, depending on usage and type. Additionally, clean vents and ducts help ensure that the warm air can circulate freely throughout your home, improving overall efficiency.

Utilize Alternative Heating Methods

Exploring alternative heating methods can help lower your heating bills while keeping your home warm and cozy. Space heaters, for example, are great for heating small areas without turning up the thermostat for the entire house. Electric blankets and heated mattress pads can also provide warmth during the night without raising the overall temperature.

Consider using natural sunlight as a free heating source. Open curtains and blinds during the day to let the sun warm up your rooms. Close them at night to keep the heat in. You can also try using thermal curtains, which help to insulate your windows and keep out the cold air. Using these alternative methods effectively reduces reliance on your main heating system, cutting down on costs.

Conclusion

Cutting down on your heating bill this winter doesn’t have to be hard. By sealing drafts, insulating properly, optimizing your thermostat settings, and keeping up with regular HVAC maintenance, you can make a big difference. Additionally, exploring alternative heating methods can provide extra savings and efficiency.

These steps not only help you save money but also create a more comfortable and energy-efficient home. Living in the Saratoga Springs and Capital Region of NY, it’s essential to keep your home warm without breaking the bank.

For the best HVAC services in Saratoga Springs and Capital Region of NY, trust My Jockey. Contact us today to learn more about our HVAC and plumbing services that can help you save on your heating bill this winter.