Common Water Heater Issues Specific to Cold Climates

Water Heater

Cold climates can be particularly tough on water heaters, impacting their performance and longevity. When temperatures drop, ensuring a steady supply of hot water becomes crucial for comfort and daily living. The chill increases the demand on your heater, potentially leading to more frequent issues or even sudden failures if not properly managed.

Frozen pipes, fluctuating water temperatures, and increased energy consumption are just a few of the challenges homeowners face during winter. Understanding these common problems helps you prepare your water heating system to handle the cold. With careful planning and regular maintenance, you can prevent many of these winter woes and keep your water heater functioning efficiently.

Selecting the best water heater for cold climates, and knowing how to troubleshoot frequent issues, ensures you’ll always have the warmth you need. It’s essential to invest in the right equipment and follow preventive measures to safeguard your system against the harsh winter months.

Understanding the Impact of Cold Climates on Water Heaters

Cold climates pose specific challenges to water heaters, affecting their efficiency and operation. As temperatures drop, water heaters must work harder to heat incoming cold water, which can strain the system. This increased demand often reduces overall efficiency, leading to higher energy bills. An elevated workload also accelerates wear and tear, shortening the lifespan of the water heater.

Maintaining a consistent hot water supply during winter can be difficult. The time it takes for water to heat up from freezing temperatures delays the delivery of hot water. This might leave you waiting longer for your morning shower to heat up. Additionally, if your unit is underpowered for the colder months, it may struggle to keep water at a consistent temperature, causing fluctuations that are both inconvenient and uncomfortable.

There’s also a risk of increased wear and tear caused by the expansion and contraction of metal parts. When temperatures fluctuate rapidly, these components experience stress, which may lead to leaks or other mechanical failures. Furthermore, the buildup of sediment, particularly in hard water areas, can be exacerbated by fluctuating warm and cold cycles, causing more wear on internal components. Understanding these challenges is key to preparing and maintaining a water heater that operates efficiently in cold weather.

Common Problems Faced by Water Heaters in Cold Climates

Water heaters in cold climates often encounter several common issues that can disrupt daily routines. Here are some problems that frequently arise:

– Frozen Pipes: One of the most prevalent issues is frozen pipes. When water inside pipes freezes, it expands, leading to burst pipes and potential water damage.

– Pilot Light Problems: Another issue is with the pilot light. Cold air drafts or condensation can extinguish the flame, causing the heater to stop functioning.

– Sediment Build-Up: Cold climates can also contribute to faster sediment buildup. As water heaters cycle on and off more frequently, mineral deposits can settle at the bottom of the tank, reducing efficiency and heating capacity.

Fluctuations in water temperature can lead to more frequent breakdowns. When the temperature outside plummets, incoming water is colder, placing a larger load on the heating element. This not only increases the risk of mechanical failure but can also result in inconsistent hot water temperatures throughout your home.

Cold weather can also cause a significant spike in energy consumption as water heaters strive to meet the higher demand. This increase not only impacts utility bills but also the heater’s lifespan. Regular maintenance and preparation are essential to avoid these issues and ensure your water heater operates smoothly during the colder months.

Preventive Measures and Maintenance Tips for Winter

Preparing your water heater for winter is crucial to avoid disruptions and costly repairs. Following a few key steps can ensure your system runs smoothly all season long. Start by insulating exposed pipes to prevent them from freezing. This simple measure keeps water flowing and helps maintain efficiency. Foam pipe insulation is affordable and easy to install, making it an effective first step against the cold.

Creating a winter-prep checklist for your water heater can be beneficial:

1. Inspect and Insulate Pipes: Look for exposed pipes and add insulation where needed.

2. Check the Anode Rod: This component prevents tank corrosion and should be checked annually.

3. Flush the Tank: Remove sediment buildup to improve efficiency.

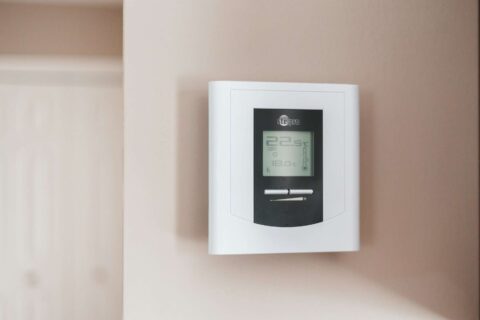
4. Test the Thermostat: Ensure it’s set to a consistent temperature to avoid unnecessary strain on the unit.

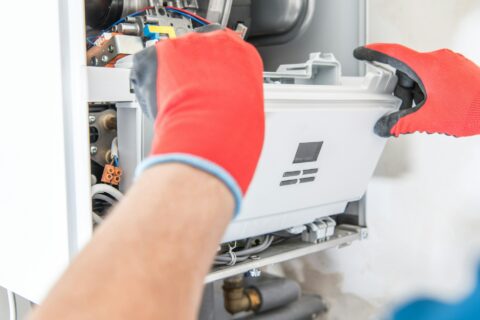
5. Schedule a Professional Inspection: A qualified technician can identify potential issues before they become problems.

Regular professional maintenance checks are vital for prolonging the lifespan of your water heater. Technicians can spot and fix minor issues before they escalate, saving you from unexpected costs and helping to ensure your home remains comfortable throughout the winter.

Choosing the Right Water Heater for Cold Climates

Selecting the correct water heater is essential when living in a cold climate. Both tanked and tankless models have their advantages and limitations in such environments. Tanked water heaters are typically insulated, allowing them to maintain warmth even in colder temperatures, but they may struggle with efficiency and space.

Tankless water heaters, which heat water as needed, can be energy efficient but may require additional insulation or backup measures in extreme cold. This choice is ideal if your home cannot accommodate a large tank.

Indirect water heaters and combi boilers are also excellent options for cold climates. Indirect models use your boiler or furnace to heat water, which can be very energy-efficient in cold temperatures. Combi boilers, combining heating and hot water functions, are efficient and save space.

When choosing a water heater, consider your home’s size, water usage, and budget. High-efficiency models with robust insulation or additional heating features are often best suited for cold climates.

Conclusion

Cold climates present unique challenges for maintaining an efficient and reliable hot water supply. Understanding these issues and implementing preventive measures can keep your system running smoothly, avoiding unexpected disruptions. Whether you’re dealing with common problems like frozen pipes or considering upgrading your system, preparation is key to ensuring comfort during the winter months.

For those considering a new water heater, it’s important to weigh the benefits of different models and select one that fits the specific demands of cold environments. Making the right choice can save on energy costs and minimize the risk of frequent repairs.

At My Jockey, we’re committed to helping you find the best heating solutions for your home. Our team of experienced professionals is ready to provide expert advice and quality service to ensure your water heater is winter-ready. Contact us today to schedule a consultation or learn more about how our water heater services can help you maintain a warm and cozy home throughout the year.

Everyday Tips to Maintain Your Furnace’s Efficiency

Thermostat Settings

A well-maintained furnace plays a crucial role in keeping your home warm and cozy during cold months. Efficient furnaces not only provide consistent heat but also help manage energy costs, making them an essential part of home comfort. By paying attention to simple maintenance tasks and optimizing your thermostat settings, you can ensure that your furnace runs smoothly throughout the winter.

Furnace efficiency affects how effectively your system converts fuel into heat, which directly impacts your utility bills. A more efficient furnace uses less fuel to produce the same amount of warmth, saving you money and reducing your environmental footprint. Everyday habits and regular checks can help maintain this efficiency, ensuring your system doesn’t work harder than it needs to.

Understanding how your furnace works and recognizing when it’s not performing at its best can prevent costly repairs and unexpected breakdowns. By implementing a few straightforward tips and staying aware of your furnace’s condition, you can enjoy a toasty home while keeping your heating system in top shape all season long.

Understanding Furnace Efficiency

Furnace efficiency is a measure of how effectively your heating system converts fuel into usable heat. It’s expressed as a percentage, known as the Annual Fuel Utilization Efficiency (AFUE) rating. A higher AFUE means your furnace is better at converting energy into heat, which means you spend less on fuel costs and more on keeping your home warm. This efficiency is crucial because a furnace with a high AFUE reduces energy waste, lowers utility bills, and provides consistent comfort throughout your living space.

Efficiency impacts much more than your heating bills. A furnace running at peak efficiency keeps your home evenly heated, preventing cold spots or significant temperature fluctuations. This balanced warmth enhances comfort and reduces strain on the furnace itself, extending its lifespan and reducing the likelihood of costly repairs.

Several factors can affect furnace efficiency. Age is one major factor; older furnaces generally have lower AFUE ratings than newer models. Regular use without proper maintenance can reduce performance, as can blocked air filters or obstructed ducts. Improvements in technology also mean that newer systems are inherently more efficient. By understanding these factors, homeowners can take steps to maintain their furnace’s efficiency year after year.

Regular Maintenance Tasks

Maintaining your furnace doesn’t have to be a complex task. With a little attention and regular upkeep, you can help ensure that your heating system runs efficiently. Here’s a checklist of everyday maintenance tasks that families can perform to keep their furnace in top condition:

1. Change Air Filters Regularly: A clogged filter restricts airflow, causing the furnace to work harder. Replace it every 1-3 months.

2. Inspect and Clean Ducts: Dust and debris in ducts reduce efficiency. Check and clean them periodically to ensure smooth airflow.

3. Check the Thermostat Settings: Make sure the thermostat is set correctly, and replace batteries as needed.

4. Examine Furnace Vents and Exhaust Pipes: Ensure they are clear of obstructions that may lead to carbon monoxide buildup.

5. Schedule Annual Professional Inspections: Regular professional tune-ups can catch small issues before they become significant problems.

Each of these tasks contributes to maintaining furnace efficiency by ensuring proper airflow, maximizing heating output, and identifying potential issues early. Regular maintenance can help prevent unexpected breakdowns and preserve the system’s longevity, keeping your home comfortable for years to come.

Optimizing Thermostat Usage

Thermostats play a huge role in managing your furnace’s efficiency. By controlling when and how intensely your furnace operates, thermostats can have a big impact on energy consumption. To maximize efficiency, keep the temperature consistent when you’re home and lower it when you’re away or asleep. A few degrees’ difference can substantially reduce energy use without sacrificing comfort.

Programmable and smart thermostats take temperature management to another level. They allow you to set schedules based on your daily routine, automatically adjusting the temperature to save energy when you don’t need as much heat. Smart thermostats also learn your preferences and can be controlled remotely via your smartphone, offering convenience and enhanced control over your home’s climate.

Some tips for optimizing thermostat use include setting a baseline temperature that feels comfortable for you and your family. When leaving the house or going to bed, drop the temperature by about 7-10 degrees to reduce energy use. Make sure your thermostat is located away from drafts or direct sunlight to ensure it gets an accurate reading of your home’s temperature. Following these strategies will optimize your furnace’s efficiency, reduce energy waste, and cut down on heating costs.

Identifying Efficiency Red Flags

Recognizing the signs that your furnace isn’t operating efficiently can prevent bigger problems. Some red flags include rising energy bills despite stable usage, uneven heating throughout the house, and short cycling, where the furnace turns on and off more frequently than usual. Additionally, strange noises like banging or rattling point to potential issues inside the unit.

These problems can have various causes, such as clogged filters, malfunctioning thermostats, or failing components. Ignoring these issues can lead to further inefficiency and costly repairs. When these signs appear, it’s crucial to address them promptly.

Scheduling regular professional inspections is key to catching these red flags early. During a tune-up, a technician will clean and calibrate your system, spot worn or faulty parts, and provide solutions to enhance efficiency. This preventive maintenance can keep your furnace running smoothly and extend its lifespan, ensuring a comfortable home environment.

Conclusion

Taking steps to maintain your furnace’s efficiency is vital for a warm and cost-effective home. By understanding how your furnace works, performing regular maintenance tasks, using your thermostat wisely, and knowing the warning signs of inefficiency, you ensure a reliable heating system. Simple actions like cleaning air filters, checking thermostat settings, and scheduling professional inspections can vastly improve your furnace’s performance, lower energy bills, and prevent future issues. It’s all about being proactive, attentive, and informed.

At My Jockey, we’re committed to helping you maintain comfort in your home with expert heating furnace installation and other services tailored to your needs. Whether it’s routine maintenance or a more complex repair, our team is here to support you. Reach out to us today to ensure your furnace stays in top shape and keeps your family warm all season long.

How to Ensure Your Heating System Is Ready for Winter

heating system cleaning

As the days grow colder, making sure your heating system is prepared for winter becomes a top priority. Having a reliable system is key to keeping your home warm and comfortable through the frosty months. A little preparation can help avoid costly breakdowns and ensure your heating works when you need it most.

Start by inspecting your heating system to catch any potential problems before they escalate. Checking crucial areas like filters, vents, and thermostats can help maintain efficient performance. Regular maintenance tasks, such as cleaning and replacing parts, keep your system running smoothly and extend its lifespan.

Sometimes, older systems might need an upgrade to handle the demands of the winter season. Newer technologies and high-efficiency models offer improved performance and energy savings. By planning ahead and preparing your heating system, you can enjoy a cozy home all winter long.

Inspecting Your Heating System Before Winter Hits

Preparing your heating system for winter begins with a thorough inspection. This process is crucial because it helps identify potential problems before they disrupt your comfort during the cold months. Catching issues early can save money on repairs and avoid sudden breakdowns.

Start with basic components like filters, which need to be clean to ensure efficient air flow. Dirty filters can restrict air movement and make your system work harder than necessary. Next, check the vents and ducts to ensure there are no blockages. Blocked vents can prevent the warm air from reaching all areas of your home effectively.

Thermostats also play a significant role. Make sure they are properly calibrated and functioning to maintain a consistent temperature. An incorrect thermostat setting could cause your system to cycle on and off more frequently, leading to increased wear and tear.

While a self-check can identify visible issues, a professional inspection offers deeper insights. Experts have the tools and knowledge to spot hidden problems that might not be obvious. Professional inspections also involve checking electrical connections and inspecting heat exchangers for cracks, which can be safety hazards. Investing in a professional inspection ensures that your heating system operates efficiently, providing peace of mind throughout the winter.

Essential Maintenance Tasks for Winter Readiness

Performing essential maintenance tasks is key to keeping your heating system ready for winter. By sticking to a regular maintenance schedule, you can help ensure that your heating unit performs at its best and lasts longer.

Here’s a checklist of crucial maintenance tasks to consider:

1. Clean and Replace Filters: Dirty filters reduce airflow and affect your system’s efficiency. Replace them every 1-3 months depending on usage.

2. Inspect and Clean Ducts: Dust and debris can accumulate inside ducts. Professional cleaning can improve air quality and system efficiency.

3. Check Thermostat Settings: Make sure your thermostat is set to a comfortable and energy-saving level.

4. Lubricate Moving Parts: Proper lubrication reduces friction, preventing wear and tear on components. Focus on fan motors and other moving parts.

5. Clear Vents of Blockages: Ensure furniture or drapes are not obstructing vents, which maximizes airflow.

Testing for system efficiency is another important step. When your system works properly, it uses less energy, saving money on utility bills. Efficiency tests might include checking for leaks in the ductwork and ensuring electrical connections are secure.

Regular tune-ups and maintenance help to keep your system running optimally. If you follow this checklist and address any issues promptly, your heating system will be well-prepared to tackle the cold weather ahead.

Upgrading or Replacing Outdated Equipment

If your heating system frequently needs repairs or struggles to maintain a consistent temperature, it might be time to consider an upgrade. Constant issues can indicate that your system is nearing the end of its useful life. Older units often become less efficient and cost more to operate, which makes upgrading a smart choice for long-term savings.

Newer heating technologies, like smart thermostats, offer several advantages. These devices allow you to control your home’s environment remotely, optimizing comfort and energy use. High-efficiency models, such as modern furnaces and boilers, convert more energy into heat with less waste, which can significantly lower utility bills.

When deciding whether to repair or replace your heating system, consider its age and overall condition. Systems nearing 15-20 years old may benefit more from a replacement. Weigh the repair costs against the expense and efficiency gains of a new system. An energy audit can also help determine if an upgrade will enhance your home’s overall efficiency.

With plenty of efficient heating options available, investing in a new system can ensure reliable performance during winter. It’s important to choose equipment that meets your needs and fits your budget, while reducing energy consumption and enhancing comfort.

Preparing for Unexpected Heating Emergencies

No matter how well you maintain your heating system, unexpected issues can still arise, especially in harsh winter conditions. It’s wise to have a plan in place to address these emergencies promptly and effectively.

Begin by creating a backup plan for heating your home. Portable space heaters can serve as temporary solutions, and enough blankets and warm clothing can help you stay comfortable until the issue is resolved. It’s also beneficial to know basic troubleshooting steps, like checking your thermostat settings or ensuring power to your system, to quickly address minor faults.

If your heating system fails, it’s essential to act quickly to prevent further damage or discomfort. Ensure that you have the contact information for professional emergency repair services. These experts can diagnose and fix problems swiftly, restoring warmth to your home.

Staying informed about the potential risks and knowing what actions to take can turn a stressful situation into a manageable one. By preparing for the unexpected, you can minimize the impact on your home and family.

Conclusion

Ensuring that your heating system is ready for winter requires a proactive approach. Regular inspections, timely maintenance, and being prepared for emergencies are key components in maintaining a reliable heating system. By staying on top of these tasks, you can keep your home warm and cozy throughout the colder months.

Choosing to upgrade or replace your heating equipment when necessary can also lead to enhanced efficiency and lower energy bills. Understanding the technology options available can guide you toward smarter choices that suit your household needs.

Creating a cozy and energy-efficient home environment during winter begins with planning. Following the steps outlined ensures that your heating system is not only ready to face the challenges of the cold season, but also operates at its best.

Stay comfortable and worry-free this winter by getting your heating system checked and tuned for peak performance. Contact My Jockey for expert heating service and repair that ensures your system is winter-ready, efficient, and reliable. Let us help you keep your home warm and safe, no matter how cold it gets outside!

Homeowner’s Guide to Emergency Furnace Repairs

Furnace Repair

When the chill of winter sets in, a functioning furnace is essential for keeping your home warm and cozy. But what happens when your furnace suddenly stops working? Emergencies can happen at any time, and being prepared is key to quickly resolving issues without undue stress. Understanding the basic signs of furnace trouble and knowing how to respond can make all the difference in maintaining a comfortable environment in your home.

Furnace problems often give warning signs before a complete breakdown occurs. Odd noises, strange odors, or inconsistent heating can all indicate that something might be amiss. By recognizing these signals early, you can take steps to address the issues before they escalate into full-blown emergencies. Whether it’s a quick fix you can handle yourself or a situation that requires professional attention, being informed helps you make the best decisions for your household.

Safety should always be a priority during any furnace malfunction. Knowing what precautions to take during an emergency ensures your family’s well-being while you sort out the problem. Paired with the right repair service, these efforts will help keep your home safe and snug throughout the winter months.

Recognizing Signs of Furnace Trouble

Being able to identify the early signs of furnace trouble can help you tackle issues before they turn into major problems. Common warning signs often include unusual noises, such as banging, clanking, or screeching. These sounds can indicate loose or worn components that need immediate attention. Ignoring these noises can lead to bigger, costlier issues down the line.

A furnace that gives off strange odors is another red flag. A burning smell might simply mean dust is settling, but if the odor is persistent or smells like gas or oil, it’s important to contact a professional right away, as it could signal a leak. Additionally, inconsistent heating throughout your home is a sign that your furnace might be struggling to distribute heat evenly. Cold spots in rooms or an inability to reach the thermostat’s set temperature indicate potential furnace malfunctions.

Spotting these issues early is crucial to preventing emergency repairs. When you catch problems quickly, you not only save on repair costs but also keep your home comfortable and safe. Regular furnace check-ups can help catch these warning signs before they escalate, ensuring your heating system runs smoothly throughout the winter.

Quick Troubleshooting Tips for Homeowners

When your furnace starts acting up, a few quick troubleshooting steps can often resolve minor issues without the need for professional intervention. Here’s a simple checklist to get you started:

1. Check the Thermostat: Ensure it’s set to the desired temperature and switched to “heat” mode. Low batteries or incorrect settings can cause malfunctions.

2. Inspect the Power Supply: Verify that the furnace is securely plugged in and that the circuit breaker hasn’t tripped. Without power, your furnace can’t function.

3. Examine Air Filters: Dirty or clogged filters reduce airflow, causing the system to overwork and potentially shut down.

4. Clear Vents and Registers: Make sure vents are open and unobstructed, so warm air can circulate freely in your home.

5. Listen for Strange Noises: While some sounds are normal, unusual ones could indicate debris or mechanical problems needing attention.

If the furnace doesn’t respond after trying these steps, it might be time to call in a professional. Problems like ignition issues or gas line concerns require specialized expertise, as attempting a DIY fix could be dangerous. Knowing when to switch from home fixes to seeking help keeps your home safe and warm while avoiding unnecessary risks.

Safety Precautions During Furnace Emergencies

During a furnace emergency, safety should always be your top priority. Knowing the right steps to take can protect both your home and your family. First, if you suspect a gas leak, turn off the furnace immediately and exit your home. Locate the gas shut-off valve and turn it off before evacuating. The smell of rotten eggs is a clear indication of a possible leak. Avoid using any electrical switches or appliances to prevent sparks that could ignite the gas.

Once you are safely out, contact emergency services and your gas company to report the situation. When dealing with any kind of furnace malfunction, it’s essential to not attempt repairs yourself, especially if electrical components or gas are involved.

Ensure you have working carbon monoxide detectors installed in your home. They are vital for alerting you to dangerous gas levels. Regularly check that the detectors are powered and functioning properly. Keep emergency contact numbers handy, such as your furnace technician, the gas company, and emergency services, to expedite assistance when needed.

By following these precautions, you help keep your home safe while waiting for professional help. Safety measures ensure that emergencies are handled efficiently without putting anyone at risk.

Choosing the Right Emergency Furnace Repair Service

When your furnace breaks down, you need to act fast to restore warmth and safety to your home. Selecting the right emergency furnace repair service is crucial. Start by considering their response time. In emergency situations, quick service can make a significant difference, so choose a company known for its swift response.

Expertise and certification are other important factors. Certified professionals have the knowledge and skills needed to tackle a wide range of furnace issues, ensuring effective and safe repairs. Check for reviews and testimonials to gauge the reliability and performance of potential service providers.

When the repair team arrives, you can expect them to assess the problem thoroughly before offering solutions. A reputable service should clearly explain the issue and what needs to be done, providing upfront cost estimates without any hidden fees.

With the right repair service, you gain peace of mind knowing that your furnace is in good hands. Their expertise and reliability get your heating system back on track with minimal hassle.

Conclusion

Furnace emergencies can be daunting, especially during the chilly months when heating is essential. By learning to recognize the warning signs and performing simple troubleshooting, you can prevent these emergencies from turning into major repairs. Staying informed about safety precautions is vital to handling any malfunctions safely. With proper planning, including choosing the right repair service, you ensure that your furnace operates efficiently when you need it most.

If you’re dealing with furnace troubles or want to be prepared, My Jockey is here to help. Our expert team offers fast and reliable emergency heating services, ensuring your home stays warm and safe. Reach out to us today to safeguard your comfort with professional and effective solutions.

Selecting the Ideal Sediment Filter for Your Home

water filtration system

Keeping your home’s water clean and debris-free is crucial for maintaining the health and efficiency of your plumbing system. Sediment filters are designed to catch particles like sand, silt, and rust before they reach your appliances and fixtures. This preserves their longevity and ensures you have clear, high-quality water every day.

Choosing the ideal sediment filter means considering several factors, such as filter type, size, and maintenance needs. The right filter can make a big difference in your water quality and the lifespan of your home’s plumbing system. Let’s explore how you can select the best sediment filter for your specific needs.

Understanding the Role of Sediment Filters

Sediment filters are crucial in keeping your home’s water clean and safe. As water flows through, these filters trap particles like dirt, sand, rust, and other debris. By removing these unwanted particles, sediment filters help protect your plumbing and appliances from damage. This is especially important because sediments can scratch and clog your pipes, reducing their efficiency and lifespan.

Sediment filters improve water quality by ensuring the water reaching your faucets is clear and tastes better. In areas where water contains high levels of sediment, such as from rivers or wells, these filters become even more valuable. They not only prevent sediments from damaging your plumbing but also safeguard your washing machines, dishwashers, and water heaters, prolonging their life.

Sediment filters are a must-have in regions with hard or dirty water. Hard water contains more minerals, which can lead to significant sediment buildup. By installing a sediment filter, you avoid common issues like mineral deposits on dishes and water fixtures and reduce the wear and tear on your plumbing system. With fewer breakdowns and more reliable water flow, sediment filters are essential to maintaining a healthy home environment.

Types of Sediment Filters and Their Differences

Various sediment filters are available, each suited to different household needs. The three most common types are spin-down, cartridge, and backwash filters.

1. Spin-Down Filters

These filters are ideal for removing large particles. They work by spinning the water around, which pushes the bigger debris to the sides. This type of filter is easy to clean, as you just need to open a valve to flush out the collected sediment. However, they may not be as effective for smaller particles.

2. Cartridge Filters

Cartridge filters are great for capturing smaller sediments. They contain replaceable cartridges that filter out fine debris. These filters are easy to replace and ideal for homes with moderate sediment levels. A drawback is the recurring cost of replacing cartridges.

3. Backwash Filters

Backwash filters are robust systems that reverse water flow to clean out sediment. These are great for whole-house filtration and require little maintenance besides periodic backwashing. However, they can be more expensive upfront and may need professional installation.

When considering which filter to choose, consider your area’s water quality and your specific household needs. Spin-down filters work well where large particles are common, while cartridge filters suit places with finer sediment. Backwash filters are ideal for homes that need comprehensive sediment removal. Understanding the types of filters helps you make an informed decision that ensures clean, safe water for your home.

Factors to Consider When Choosing a Sediment Filter

Selecting the right sediment filter involves understanding several important factors that impact its performance and suitability for your home. First, consider the micron rating, which measures the size of particles a filter can trap. Lower micron ratings capture smaller particles, providing more thorough filtration. Choose a lower micron rating if your water source has high fine sediments.

Flow rate is another crucial consideration, indicating how much water a filter can process. Filters with higher flow rates are ideal for larger households to ensure that water pressure remains consistent when multiple fixtures are in use. However, keep in mind that higher flow rates may reduce filtration effectiveness.

The lifespan of the filter is also essential. A longer-lasting filter might cost more upfront but can save money and effort over time by reducing the frequency of replacements. Evaluate how easy it is to access and replace the filter, as this could influence your choice if you plan on undertaking maintenance yourself.

Additionally, installation requirements and compatibility with existing plumbing systems should be considered. Some filters may require professional help for installation, adding to overall costs. Finally, evaluate your household size and water usage patterns. Larger families typically use more water, affecting both the choice and lifespan of the filter you opt for.

Maintaining Your Sediment Filter for Long-Term Efficiency

Proper maintenance of your sediment filter is key to ensuring it works efficiently and lasts longer. Begin by setting a regular maintenance schedule based on the manufacturer’s guidelines and your household’s water usage. Consistent upkeep helps avoid clogs and ensures clean water flows through your system without interruption.

Cleaning or replacing the filter cartridges is an important maintenance task. For cartridge filters, this usually means swapping out the old cartridge for a new one every few months. Spin-down filters may require you to open the drain valve to flush out collected sediments periodically. Ensure you have basic tools like wrenches or pliers for these jobs, as they will make the process easier.

Regular maintenance also involves checking for leaks or damage to the filter housing. This can prevent costly water damage and ensure that the system functions properly. When repairs or replacements are beyond your capability, it might be time to call a professional.

Professional services can provide thorough inspections and maintenance, ensuring the filter is in excellent condition. They can also assist with more complicated tasks like backwashing in large systems. Keeping your sediment filter in top shape ensures it protects your plumbing and maintains superior water quality.

Conclusion

Choosing and maintaining the right sediment filter for your home is essential for protecting your plumbing and ensuring clean, clear water. By understanding the different types of filters, their strengths, and the key factors important in selecting one, you equip yourself to make a long-term decision that benefits your household. Maintaining your filter with regular cleaning and timely replacements ensures optimal performance and longevity of your system.

If you’re ready to improve your home’s water quality, let My Jockey help you with top-quality sediment filter and water heater services. Our expert team is here to ensure your system runs smoothly and efficiently. Reach out to us today for more information and take the first step toward cleaner water in your home!

Best Practices for Installing a New Heater

heater installation

Installing a new heater in your home can be rewarding, ensuring comfort during cold seasons. However, choosing the right heater and understanding the installation process can be tricky without the right knowledge. Whether it’s a furnace, water heater, or combination boiler, each type has unique benefits for different household needs.

This guide aims to simplify the process, highlighting best practices for installing a heater. With clear steps and useful tips, you’ll be equipped to handle this task easily while ensuring your home remains cozy and warm.

Choosing the Right Type of Heater

Selecting the right heater for your home is important to ensure comfort and efficiency. Different heaters serve different needs, so understanding the options can help you make the best choice. Furnaces are popular for whole-home heating, using forced air systems to distribute heat. They are ideal for larger homes needing consistent warmth across multiple rooms.

Tanked water heaters store a large amount of hot water, making them great for families with high hot water demands. They provide a stable supply but may consume more energy due to constant heating. On the other hand, tankless water heaters heat water on demand, leading to lower energy consumption. They’re suitable for smaller homes or those seeking energy efficiency.

Combi boilers combine water heating and central heating in one unit. They’re compact and efficient, perfect for smaller spaces. Meanwhile, indirect water heaters use your home’s existing furnace or boiler to heat water. This option is good for regions with long, cold winters, offering a consistent hot water supply.

To choose the right heater, consider your household size, energy needs, and available space. Evaluate your daily usage patterns and prioritize what’s most important, such as energy efficiency or capacity. By aligning these factors, you can select a heater that fits your lifestyle and keeps your home cozy.

Preparing Your Home for Installation

Preparing your home properly before installing a new heater ensures a smooth process. Start by clearing the area where the heater will be installed. This provides easy access for installation and reduces the risk of damage to surrounding objects. Measure the space to confirm that the new unit will fit appropriately.

Check that the area has proper ventilation, especially if installing a gas-powered system. Adequate ventilation prevents dangerous buildup of exhaust gases. It’s also a good idea to assess your current ductwork or piping, ensuring they’re in good condition and compatible with the new heater.

Permits and inspections might be necessary before installation. These ensure the installation meets local building codes and safety regulations. Contact your local government or a licensed technician to determine if you need specific documentation. Arranging these permits ahead of time can prevent delays during the installation process.

Additionally, consider having a professional inspection of your electrical and plumbing systems. This helps identify any potential issues that could affect the performance of your new heater. Addressing these concerns proactively saves time and prevents costly repairs later on. By thoroughly preparing your home, you pave the way for a trouble-free installation and long-term efficiency.

Installation Process and Key Considerations

Installing a new heater requires careful attention to detail and adherence to safety protocols. Review the manufacturer’s instructions; each heater type may have specific requirements. This is crucial to ensure the installation is correct and the warranty is maintained.

First, confirm that the heater’s location is suitable and has enough clearance from walls or other obstacles. Proper placement enhances efficiency and safety. For gas heaters, connect the gas supply following safety guidelines and check for leaks using soapy water on connections. For electric heaters, ensure the electrical connections are secure and grounded, adhering to local codes.

During installation, prioritize safety by wearing protective gear like gloves and goggles, especially when handling gas or electrical components. It’s also vital to ensure that power and gas supplies are turned off before installation.

Energy efficiency is another important factor. Installations positioned closer to the points of use, like kitchens and bathrooms, minimize heat loss from pipes. Also, insulation should be added to water pipes to maintain water temperature and reduce energy consumption.

Once installed, test the heater by turning it on and monitoring its performance. Watch for unusual noises or leaks, and ensure the thermostat functions correctly. Address any concerns immediately to prevent future issues. Installing a new heater with these considerations in mind maximizes safety and efficiency, delivering consistent comfort.

Post-Installation Tips and Maintenance

Once your new heater is up and running, a few simple checks can ensure everything is performing perfectly. Start with a checklist right after installation:

– Confirm that all connections, whether gas or electrical, are secure and leak-free.

– Check the thermostat settings to verify they’re working as expected.

– Inspect for unusual noises or vibrations, which might indicate installation issues.

– Ensure proper airflow and no obstructions around the heater.

Regular maintenance is key to extending the life and efficiency of your heater. Schedule a professional tune-up annually to inspect essential components and clean the system. For water heaters, consider flushing the tank once a year to remove sediment build-up, which can affect performance.

Change or clean air filters regularly, typically every 1–3 months, to improve airflow and efficiency. This is essential for furnaces and HVAC systems. Also, keep vents and ducts clear of dust and debris to ensure optimal circulation.

Finally, monitor your energy bills; a sudden spike could indicate an issue with your heater’s efficiency. By following these maintenance tips, you can ensure that your heater continues to provide warmth and comfort efficiently.

Conclusion

Efficiently installing a new heater involves understanding the type needed, preparing your home, and carefully carrying out the installation. Regular maintenance checks play a significant role in keeping your heating system running smoothly over the years. By following these practices, you enhance comfort and optimize energy use, which can lead to long-term savings.

My Jockey is ready to provide expert water heater services for your heating needs. Our team can guide you through selecting the right heater, ensuring its proper installation, and maintaining it for years of reliable service. Reach out today to ensure your home remains warm and inviting all winter.

Benefits of Tanked vs. Tankless Water Heaters for Your Home

water heater

Choosing the right water heater ensures your home’s steady hot water supply. The main types are tanked and tankless, offering unique benefits tailored to different needs. Whether you’re considering efficiency, space, or budget, understanding these options will help you make an informed decision.

From ensuring enough hot water for a bustling family home to reducing energy use in a smaller space, each type of heater has features to meet your specific needs. Comparing tanked and tankless water heaters helps you decide which will best serve your home’s requirements and your wallet.

Understanding Tanked and Tankless Water Heaters

Tanked water heaters, also known as storage heaters, use a large tank to store a specific amount of hot water ready for use at any time. When you turn on the tap, these units constantly hold and heat water, ensuring readily available hot water. On the other hand, tankless water heaters, also known as on-demand or instant heaters, heat water only when you need it. This means they don’t store water, hence no standby heat loss.

The main difference between these systems lies in their design and operation. A tanked water heater maintains a reservoir of heated water, using energy continuously to keep the water hot. Meanwhile, tankless water heaters use heating elements to heat water as it flows through the unit instantly. This method can be more energy-efficient because it avoids the constant energy use associated with keeping stored water hot.

Regarding hot water delivery, tanked water heaters provide a limited supply due to their fixed storage capacity. Once the hot water is depleted, there’s a wait for it to reheat. Conversely, tankless models provide continuous hot water since they heat water on the go. This means no waiting for a tank to refill, making them ideal for families with varied usage patterns or those who want consistent access to hot water without limits.

Advantages of Tanked Water Heaters

Tanked water heaters offer several advantages, making them a popular choice for many homeowners. One of the primary benefits is their lower initial cost compared to tankless models. This affordability makes them accessible for many households. Additionally, their installation process is usually simpler and less demanding, especially in homes with existing tanked system setups.

Another advantage is that certain tanked water heaters, depending on the fuel source, can operate during power outages. For instance, gas-powered tanked systems provide hot water even when electricity is down, offering a sense of reliability during emergencies.

Tanked heaters are particularly suitable for homes with a high demand for hot water. They can provide a consistent supply, which is beneficial during peak usage times. In larger households with simultaneous water needs, tanked systems help ensure that showers, laundry, and dishwashing can occur without interruption.

Overall, tanked water heaters suit homes where the convenience of always having a ready supply of hot water at a lower upfront cost is a priority. With their straightforward operation and ability to meet large volume demands, they remain a practical choice for many.

Advantages of Tankless Water Heaters

Tankless water heaters are known for their efficiency, significantly benefiting energy savings. Since they heat water only when needed, they use less energy overall than constantly keeping a tank of water hot. This on-demand method can lower monthly utility bills, making them an attractive option for energy-conscious homeowners.

Another major advantage is their compact size. Without a bulky tank, tankless models can be installed in smaller spaces, freeing up valuable room that a conventional tank would occupy. This makes them ideal for smaller homes or apartments where space is at a premium. They can also be mounted on a wall, contributing to space savings.

Environmentally speaking, tankless heaters consume less fuel over their lifespan due to reduced energy waste. This makes them a greener choice, appealing to those looking to lessen their environmental footprint. They also offer the benefit of providing an endless hot water supply, which is perfect for households with high demands at varying times of the day. With the right size and capacity, tankless systems can ensure that no one has to take a cold shower, even if multiple appliances run simultaneously.

Key Considerations for Choosing Between the Two

Several factors come into play when deciding whether a tanked or tankless water heater is the best fit for your home. It’s crucial to consider the size of your household and its hot water needs. Larger families might benefit more from tanked models because they can store and quickly supply large volumes of water. Meanwhile, smaller households or those with staggered water use might find tankless heaters more advantageous due to their efficient heating.

Energy efficiency is another important consideration. While tankless models are more efficient and save energy over time, their higher upfront costs can be a limiting factor. A thorough budget evaluation will help determine which system best suits your financial situation.

Maintenance requirements are also worth noting. Tanked water heaters are generally simpler to maintain but may require more frequent attention, such as flushing to remove sediment buildup. On the other hand, while tankless units often have fewer maintenance needs, their more complex systems might require professional services to ensure proper function.

Ultimately, lifespan expectations can affect your decision. Tankless heaters often last longer than their tanked counterparts, providing a longer-term investment if initial costs and installation are viable. Weighing these factors will guide you in making the best choice for your household’s specific needs and circumstances.

Conclusion

Understanding the unique features of tanked and tankless water heaters can help you make a smart and tailored choice for your home. Each type offers distinct advantages that can enhance the comfort and efficiency of your household’s hot water supply. Whether you favor the tried-and-true reliability of tanked heaters or the modern efficiency of tankless systems, consider each aspect carefully to make an informed decision.

Tanked water heaters provide a straightforward solution with options for scalable capacity. This is ideal for homes where large amounts of simultaneous water use are common. Such systems offer stability at a lower entry price, balancing cost with consistent hot water availability. On the other hand, tankless water heaters shine with their energy efficiency and endless hot water flow, maximizing convenience for active households.

At My Jockey, we understand that every home has unique needs. Whether you are installing a new system or replacing an old one, our expert team is here to help you find the perfect tankless water heater service. Contact us today to learn more about how we can help you get the most out of your home’s hot water system.

How to Troubleshoot and Repair Common Furnace Issues

furnace repair

Furnaces work hard to keep our homes warm and cozy during chilly months, but sometimes, they need some help. Identifying and fixing common furnace problems early can save you from bigger headaches and higher costs later.

Understanding the basics of furnace care helps you decide when to tackle a problem and when it’s time to call in an expert. This not only keeps your heating system running smoothly but also ensures safety in your home. Let’s investigate how you can troubleshoot and repair typical furnace issues.

Recognizing Signs of Furnace Problems

Knowing when your furnace is acting up is the first step toward solving any issues. Common warning signs can help you catch problems early before they become major repairs. Unusual noises such as banging or rattling can signal loose parts or air duct issues. Inconsistent airflow might mean a blockage or a problem with the blower. If you notice your furnace cycling on and off more frequently than normal, it’s time to investigate further.

Early detection matters because it prevents small problems from escalating. If left unchecked, a clanging noise today could lead to a significant repair tomorrow. Checking these signals allows you to address them quickly, often avoiding more severe damage.

Here’s a simple checklist to help you recognize potential furnace issues:

– Listen for strange noises when the furnace is running.

– Check if rooms are heating unevenly.

– Observe the frequency of your furnace cycling on and off.

– Monitor if any unusual smells occur when the furnace is in operation.

– Take note of any noticeable increases in energy bills.

Using this checklist regularly can alert you to emerging issues, enabling timely intervention and peace of mind.

Diagnosing Common Furnace Issues

Once you’ve identified the signs, the next step is diagnosing the problem. Typical furnace problems include clogged filters, malfunctioning thermostats, and ignition issues. These are often the culprits behind a furnace not working as it should. For instance, a dirty filter restricts airflow, compromising heating efficiency and increasing energy consumption. A faulty thermostat can cause temperature discrepancies, while ignition issues can prevent the furnace from heating altogether.

To pinpoint these problems accurately, follow these steps:

– Check the thermostat settings to ensure they are correct.

– Examine filters to see if they need replacement.

– Assess the ignition system by listening for clicking sounds indicating ignition failure.

Essentials for basic diagnostic work on furnaces can include:

– A flashlight to examine internal parts.

– A screwdriver for opening access panels.

– A multimeter to test the thermostat and electrical connections.

These tools can help you investigate common issues safely and efficiently, providing a better idea of whether the furnace needs a simple fix or requires professional repair. Keeping diagnostic work at the forefront enables homeowners to make informed decisions about their heating systems.

Simple DIY Furnace Fixes

Sometimes, furnace issues are simple enough to handle on your own, saving time and money. For instance, a clogged air filter may cause restricted airflow, leading to inefficient heating. Simply replacing a dirty filter can often solve this. Additionally, resetting the thermostat can fix issues related to incorrect temperature readings, especially if it’s a programmable model that’s not set correctly.

It’s essential to address obstructions around and within the furnace. Ensure that nothing is blocking the airflow to and from the unit, which includes checking vents and registers for any hindrances. If your pilot light is out, relighting it carefully after consulting your manufacturer’s manual might resolve the problem.

When attempting DIY repairs, keep safety first. Always turn off the power to your furnace before starting any work. Wear gloves and ensure proper ventilation if you’re working with gas components. Despite these simple solutions, some situations do require a professional touch. If you consistently face the same issues after attempting repairs or if you notice gas odors, it’s best to call a professional to prevent potential hazards.

When to Call a Professional

While DIY fixes are handy, certain furnace problems need expert intervention. Complex issues like electrical faults, frequent cycling caused by blower motor errors, or trouble with the gas line require specialized tools and knowledge. Working on these components can be dangerous if you are not trained. An expert can accurately assess and fix these problems, ensuring your furnace operates safely and efficiently.

Choosing the right professional service involves some research. Look for licensed technicians with experience in heating systems and read customer reviews to ensure quality service. When a professional visits, they typically diagnose the problem, explain repair options, and provide estimates before starting work.

Routine professional maintenance is also beneficial. Regular check-ups can catch issues before they become severe, prolonging your furnace’s lifespan and improving performance. A well-maintained furnace operates more efficiently, lowering energy bills and better home comfort.

Conclusion

Maintaining your furnace involves recognizing issues, attempting easy fixes, and knowing when to seek expert help. Understanding the basics of furnace care ensures your heating system remains reliable and safe throughout the colder months. Regular checks and timely interventions can prevent small issues from turning into extensive repairs, providing comfort and savings for your household.

If you’re dealing with stubborn furnace problems or need a professional tune-up, My Jockey is your go-to solution in Saratoga Springs and The Capital Region, NY. Our trained team offers expert furnace humidifier services to keep your heating system running smoothly. Contact us today to inquire about our comprehensive HVAC services and how we can assist with all your heating needs.

Improving Your Heating System’s Efficiency This Winter

heating system

As the chill of winter sets in, keeping your home warm and cozy can seem challenging. Improving your heating system’s efficiency not only makes your living space more comfortable but can also save money on heating bills. Simple changes and maintenance can make a significant difference in how well your heating system performs.

Many homeowners overlook small tasks such as regular tune-ups and sealing air leaks, which can result in big improvements. Incorporating advanced technology like smart thermostats and investing in energy-efficient equipment are key steps to optimize your home’s heat usage. By taking thoughtful measures, you can ensure your home remains a haven of warmth throughout the winter months.

Conducting a Professional Heating System Tune-Up

Scheduling regular heating system tune-ups is essential for maintaining efficient and reliable performance. These check-ups help ensure your system runs smoothly, especially during colder months when it’s needed most. Regular tune-ups improve heating efficiency and extend the lifespan of your system, potentially saving you money on repairs and energy bills over time.

A comprehensive tune-up involves several key steps. Technicians clean or replace dirty filters that can hinder airflow and reduce efficiency. They also inspect and clean ducts to remove any dust or debris blocking the system. Another important task is testing controls and safety features to make sure everything operates correctly and safely.

Regular professional inspections offer another significant benefit: they help identify and address small issues before they turn into costly repairs. Even minor problems, if left unchecked, can lead to major system failures requiring expensive fixes or even complete system replacements. 

Optimizing Home Insulation and Sealing Air Leaks

Good insulation and sealing play a vital role in maintaining your home’s warmth and boosting energy efficiency. Upgrading insulation in areas like walls, attics, and ductwork reduces heat loss, ensuring your heating system doesn’t work harder than necessary. This enhancement helps retain warmth, ultimately reducing energy costs.

Here are simple steps to identify and seal air leaks:

1. Check for Drafts: Feel around windows, doors, and utility lines for drafts.

2. Seal Gaps: Use weather stripping or caulk to close gaps around windows and doors.

3. Inspect Attic and Basement: Look for spaces where air might escape, like around pipes or wires.

4. Utilize Draft Stoppers: Place them at door bottoms to prevent heat from escaping.

Proper insulation and sealing also contribute to a more consistent temperature throughout your home, eliminating cold spots that can be uncomfortable. By keeping warm air inside and cold air out, you lessen the load on your heating system. 

This efficiency helps lower your utility bills while creating a cozier environment. Investing in these upgrades is a smart way to make your home more energy-efficient and comfortable all year long.

Utilizing Smart Thermostats and Advanced Controls

Smart thermostats are a fantastic innovation for optimizing heating schedules and cutting down on energy use. These devices allow homeowners to control heating systems remotely and make real-time adjustments, ensuring comfort without wasting energy. By scheduling heating cycles based on your daily routine, smart thermostats help maintain an efficient environment and minimize unnecessary heating during unoccupied hours.

Key features that enhance these benefits include remote control through smartphone apps, learning modes that adapt to your lifestyle, and detailed energy usage reports. These reports provide insights into your heating habits, identifying ways to improve efficiency. Smart thermostats also offer integration with other smart home technologies, making it easier to manage all your home systems seamlessly.

Upgrading to a smart thermostat involves a few straightforward steps:

1. Select a Compatible Model: Choose a device that works with your heating system.

2. Remove Your Old Thermostat: Turn off the power, take off the cover, and disconnect the wires.

3. Install the New Thermostat: Follow instructions, matching the wires correctly.

4. Connect to Wi-Fi: Sync your thermostat with the app for remote control.

This upgrade maximizes your control over heating, keeps your home cozy, and helps reduce energy bills significantly.

Choosing Energy-Efficient Equipment and Upgrades

Opting for high-efficiency equipment is a step towards more sustainable living and lower utility bills. Upgrading to energy-efficient furnaces, boilers, or water heaters can significantly decrease your energy consumption. These modern systems use advanced technology to deliver better performance while using less fuel or electricity.

Comparing options like combi boilers and tankless water heaters is essential. Combi boilers provide both heating and hot water on demand, making them highly efficient for homes with limited space. Tankless water heaters heat water only when needed, which reduces energy waste and offers a constant supply of hot water. Both options enhance efficiency and reduce costs over time.

Several factors should guide your decision to replace existing equipment. These include the age and condition of your current system, your household’s heating needs, and potential savings on energy bills. It’s also important to consider available tax credits and incentives for upgrading to more efficient systems. Selecting the right equipment for your home ensures comfort, reliability, and cost-effectiveness.

Conclusion

Maintaining an efficient and dependable heating system in your home requires a proactive approach. Regular tune-ups keep your system in top form, preventing unexpected breakdowns. Enhancing insulation and sealing air leaks protect your home from energy losses, helping maintain a warm environment while cutting costs. Upgrading to smart thermostats and energy-efficient equipment further optimizes your home’s heating efficiency, ensuring comfort and savings.

Choosing the right heating solutions involves understanding your home’s specific needs and the capabilities of available technologies. A focus on preventing problems, rather than just reacting to them, saves time and money. With these approaches, you can enjoy a warm and energy-efficient home that meets your modern living standards.

At My Jockey, we understand the importance of reliable heating in Saratoga Springs. Our team is dedicated to helping you make the best choices. Whether you need a tune-up, are considering equipment upgrades, or are just seeking advice, we’re here to support you. Contact us today to ensure your heating system is ready to keep you warm all season long.

Identifying and Fixing Common Plumbing Issues

plumbing service

Plumbing issues can sneak up on homeowners when they least expect them. A dripping faucet, a clogged drain, or a running toilet may seem small, but they can quickly become annoying and costly if ignored. Fortunately, tackling these issues doesn’t always require a call to the plumber. With a little knowledge and the right tools, you can handle many common plumbing repairs yourself.

Knowing what causes these problems is the first step toward fixing them. Identifying the source of the issue helps prevent it from happening again in the future. So, it’s worth learning a bit about your home’s plumbing system. By understanding the basics, you’ll be better equipped to manage small repairs and perform regular maintenance to keep everything running smoothly. Let’s explore how you can keep your plumbing in top shape.

Common Plumbing Problems and Their Causes

Several plumbing problems commonly occur in households, causing frustration and potential damage. Understanding these issues and their causes helps in managing them effectively. One of the most frequent problems is a leaking faucet. This is often due to worn-out washers or seals that need replacement. Over time, these small parts wear down from constant use, leading to drips that increase your water bill.

Clogged drains are another common issue. Hair, soap, grease, and food particles can accumulate in pipes, creating blockages. In kitchens, the build-up from cooking oils and food scraps is a usual suspect. Bathrooms often face clogging due to hair and soap scum. With continuous usage, these substances form tough blockages that hinder water flow.

Running toilets rank high on the list of plumbing nuisances. Typically, this results from problematic flappers or fill valves inside the tank. A worn-out flapper can stop sealing properly, causing water to continuously leak from the tank into the bowl. This wastes a significant amount of water and spikes your utility bill if not fixed promptly.

Understanding the root of these common issues is crucial. It allows homeowners to take preventive actions and handle minor fixes efficiently. With a little attention and care, you can address these problems and keep your plumbing in good shape.

Step-by-Step Guides to Simple Fixes

Tackling minor plumbing repairs is manageable with the right instructions. Let’s start with fixing a dripping faucet, a task most homeowners can tackle. Begin by turning off the water supply to prevent flooding. Next, remove the handle with a wrench and take out the old washer. It’s important to replace it with a new washer that matches the size, then reassemble the faucet and turn the water back on.

Unclogging a drain can often be done with household items. Start by pouring a mix of baking soda and vinegar down the drain, allowing it to fizz and break down the blockage. After a few minutes, flush it out with hot water. A plunger or a drain snake can help if the clog persists. These tools can reach further into the pipes, dislodging stubborn debris.

A running toilet often signals a broken flapper or faulty fill valve. To fix this, first remove the tank lid. If the flapper isn’t sealing correctly, it might need repositioning or replacement. Ensure the chain attached to the flapper isn’t too loose or tight. If the fill valve is the issue, you may need to replace it for proper functioning.

These DIY solutions are effective for fixing simple plumbing issues. By following these steps, you can address these problems quickly without breaking a sweat. This empowers you to tackle minor repairs, maintaining a smoothly running plumbing system.

When to Call a Professional Plumber

While some plumbing issues can be handled with a DIY approach, others require the expertise of a professional plumber. Knowing when to call in a professional can save you from potentially costly damage. For instance, burst pipes can cause significant water damage if not addressed immediately. It’s crucial to contact a plumber who can quickly repair or replace the damaged sections.

Major leaks, particularly those affecting main water lines or sewer lines, also warrant professional intervention. These problems are complex and might involve specialized tools and techniques that are beyond the scope of a typical DIY repair. Attempting to fix these on your own could lead to further damage and increased repair costs.

Safety is another factor to consider. Working with plumbing involves handling water and, sometimes, electricity. For instance, issues involving water heaters or any plumbing systems linked to electrical components should always be handled by a trained technician to avoid safety risks.

Additionally, persistent problems that keep recurring despite your best DIY efforts indicate a need for professional attention. A skilled plumber can assess and diagnose these issues more accurately, offering solutions that are likely to be more effective and long-lasting.

Preventative Maintenance Tips

Keeping your plumbing in top condition is easier with regular maintenance. Simple, routine checks can prevent big problems before they start. Start by inspecting all visible pipes and connections for leaks or signs of wear. Catching a leak early can prevent water wastage and possible structural damage.

Cleaning out drains regularly helps prevent clogs. Use a mixture of hot water and baking soda to clear out small blockages. Installing screens over drains is also a great way to keep hair and debris from getting into your pipes in the first place.

Ensure your water heater is running efficiently by regularly checking the temperature settings and inspecting for any leaks or corrosion. Flushing the tank once a year can remove sediment buildup, which helps it operate smoothly and extends its lifespan.

Maintaining your plumbing’s health also involves being mindful of what you flush down your toilets or pour down your sinks. Avoid disposing of grease, oil, or heavy-duty cleaning wipes in your drains, as these can cause blockages.

Conclusion

Addressing and preventing plumbing problems is crucial for maintaining a safe and comfortable home. By understanding common issues and how to solve them, you can keep your plumbing system running efficiently. Regular maintenance and knowing when to call a professional are key steps in protecting your home’s plumbing.

If you’re facing persistent plumbing issues or require expert advice, reach out to My Jockey today. Our team of plumbers in Saratoga Springs, NY is ready to assist you with everything from simple fixes to complex repairs, ensuring your plumbing system functions flawlessly. Let us help you avoid major inconveniences and protect the comfort of your home.