Experiencing cold air blowing from your furnace when you expect warmth can be a major frustration, especially during chilly months in Saratoga Springs, New York. This unexpected problem often leaves homeowners puzzled and concerned about potential heating system failures. But not to worry, there are common reasons for this phenomenon, and understanding them can lead to straightforward solutions.
Regular maintenance of your furnace is crucial for preventing issues like this from occurring. By ensuring all parts work effectively, you reduce the chances of unexpected cold gusts greeting you instead of the cozy warmth you’d expect in your home. As we explore potential causes, keep in mind the importance of professional intervention in maintaining the comfort and safety of your house.
Common Reasons Your Furnace Might Be Blowing Cold Air
A few typical issues might cause your furnace to blast cold air. Knowing what to look for can help you determine whether it’s time to call in a professional. Here are some common culprits:
– Thermostat Settings: If your thermostat isn’t set correctly, your furnace might not function as expected. Check if it’s on “heat” mode and the fan is set to “auto” rather than “on” mode, which constantly blows air regardless of whether it’s heated.
– Pilot Light Problems: Older furnaces rely on a pilot light to ignite the burners. If this light goes out, resuming the flow of hot air might not be possible. Sometimes, relighting the pilot light can solve the issue, but it often indicates a deeper problem requiring expert attention.
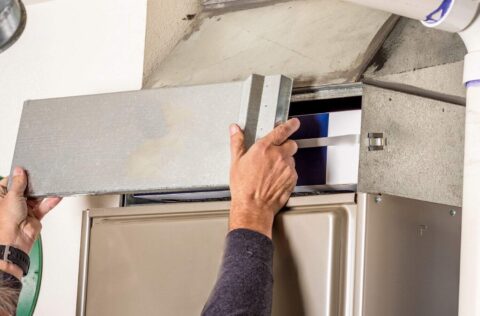
– Clogged Filters: Dirty air filters restrict airflow, causing the furnace to overheat and shut down, leaving you with cold air. Regularly replacing filters helps maintain proper air circulation and can prevent this issue.
Professional service is paramount when addressing each of these issues. While you might identify the problem yourself, fixing the root cause is often best left to experts. They have the experience to manage the intricacies of your heating system, ensuring comfort and efficiency return to your home swiftly.
How Furnace Humidifiers Help
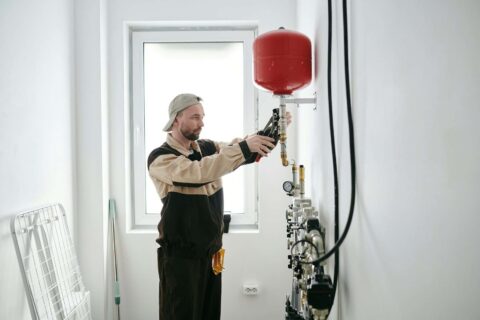
Furnace humidifiers play a crucial role in maintaining air quality and efficiency in your home. These devices add moisture to the air, preventing the dry indoor conditions often caused by running a furnace. By doing so, they help maintain a comfortable humidity level, which can make your home feel warmer even when the temperature is lower. This added moisture can prevent dry skin, irritated throats, and static electricity, which are common complaints during the colder months.
In Saratoga Springs, where winters can be harsh, using a humidifier can improve the overall effectiveness of your heating system. It helps your furnace operate more efficiently, which can be particularly useful in managing energy consumption and maintaining consistent warmth throughout your house. Regular service for your humidifier ensures it functions correctly, reducing the risks of unexpected issues and keeping your indoor air at a pleasant balance.
Importance of Timely Professional Maintenance
Regular maintenance is a key factor in preventing your furnace from blowing cold air. By scheduling timely service, you can catch potential problems before they escalate. Professional technicians can identify minor issues during routine check-ups, which could prevent major repairs down the line. This proactive approach not only saves you money but also ensures your furnace runs smoothly, providing reliable warmth throughout the cold season.
Timely maintenance keeps your furnace and humidifier in top shape. During these check-ups, professionals clean and inspect all components, ensuring everything operates efficiently. This thorough inspection can reveal issues such as worn-out parts or blockages that might not be obvious but could lead to severe problems if left unattended. By addressing these concerns early, you enhance your system’s lifespan and reliability.
When to Call a Professional
Knowing when to call for expert help is essential in maintaining your furnace’s performance. If you notice unusual noises, persistent cold air despite adjusting the thermostat, or frequent cycling of your furnace on and off, it might be time to seek professional assistance. These signs often indicate underlying issues that need immediate attention from skilled HVAC technicians.
Another critical moment for professional intervention is when your furnace or humidifier hasn’t been serviced for over a year. Regular maintenance is crucial to ensure both systems run efficiently. Professionals have the tools and knowledge to diagnose and fix problems effectively, helping avoid discomfort and ensuring your home’s warmth and comfort.
Ensuring Warm and Cozy Homes in Saratoga Springs
Keeping your home warm and inviting during the cold months requires attention to your heating system’s condition. With regular maintenance and prompt professional service, you can enjoy uninterrupted warmth and increased comfort, even when the temperatures drop outside. Addressing potential furnace issues with knowledgeable care ensures your home’s environment remains pleasant and energy-efficient.
By taking these steps, you’re set to experience a consistent climate in your living space, making every corner of your home cozy and enjoyable. Prioritizing the health of your furnace, along with timely humidifier service, will support a snug and welcoming atmosphere for everyone in your home throughout Saratoga Springs’ cold season.
Stay ahead of unexpected issues and ensure a warm home throughout Saratoga Springs with regular furnace maintenance. My Jockey offers professional services to keep your systems running smoothly. Discover how our furnace humidifier service can enhance comfort and efficiency this season. Don’t wait for problems to arise—take the step toward a cozier home today.