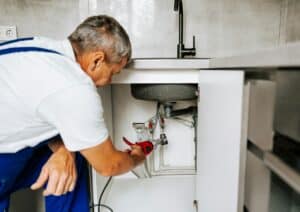

Plumbing problems can be a major headache, but many common issues are easy to fix with a little know-how. Learning how to tackle some basic plumbing repairs can save you time and money. Whether your sink is clogged, your toilet won’t stop running, or you’re dealing with a dripping faucet, a few simple steps can often resolve the issue.
One of the most frustrating plumbing problems is a clogged drain. Whether it’s in your sink or shower, a blocked drain can cause water to back up and even lead to bad smells. Knowing how to properly clear a clog can make a big difference in keeping your plumbing system running smoothly.
Another common issue homeowners face is a running toilet. Not only is the constant sound of water running annoying, but it also wastes a lot of water. Understanding the components inside your toilet tank and knowing how to adjust or replace them can help stop the problem quickly.
Leaky faucets are another frequent plumbing annoyance. Over time, faucets can wear out and start to drip. This can lead to higher water bills and is generally bothersome. With just a few tools and some basic instructions, you can often fix a leaky faucet on your own.
Lastly, low water pressure can make showers less enjoyable and make it difficult to rinse dishes and perform other household tasks. Finding the cause of low water pressure and addressing it can improve your home’s water flow significantly.
Understanding and addressing these common plumbing problems can help you maintain your home’s plumbing system and prevent more serious issues down the road.
How to Unclog a Sink or Shower Drain
Clogged drains are a common issue that can cause water to back up and create unpleasant odors. Luckily, most clogs can be fixed with a few simple steps.
1. Use a Plunger: A plunger can be very effective for unclogging drains. Make sure you have a good seal around the drain and plunge up and down several times. This can help dislodge whatever is blocking the drain.
2. Try a Drain Snake: If a plunger doesn’t work, try a drain snake, also known as a plumber’s snake. Insert the snake into the drain and twist it to break up and pull out the clog. This tool can reach deeper clogs that a plunger can’t.
3. Homemade Drain Cleaner: Sometimes, a homemade solution can do the trick. Pour half a cup of baking soda, followed by half a cup of vinegar, down the drain. Let it sit for 15-30 minutes, then flush with hot water. This method can help dissolve greasy clogs.
4. Remove the Trap: For sink clogs, you can also remove the U-shaped pipe under the sink called the trap. Place a bucket underneath to catch any water, then unscrew the trap and clean out any debris inside. Reattach it and check if the water flows freely.
Taking these simple steps can usually clear most clogs. Regularly cleaning your drains can also help prevent future blockages.
Fixing a Running Toilet
A running toilet can waste a lot of water and increase your utility bills. Fortunately, fixing it is often straightforward.
1. Check the Flapper: The flapper is a rubber seal in the toilet tank that lifts when you flush. If it’s not sealing properly, water will continue to run into the bowl. Check to see if it’s worn out or misaligned. You can replace it easily if needed.
2. Adjust the Float: The float controls the water level in the tank. If the water level is too high, it will spill into the overflow tube and cause the toilet to run. Adjust the float by bending the arm or turning the screw until the water stops just below the overflow tube.
3. Inspect the Fill Valve: The fill valve controls water flow into the tank. If it’s faulty, the tank might not fill correctly, causing continuous running. You can inspect the valve for any debris and clean it. If it’s damaged, you may need to replace it.
4. Look at the Chain: Make sure the chain that connects the flapper to the flush handle isn’t too long or tangled. If it’s too long, it might get stuck under the flapper, preventing it from sealing.
Following these steps can fix most running toilets and help you save water and reduce your bills. Regularly inspecting your toilet can also prevent future issues.
Repairing a Leaky Faucet
A leaky faucet can waste a lot of water and become annoying quickly. Fixing a leaky faucet is usually straightforward but varies depending on the type of faucet you have.
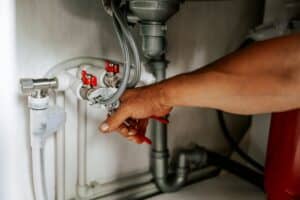
1. Turn Off the Water: Before you begin any repairs, make sure to turn off the water supply to the faucet. Usually, there are valves under the sink that you can turn clockwise to shut off the water. If there are no under-sink valves, you might need to turn off the main water supply.
2. Identify the Type of Faucet: There are four main types of faucets: compression, cartridge, ball, and disc. Identifying which type you have will guide you in making repairs. Compression faucets have separate hot and cold handles, while the other types use a single handle.
3. Disassemble the Faucet: Use a screwdriver to remove the handle and, depending on the type, the various components inside (like the cartridge or O-ring). Lay them out in order so you know how to reassemble them later.
4. Inspect and Replace Worn Parts: Look for worn-out parts like washers, O-rings, or cartridges. These parts can often be purchased at a hardware store. Replace any damaged or worn parts with new ones.
5. Reassemble the Faucet: Put everything back together in the reverse order that you disassembled it. Make sure each part is securely in place.
6. Turn On the Water and Test: Once reassembled, turn the water supply back on and test the faucet to ensure it no longer leaks.
Repairing a leaky faucet can save water and reduce your utility bills. Most faucets have parts that are easy to replace, making this a straightforward DIY task.
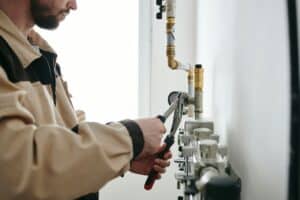
Dealing with Low Water Pressure
Low water pressure can make everyday tasks like showering and washing dishes frustrating. Fortunately, there are a few simple ways to troubleshoot and fix this problem.
1. Check the Aerator: Sometimes, low water pressure is caused by a clogged aerator, which is the screen at the tip of the faucet. Remove it and clean out any debris that may be blocking water flow. A clean aerator can often solve the issue.
2. Inspect the Showerhead: If the low pressure is coming from a shower, unscrew the showerhead and soak it in vinegar overnight to remove any mineral buildup. Scrub away any remaining residue before reattaching it.
3. Look for Leaks: Check your home’s plumbing for any leaks. Even a small leak can reduce water pressure significantly. Look under sinks, around the base of fixtures, and on visible pipes for any signs of water.
4. Check the Main Shut-Off Valve: Make sure the main shut-off valve is fully open. If it’s partially closed, it can reduce water pressure throughout your home.
5. Examine the Pressure Regulator: Many homes have a pressure regulator on the main water line. If this malfunctions, it can cause low pressure. You might need to adjust or replace it.
6. Consider Pipe Issues: In older homes, pipes might become corroded or clogged over time, reducing water flow. This often requires professional help to replace affected sections of plumbing.
Fixing low water pressure can make your home more comfortable and efficient. Regular maintenance and prompt attention to any signs of trouble can help keep your water pressure at an optimal level.
Conclusion
Learning how to fix common plumbing problems at home can save you time, money, and frustration. From unclogging a drain to repairing a leaky faucet, many issues can be solved with a few basic tools and some know-how. Regular maintenance and checking for minor problems can help keep your plumbing system running smoothly and prevent major issues down the line.
Remember, while many plumbing fixes are straightforward, there are times when you need professional help. If your plumbing problem is more complicated or you’re unsure how to proceed, it’s best to call in experts.
Need help with a plumbing problem that you can’t fix on your own? Contact My Jockey today for expert HVAC and affordable plumbing service in Saratoga Springs and The Capital Region, NY. We’re here to ensure your home stays comfortable and functioning perfectly!